OpenCV 按位bitwise运算、掩膜mask运算详解 表格+图解 Python代码实例详解 基础实用款
Table of Contents
按位运算基本知识
Mask基本知识
mask用途
代码一:基本的位运算和Mask运算
代码二:用mask提取ROI(Region of Interest)-单通道颜色
代码三:用mask提取ROI(Region of Interest)-三通道颜色
常见错误及解决方案
扩展阅读
按位运算基本知识
| 运算 | 运算结果 | 类比 | 举例 |
| AND | 两个都不为零 -- 真,返回1 其他情况 -- 假,返回0 |
交集 | 二进制:[0000 0011] AND [0010 0010] = [0000 0010] 十进制:3 AND 34= 2 |
| OR | 返回的是按位或运算结果 有一个不为零--真,返回1 |
并集 | 二进制:[0000 0011] OR [0010 0010] = [0010 0011] 十进制:3 OR 34= 35 |
| XOR | 两个数不一样-- 真,返回1 两个数相等 -- 假,返回0 |
N/A | 二进制:[0000 0011] XOR [0010 0010] = [0010 0001] 十进制:3 XOR 34= 33 |
| NOT | 反转数组的每一位(bit) | N/A | 二进制:NOT [0000 0011] = [1111 1100] 十进制:NOT 3 = 252 |
Mask基本知识
Masking(掩膜运算) 即图与掩膜的“按位与”运算:
原图中的每个像素和掩膜(Mask)中的每个对应像素进行按位与运算,
如果为真,结果是原图的值【这是重点】
如果为假,结果就是零
比如1 & 1 = 1;1 & 0 = 0;
具体见下图:
注意:
mask只能是二维矩阵,与原图shape[:2]维数相同;
只能是单通道矩阵,图片表现是灰度值;
不管mask的值是10还是255,如果为真,mask结果都是原图的值
mask用途
mask的最大作用:让我们只关注我们感兴趣的图像部分。如下引用选自《Practical Python and OpenCV 3rd Edition》
the key point of masks is that they allow us to focus our computation only on regions of the image that interests us.
代码一:基本的位运算和Mask运算
#! /usr/bin/env python
# -*- coding: utf-8 -*-

import numpy as np
import cv2

# 因为是颜色,取值范围[0, 255], 类型应该为unsigned int 8 bit, 即uint8
# 可以把src1, src2看成一个像素点
# OpenCV中颜色顺序为BGR
src1 = np.array([[192, 0, 3]], dtype="uint8")
src2 = np.array([[162, 0, 34]], dtype="uint8")  # 红色

# src1 = np.array([[128, 0, 128]])
# src2 = np.array([[255, 0, 0]])
# print("src1.dtype:", src1.dtype)

dst_and = cv2.bitwise_and(src1, src2)   # 按位与AND运算
dst_or = cv2.bitwise_or(src1, src2)     # 按位或OR运算
dst_xor = cv2.bitwise_xor(src1, src2)   # 按位异或XOR运算
dst_not_src1 = cv2.bitwise_not(src1)    # 按位否NOT运算
dst_not_src2 = cv2.bitwise_not(src2)    # 按位否NOT运算

# 打印src1, src2的shape【可以理解为矩阵的维数】与内容
print("src1.shape:{}, src1:{}".format(src1.shape, src1))
print("src2.shape:{}, src2:{}".format(src2.shape, src2))

# 输出以上的按位运算结果
print("dst_and:",dst_and)
print("dst_or:",dst_or)
print("dst_xor:",dst_xor)
print("dst_not_src1:",dst_not_src1)
print("dst_not_src2:",dst_not_src2)

# 构建一个mask
# mask = np.array([[8, 46, 84]])    # not right
# mask = np.array([8,46,84])        # not right
# mask = np.array([[8]])            # not right
# 注意:以上几种写法都不对

# 正确写法如下:
mask = np.array([[231, 0, 0]], dtype="uint8")  # right, 一定要加dtype="uint8"
# mask = np.zeros((1,3), dtype="uint8")   # right,mask都为零
# mask = np.ones((1,3), dtype="uint8")      # right,mask都为一

# mask只能是二维的,单通道;因为这里src1.shape是二维的(1*3),所以我们可以这么写
# mask = np.zeros(src1.shape, dtype="uint8")    # right,mask都为零。

# 打印mask的shape与内容
print("mask.shape:{}, mask:{}".format(mask.shape, mask) )

# mask运算
# 先按位与操作AND,再进行mask操作
and_mask = cv2.bitwise_and(src1, src2, mask=mask)
# 先按位或操作OR,再进行mask操作
or_mask = cv2.bitwise_or(src1, src2, mask=mask)
print("and_mask:", and_mask)
print("or_mask:",or_mask)
以上代码的输出结果如下:
src1.shape:(1, 3), src1:[[192 0 3]]
src2.shape:(1, 3), src2:[[162 0 34]]
dst_and: [[128 0 2]]
dst_or: [[226 0 35]]
dst_xor: [[98 0 33]]
dst_not_src1: [[ 63 255 252]]
dst_not_src2: [[ 93 255 221]]
mask.shape:(1, 3), mask:[[231 0 0]]
and_mask: [[128 0 0]]
or_mask: [[226 0 0]]
结果为何是这样可以参考按位运算基本知识,Mask基本知识
代码二:用mask提取ROI(Region of Interest)-单通道颜色
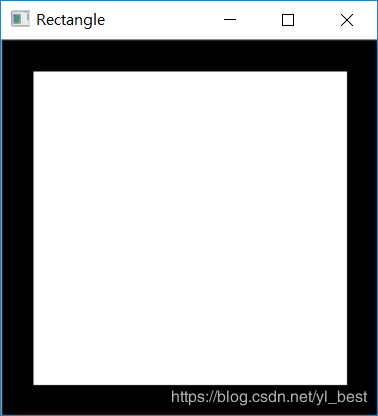
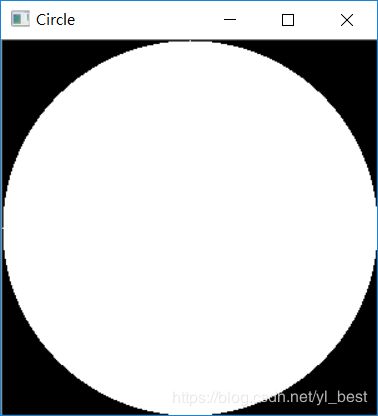
这里rectangle与circle都是二维图片,单通道的,即颜色只有[0,255]的灰度值
#! /usr/bin/env python
# -*- coding: utf-8 -*-

import numpy as np
import cv2

# 在画布中心画了一个250*250像素的矩形,用白色填充
# 注意:这是一个二维矩阵,反映在图片上是单通道的
rectangle = np.zeros((300, 300), dtype="uint8")
# 第二个参数为矩形左上角的点的坐标,第三个参数为矩形右下角的点的坐标
cv2.rectangle(rectangle, (25, 25), (275, 275), 255, -1)
cv2.imshow("Rectangle", rectangle)

# 在画布中心画了一个半径150像素的圆圈,用白色填充
# 注意:这是一个二维矩阵,反映在图片上是单通道的
circle = np.zeros((300, 300), dtype="uint8")
cv2.circle(circle, (150, 150), 150, 255, -1)
cv2.imshow("Circle", circle)

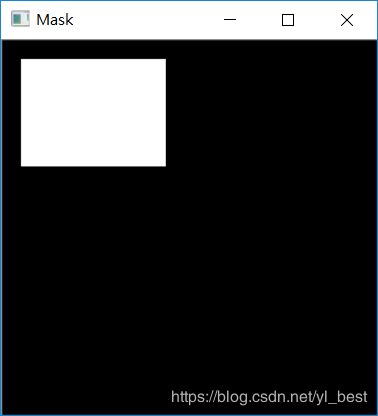
# mask为矩形,用白色填充
# dtype="uint8"要写上,保持一致
# 注意:mask维数需要与被mask作用的图片高与宽的维数一致,如下两句话一样的
# mask = np.zeros((300, 300), dtype="uint8")            # mask的高与宽=原图的高与宽
mask = np.zeros(rectangle.shape[:2], dtype="uint8")     # mask的高与宽=原图的高与宽
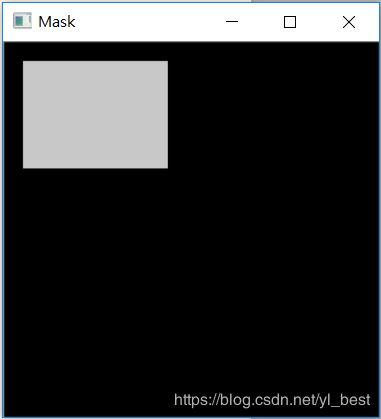
cv2.rectangle(mask, (15, 15), (130, 100), 255, -1)
cv2.imshow("Mask", mask)

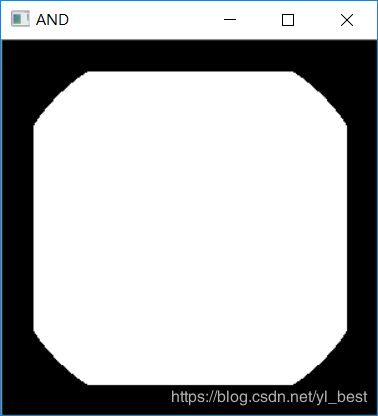
# 按位与操作AND
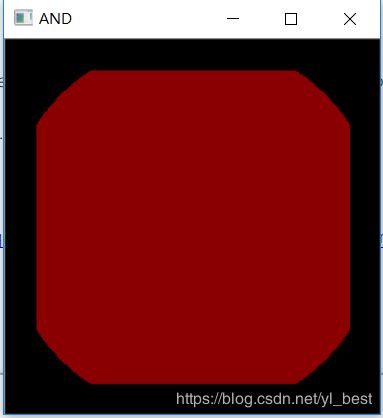
bitwiseAnd = cv2.bitwise_and(rectangle, circle)
cv2.imshow("AND", bitwiseAnd)
# 先按位与操作AND,再进行mask操作
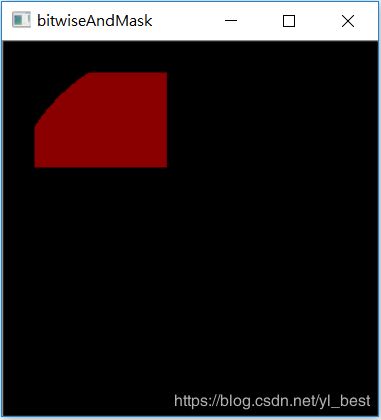
bitwiseAndMask = cv2.bitwise_and(rectangle, circle, mask=mask)
cv2.imshow("bitwiseAndMask", bitwiseAndMask)

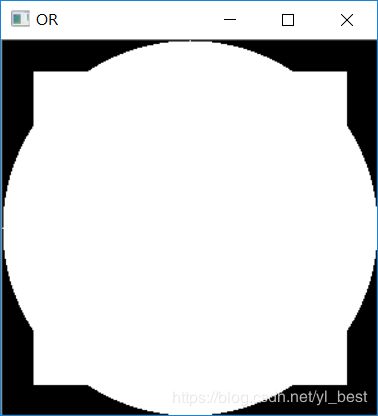
# 按位或操作OR
bitwiseOr = cv2.bitwise_or(rectangle, circle)
cv2.imshow("OR", bitwiseOr)
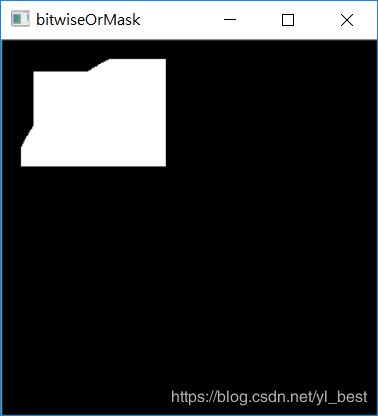
# 先按位或操作OR,再进行mask操作
bitwiseOrMask = cv2.bitwise_or(rectangle, circle, mask=mask)
cv2.imshow("bitwiseOrMask", bitwiseOrMask)

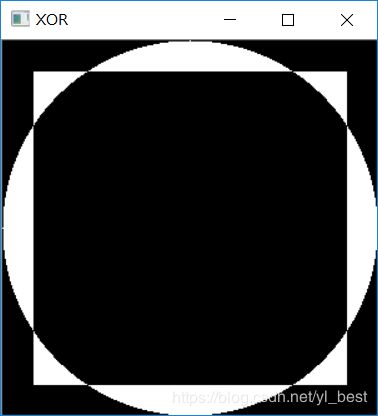
# 按位异或XOR
bitwiseXor = cv2.bitwise_xor(rectangle, circle)
cv2.imshow("XOR", bitwiseXor)

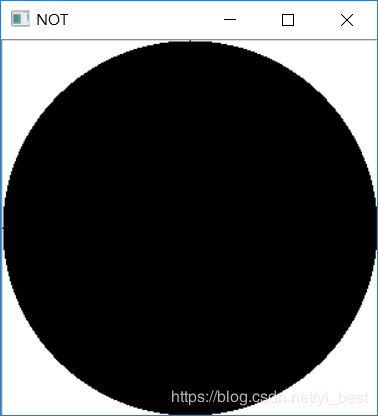
# 按位非NOT
bitwiseNot = cv2.bitwise_not(circle)
cv2.imshow("NOT", bitwiseNot)

cv2.waitKey(0)  # 等待用户输入,按任意键即可
输出结果如下:
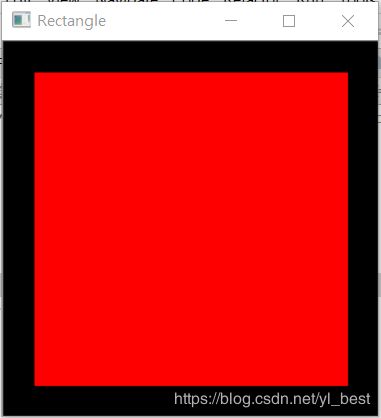
代码三:用mask提取ROI(Region of Interest)-三通道颜色
这里rectangle与circle都是三维图片,三通道的,即颜色可以为三通道值(B, G, R),比较符合实际情况
说明下:OpenCV中颜色顺序为BGR,即(Blue, Green, Red)
实际图片的颜色顺序为RGB即(Red, Green, Blue)
#! /usr/bin/env python
# -*- coding: utf-8 -*-

import numpy as np
import cv2


# 在画布中心画了一个250*250像素的矩形,颜色为三通道,用红色填充
rectangle = np.zeros((300, 300, 3), dtype="uint8")
# color顺序为BGR, 红色的RGB为(255, 0, 0),在这边为(0, 0, 255)
cv2.rectangle(rectangle, (25, 25), (275, 275), (0, 0, 255), -1)
cv2.imshow("Rectangle", rectangle)

# 在画布中心画了一个半径为150像素的圆圈,颜色为三通道,用紫罗兰色填充
circle = np.zeros((300, 300, 3), dtype="uint8")
# color顺序为BGR, 紫罗兰色的RGB为(138,43,226),在这边为(226, 43, 138)
cv2.circle(circle, (150, 150), 150, (226, 43, 138), -1)   #
cv2.imshow("Circle", circle)

# 构建一个mask,形状为矩形,300*300
# mask为矩形,只能是单通道矩阵,图片表现是灰度值;
# 不管mask的值是10还是255,如果为真,mask结果都是原图的值
# mask = np.zeros((300, 300, 3), dtype="uint8")     # 错误,不应该有三个channel
# mask = np.zeros((300, 300, 1), dtype="uint8")     # 正确
mask = np.zeros((300, 300), dtype="uint8")          # 正确,推荐使用此种写法
# mask只能是灰度值,不管是10还是255,mask结果都是原图的值
cv2.rectangle(mask, (15, 15), (130, 100), 200, -1)
cv2.imshow("Mask", mask)

# 将rectangle与mask的shape和数据格式打印出来供对比
print("rectangle shape:{}, dtype: {}".format(rectangle.shape, rectangle.dtype))
print("mask shape:{}, dtype: {}".format(mask.shape, mask.dtype))

# 按位与操作AND
bitwiseAnd = cv2.bitwise_and(rectangle, circle)     # 按位与AND操作结果为[0   0 138]
cv2.imshow("AND", bitwiseAnd)

# 先按位与操作AND,再进行mask操作
bitwiseAndMask = cv2.bitwise_and(rectangle, circle, mask=mask)
# mask不管是10还是255,mask结果都是原图的值,为[0  0 138]
cv2.imshow("bitwiseAndMask", bitwiseAndMask)
# 可以用下面的方法打印矩阵中不是零的内容
print("bitwiseAndMask:")
# 方法一:打印矩阵中不是零的元素
# 输出结果为138……
(rows, cols, chans) = bitwiseAndMask.shape
for r in range(rows):
    for c in range(cols):
        for chan in range(chans):
            if bitwiseAndMask[r, c, chan] != 0:
                print(bitwiseAndMask[r, c,chan])
# 方法二:打印矩阵中不是零的行
# 输出结果为……[0  0 138]……
for row in bitwiseAndMask:
    if row.any() != 0:
        print(row)

# 按位或操作OR
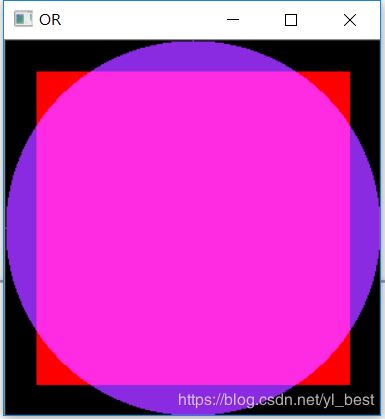
bitwiseOr = cv2.bitwise_or(rectangle, circle)
# OpenCV中颜色顺序为BGR, 两个颜色重合地方的或运算结果为
# (0, 0, 255) OR (226, 43, 138) = (226, 43, 255)
# 转为RGB即(255, 43, 226)
cv2.imshow("OR", bitwiseOr)

# 先按位或操作OR,再进行mask操作
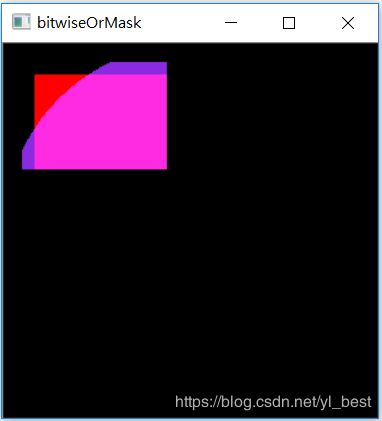
bitwiseOrMask = cv2.bitwise_or(rectangle, circle, mask=mask)
cv2.imshow("bitwiseOrMask", bitwiseOrMask)

cv2.waitKey(0)  # 等待用户输入,按任意键即可
图片输出结果如下:
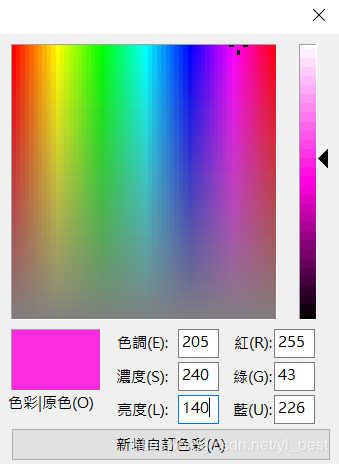
说明:
# OpenCV中颜色顺序为BGR, 两个颜色重合地方的或运算结果为
# (0, 0, 255) OR (226, 43, 138) = (226, 43, 255)
# 转为RGB即(255, 43, 226),如下图小画家中所示颜色常见错误及解决方案
常见错误:
bitwiseAndMask = cv2.bitwise_and(rectangle, circle, mask=mask)
cv2.error: OpenCV(3.4.4) C:\projects\opencv-python\opencv\modules\core\src\arithm.cpp:245: error: (-215:Assertion failed) (mtype == CV_8U || mtype == CV_8S) && _mask.sameSize(*psrc1) in function 'cv::binary_op'
原因分析:
我们的原始图片是3通道的,有BGR三个channel;
但是,mask必须是单通道的,就是说shape只能是二维的(height, width)【(row, column)】,
原来的错误代码提供的mask是三维三通道的,所以会出错。
解决办法:
mask = np.zeros((300, 300, 3), dtype="uint8") #不对的
将上面的语句改为下面一个通道(1 channel)即可进行mask运算了
mask = np.zeros((300, 300, 1), dtype="uint8")
mask = np.zeros((300, 300), dtype="uint8") # 推荐使用此种写法
参考阅读:
https://stackoverflow.com/questions/47165847/opencv-error-assertion-failed-mtype-cv-8u-mtype-cv-8s-mask-same
http://www.it1352.com/542039.html
扩展阅读
图片处理_思维导图

