LVS+Keepalived实现高可用负载均衡部署实战(下)
我来兑现承诺了,今日不太忙,特将后半部分补充一下:
关于上半部分给大家一个神奇的时空穿梭器:https://blog.csdn.net/D_Janrry/article/details/105078889
个人环境
(1)Centos 7.0
(2)Lvsadm
(3)Keepalived-2.0.12
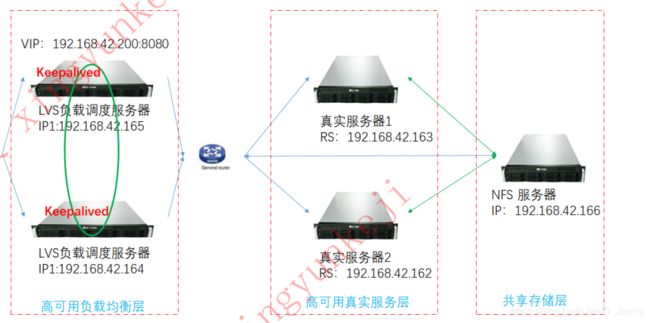
1.负载均衡方案系统架构拓扑图
2.安装Lvsadm与Keepalived软件包
hostnamectl set-hostname DS1
su -l
(…略)
(2)处理防火墙
(…略)
(3)同步时钟源
yum  -y install ntp ntpdate
ntpdate cn.pool.ntp.org.
hwclock --systohc
以上步骤全部节点都需要设置
2.3 搭建LVS-DR集群
参考《LVS+Keepalived实现高可用负载均衡部署实战(上)》
注:测试好集群以后,一定要将绑定的浮动IP摘掉,不然肯定会出错(因为我就出错了,哈哈哈)
2.4 安装keepalived
参考《LVS+Keepalived实现高可用负载均衡部署实战(上)》
注:两个负载均衡器都要配置Lvs和keepalived
3.配置keepalived实现LVS负载均衡
DR模式主从,master及backup机器keepalived配置对比
(1)LVS MASTER keepalived.conf
vim /etc/keepalived/keepalived.conf

! Configuration File for keepalived

global_defs {
   notification_email {
     [email protected]
     [email protected]
     [email protected]
   }
   notification_email_from [email protected]
   smtp_server 192.168.200.1
   smtp_connect_timeout 30
   router_id LVS_1
}

vrrp_instance VI_1 {
    state MASTER
    interface ens33
    virtual_router_id 51
    priority 150
    advert_int 1
    authentication {
        auth_type PASS
        auth_pass 1111
    }
    virtual_ipaddress {
        192.168.239.200/24 dev ens33 label ens:33:10
    }
}

virtual_server 192.168.239.200 80 {
    delay_loop 6
    lb_algo rr
    lb_kind DR
    nat_mask 255.255.255.255
    persistence_timeout 1
    protocol TCP
    real_server 192.168.239.7 80{
    weight 1
    TCP_CHECK {
                connect_timeout 8
                nb_get_retry 3
                delay_before_retry 3
                connect_port 80
}
}
    real_server 192.168.239.5 80{
    weight 1
    TCP_CHECK {
                connect_timeout 8
                nb_get_retry 3
                delay_before_retry 3
                connect_port 80
}
}
}
重启keepalived
systemctl restart keepalived
(2)LVS BACKUP keepalived.conf
vim /etc/keepalived/keepalived.conf

! Configuration File for keepalived

global_defs {
   notification_email {
     [email protected]
     [email protected]
     [email protected]
   }
   notification_email_from [email protected]
   smtp_server 192.168.200.1
   smtp_connect_timeout 30
   router_id LVS_1
}

vrrp_instance VI_1 {
    state BACKUP
    interface ens33
    virtual_router_id 51
    priority 100
    advert_int 1
    authentication {
        auth_type PASS
        auth_pass 1111
    }
    virtual_ipaddress {
        192.168.239.200/24 dev ens33 label ens:33:11
    }
}

virtual_server 192.168.239.200 80 {
    delay_loop 6
    lb_algo rr
    lb_kind DR
    nat_mask 255.255.255.255
    persistence_timeout 1
    protocol TCP
    real_server 192.168.239.7 80{
    weight 1
    TCP_CHECK {
                connect_timeout 8
                nb_get_retry 3
                delay_before_retry 3
                connect_port 80
}
}
    real_server 192.168.239.5 80{
    weight 1
    TCP_CHECK {
                connect_timeout 8
                nb_get_retry 3
                delay_before_retry 3
                connect_port 80
}
}
}
重启keepalived
systemctl restart keepalived
4.结果测试
4.1 查看浮动IP
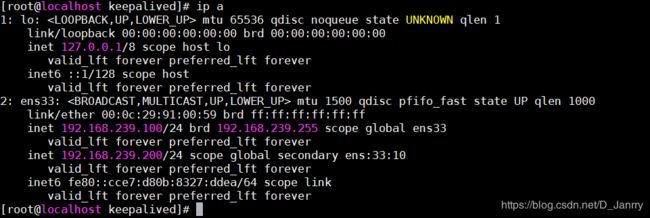
在DS1(主)上查看IP信息
在DS2(主)上查看IP信息
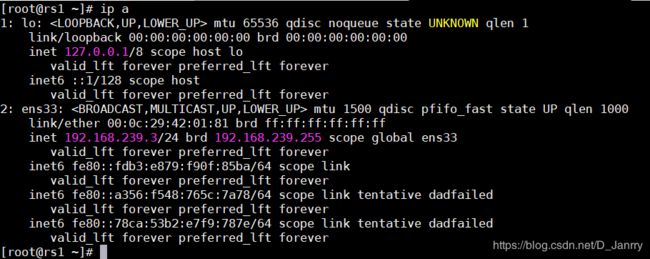
由此可见浮动IP在DS1(主)上
4.2 在网页上访问测试
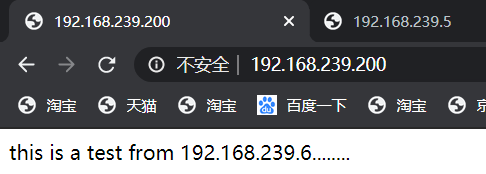
动态打印RS1和RS2的日志


可见这次浏览器的请求在RS1上
4.3故障切换
随便打开一个节点,只要能和192.168.239.200(浮动IP)正常通信的都可以。但是,除 NFS-SER的节点 ,本人亲测一下午,才终于发现这个秘密,所以悄悄的噢!!!
(1)写一个死循环,持续监控

(2)模拟故障
将DS1的keepalived停掉,
systemctl stop keepalived
查看网卡

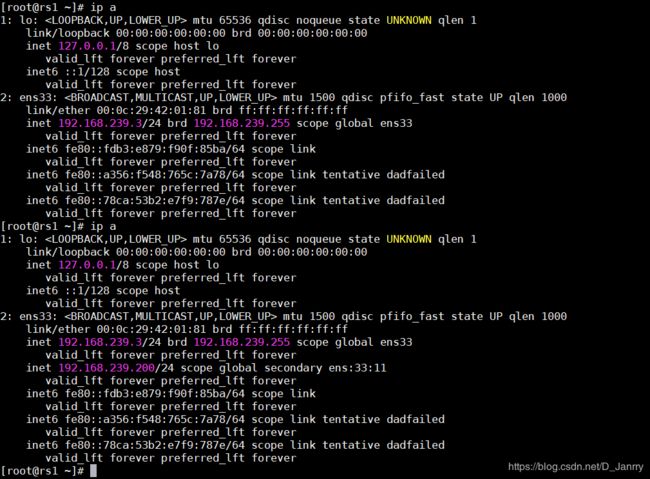
由此可见浮动IP已经发生了转移,到了DS2(从)。
看看刚才的死循环:

从未发生中断
(3)模拟故障恢复
systemctl restart keepalived
查看网卡:
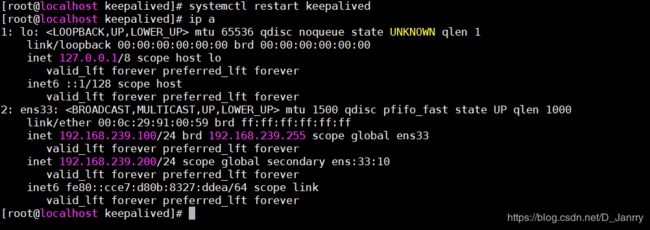
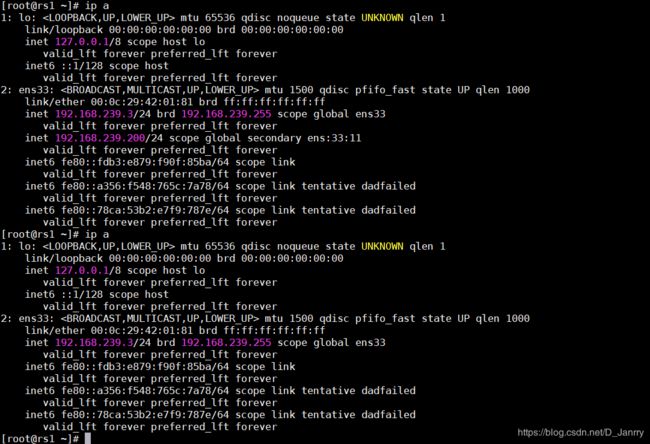
可以看到浮动IP已经飘回到DS1(主)。
查看死循环:

业务从未中断,一切正常。
至此,本实战项目全部完成。对了,插一句话,最好别用NAT模式去实现本项目,因为最后牵扯到一个路由的切换,就是DS1和DS2节点故障浮动IP切换,涉及到内外网,很难实现。所以,别倔强啊,原理搞懂才是王道…
