ant design pro 的model,service,connect的使用以及如何调取后端服务器的数据并渲染到本地
ant design pro的model书写规范:
首先定义好自己的数据类型
export interface TagType {
  id: number;
  history_ip: string;
  history_datetime: string;
  history_cpu_load: number;
  history_disk_usage: number;
  history_memory_usage: number;

}
//model.ts
import { AnyAction, Reducer } from 'redux';

import { EffectsCommandMap } from 'dva';
import { TagType } from './data.d';
import { queryTags } from './service';

// export interface StateType是自定义一个数据类型
// 这里使用到的TagTyp是data.d.ts中定义好的数据
export interface StateType {
  tags: Partial<TagType>;
}
// 这里是定义函数类型
export type Effect = (
  action: AnyAction,
  effects: EffectsCommandMap & { select: <T>(func: (state: StateType) => T) => T },
) => void;
//这里是定义model的数据结构
export interface ModelType {
  namespace: string;
  state: StateType;
  effects: {
    fetchTags: Effect;
  };
  reducers: {
    saveTags: Reducer<StateType>;
  };
}
// 定义一个const Model变量,然后导出Model
// 首先定义Model的类型是一个ModelType,这个ModelType是在上面进行定义过的,
// 所以这个Model里面包含ModelType的所有属性,包括:namespace ,state,effects,和reducers
const Model: ModelType = {
// 这里是每个model都要有的命名空间
  namespace: 'dashboardAndmonitor',
// 这里是state,用来保存数据
  state: {
    tags: {},
  },

  effects: {
  // 这里的fetchTags就是我们定义的类似于函数名的东西,它会调用service里面的接口,然后通过put把请求的返回数据放到reducers里面,call是调用接口方法,payload就是视图层传递过来的参数
    *fetchTags(_, { call, put }) {
      const response = yield call(queryTags);
      yield put({
        type: 'saveTags',
        payload: response,
      });
    },
  },
// 这里 要定义login里面的loginInfo,state不是Model的state属性,action就是put里面的那一部分
// 还有要注意,这里的tags要和上面state里面的tags的名称要一致
  reducers: {
    saveTags(state, action) {
      return {
        ...state,
        tags: action.payload || {} ,
      };
    },
  },
};

export default Model;
接下来是service
import request from '@/utils/request';

export async function queryTags() {
  return request(`http://192.168.2.144:8000/monitor_data/getdata/`, {
    method: 'GET',
    // headers: {'content-type':'application/json'},
  });
}
最后是index页面
import {Button, Card, Col, Row, Statistic} from 'antd';
import { FormattedMessage, formatMessage } from 'umi-plugin-react/locale';
import React, { Component } from 'react';

import { Dispatch } from 'redux';
import { connect } from 'dva';
import { TagType } from './data';

import { RouteChildrenProps } from 'react-router';
import styles from './style.less';
import {StateType} from "@/pages/mymonitor/monitor/model";
import { Pie } from '@/pages/mymonitor/DashboardMonitor/components/Charts';


interface MonitorProps extends RouteChildrenProps {
// 注意,这里的TagType要使用tags作为继承,在connect里面要用到
  tags: Partial<TagType>;
  dispatch: Dispatch<any>;
  loading: boolean;
}

class Monitor extends Component<MonitorProps> {
// 要使用到数据等与后端交互的事件的时候,要再写一个方法来调取我的数据,然后再componentdidmount里面this.这个方法
  loadData = () => {
    const { dispatch } = this.props;
    dispatch({
      type: 'dashboardAndmonitor/fetchTags',
    });
  };

  componentDidMount() {
    this.loadData();
  }

  render() {
    const { tags, loading } = this.props;
    console.log(tags,'==========');
    console.log(tags[0],'==========');
    return (
      <div>
        <Button
          onClick={() => this.componentDidMount()}
        >
          刷新
        </Button>
        <br/>
      </div>
    );
  }
}

// connect要放在最后
// 用到的有mapstatetoprops和mapdispatchtoprops,mapstatetoprops表明是当前的state,传递给父组件,mapdispatchtoprops表明是从上级组件传递过来的
// 而mapstatetoprops里面应该是再model里面定义好的命名空间和loading
export default connect(
  ({
    dashboardAndmonitor,
    loading,
  }: {
  // 注意这里是model.ts里面定义好的StateType
    dashboardAndmonitor: StateType;
    loading: {
      models: { [key: string]: boolean };
    };
  }) => ({
  // 这里解读: tags: 命名空间.StateType里面的tags
    tags: dashboardAndmonitor.tags,
    loading: loading.models.dashboardAndmonitor,
  }),
  // 最后这里要带上面的class
)(Monitor);
PS:忘记说这里有一个要注意的地方,就是在前端调用接口的时候会有一个跨域的问题
![]()
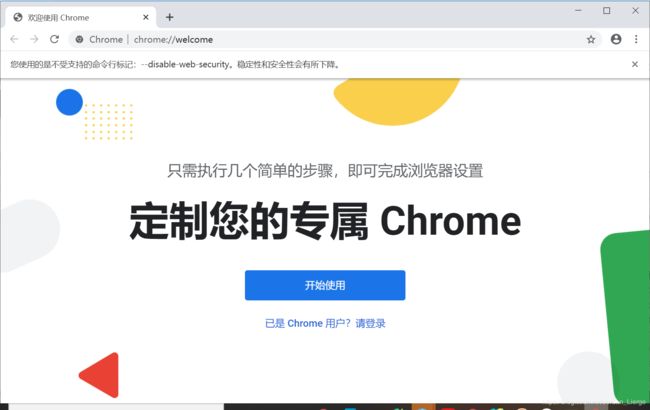
因为自己是在测试,并没有真正上线,所哟对于跨域的问题仅仅针对chrome浏览器做出了改动,让浏览器允许跨域访问:
1.
2.使用Windows命令行操作

3.
在当前界面打开前端就解决了跨域的问题!