SpringBoot学习笔记——第二节,依赖注入与控制反转
Spring框架有四大原则:
·使用POJO进行轻量级与最小侵入式开发
·通过依赖注入和基于接口编程实现松耦合
·通过AOP和默认习惯进行声明式编程
·通过AOP和模板减少模式化代码
那么什么是依赖注入与控制反转呢?我们先通过一个例子来理解一下
首先我们有一个类叫做Student,里面有两个成员变量分别是id和name,并提供给他们get和set方法
public class Student {
	private int id;                                                                    //学生ID
	private String name;                                                               //学生姓名
	public int getId() {
		return id;
	}
	public void setId(int id) {
		this.id = id;
	}
	public String getName() {
		return name;
	}
	public void setName(String name) {
		this.name = name;
	}

}
然后我们有另外一个类叫做StudentManager
public class StudentManager {

	Student student;                                                    //StudentManager管理了一个Student的对象

	public void setStudent(Student student) {                           //提供SetStudent方法添加依赖
		this.student = student;
	}

	public void show() {
		System.out.println(student.getId());
		System.out.println(student.getName());
	}
}
这个StudentManager的类有个成员是Student的一个对象,然后它的Show方法能够打印这个student的 id 以及 name,并提供了setStudent方法初始化Student对象。我们可以说,StudentManager是依赖于Student的。
但是一个问题就出现了,StudentManager与Student之间的耦合非常紧密,假如我们还没有来的及对StudentManager的student绑定对象,却调用了show方法的话,那么程序将会抛出空指针异常。
这是我们开发过程中最不希望看到的结果,所以Spring提供了一套叫做控制反转与依赖注入这套机制,目的就是为了解耦。
在Spring中,你不需要自己创建对象,你只需要告诉Spring,哪些类我需要创建出对象,然后在启动项目的时候Spring就会自动帮你创建出该对象,并且只存在一个类的实例。这个类的实例在Spring中被称为Bean。而这种模式,我们称之为“单例模式”。也就是一个类只有一个实例的意思。
那么Spring是靠什么来了解究竟哪些类需要帮我们创建呢,这里介绍最常用的两种方式——JAVA注解配置,JAVA代码配置。之前的还有XML配置,groovy配置等,但是我们现在已经不推荐使用了。
首先我们要介绍的,是JAVA注解配置,这是最简单也是最常用的一种方法。
我们先来看看声明注解的语法:
声明 含义
@Component 当前类是组件,没有明确的意思
@Service 当前类在业务逻辑层使用
@Repositorty 当前类在数据访问层使用
@Controller 当前类在展现层(MVC)使用
以上四种声明方式效果完全一致,使用不同的关键词是为了给阅读的人能够快速了解该类属于哪一层
使用方法为:在定义类前使用该注解。让我们看下面一段代码
import org.springframework.stereotype.Component;    //使用了@Component了以后eclipse会自动帮我们导入该包

@Component                                          //这是在告诉Spring,在创建项目时要自动帮忙创建这个类的Bean
public class Student {
	private int id;
	private String name;
	public int getId() {
		return id;
	}
	public void setId(int id) {
		this.id = id;
	}
	public String getName() {
		return name;
	}
	public void setName(String name) {
		this.name = name;
	}

}
我们在刚才的Student类前面,加上了@Component注解,成功告诉Spring:你要在项目创建运行时帮我创建Student类的Bean(对象)。
OK,添加“依赖”我们已经做完了,是不是很简单呢。
但是还没完,我们虽然让Spring帮我们创建了对象,但是StudentManager怎么知道这个对象在哪呢?它根本就不知道你有这么一个Bean(对象)啊。
所以接下来,我们要告诉StudentManager刚才Spring帮我们创建的Bean(对象)到底在哪,也就是“注入”这个Bean。
我们来看看注入注解的语法:
声明 含义
@Autowired Spring为这个变量注入一个Bean
@Inject 翻译为“注入”最易懂的注入注解
@Resource 翻译为“资源”,可以理解为Spring往里面注入的时一个资源
以上四种声明方式效果完全一致,使用不同的关键词是为了给阅读的人能够快速了解注入的Bean到底是个什么东西。
使用方法为:在我们需要注入依赖的成员变量前使用该注解。让我们看下面一段代码
import org.springframework.beans.factory.annotation.Autowired;    //这是使用@Autowired自动导入的包
import org.springframework.stereotype.Component;                  //这是使用@Component自动导入的包

@Component
public class StudentManager {
	@Autowired                                                //要求Spring帮我们注入一个Bean
	Student student;

	public void show() {
		System.out.println(student.getId());
		System.out.println(student.getName());
	}
}
我们可以看到,在声明成员变量Student的前面我们使用了@Autowired,所以Spring会自动帮我们注入一个Bean,我们就再也不用担心忘记绑定对象而出现空指针啦。
但是这还没完,虽然我们告诉了Spring哪些类是需要添加依赖,哪些类是需要注入Bean,但是Spring还需要我们做一次配置,来真正完成这样一个操作。
下面我们将介绍Spring的第一种配置方式:JAVA注解配置
创建配置类的方法为:在该类前使用@ComponentScan语句,声明这个类是一个配置类。一般来说,一个Spring项目只有一个配置类。然后我们要用@ComponentScan("包路径")来扫描需要注入Bean的包。
我们看下面一段代码:
import org.springframework.context.annotation.ComponentScan;
import org.springframework.context.annotation.Configuration;

@Configuration                        //告诉Spring这是一个配置类
@ComponentScan("com.example.demo")    //配置com.example.demo包

public class DIConfig {

}
这样就万事具备只欠东风啦,让我们让这个Spring项目真正跑起来吧
我们都知道,要让项目跑起来我们需要一个主类,并运行Main函数,我们这里直接使用java/main下自动创建的VadaskiSpring1Application类来作为主函数
import org.springframework.boot.autoconfigure.SpringBootApplication;
import org.springframework.context.annotation.AnnotationConfigApplicationContext;

@SpringBootApplication
public class VadaskiSpring1Application {

	public static void main(String[] args) {

		AnnotationConfigApplicationContext context =
				new AnnotationConfigApplicationContext(DIConfig.class);     //获取Spring项目的对象
		StudentManager studentManager = context.getBean(StudentManager.class);
		studentManager.student.setId(0);                                            //我们给这个Student对象id属性设置为0
		studentManager.student.setName("LitaVadaski");                              //我们给这个Student对象name属性设置为LitaVadaski
		studentManager.show();                                                      //我们让StudentManager去Show出来
		context.close();
	}
}
context就是Spring项目的一个对象,我们将测试类的类名告诉Spring,所以这个对象创建的时候就会自动帮我们注入Bean。
既然Spring已经帮我们创建了Bean,那我们怎么获得每个类的Bean(对象)呢
我们这里使用了Spring对象的getBean方法,这个方法就能获取Spring帮我们创建的Bean,之后我们就可以用这个对象来做一些事情啦!
我这里干了三件事:
·给这个Student对象id属性设置为0
·给这个Student对象name属性设置为LitaVadaski
·让StudentManager去Show出来
我们来看看运行截图
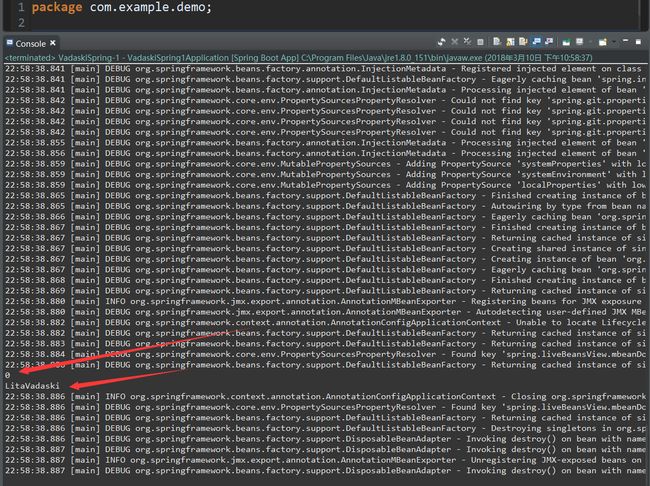
我们看到成功Show出来我们的 id 以及 name!Spring成功跑起来啦~
是不是巨简单呢?
第二种配置方法:使用Spring自动注入Bean的第二种配置方式:JAVA代码配置
我们刚才通过在类名前面添加注解
@Component @Service @Repositorty @Controller 来告诉Spring这个类需要你来帮我们创建Bean
那么假如我们这个Bean想要初始化该怎么办呢,Spring怎么知道你要初始化哪些值呢?
所以接下来我们要介绍的是Spring的第二种配置方法——JAVA代码配置,它的优势在于更加灵活,我们可以定义创建Bean的时候到底要创建什么样的Bean,由我们在 配置类 中手工定义。
首先我们创建类的时候,就不用再定义类前添加注解
//取消掉了自动加入依赖的注解
public class Student {
	private int id;
	private String name;

	public int getId() {
		return id;
	}
	public void setId(int id) {
		this.id = id;
	}
	public String getName() {
		return name;
	}
	public void setName(String name) {
		this.name = name;
	}
}
//取消掉了自动加入依赖的注解
public class StudentManager {
//取消了自动注入Bean的注解
Student student;
//手工创造一个注入依赖的方法
public void setStudent(Student student) {
this.student = student;
}
public void show() {
System.out.println(student.getId());
System.out.println(student.getName());
}
}在StudentManager类中我们取消了自动加入依赖的注解,并取消了自动注入Bean的注解
但是StudentManager类却新增加了一个手工注入Student的Bean的方法——setStudent()
然后我们来看配置类应该如何配置
我们在配置类中,手动写入需要注入的类的构造方法,并使用@Bean告诉Spring要添加这个
@Configuration
public class DIConfig {
	@Bean
	public Student student() {
		return new Student();
	}

	@Bean
	public StudentManager studentManager() {
		StudentManager SM = new StudentManager();			//先创建出一个需要的StudentManager对象
		Student student = student();					//再创建我们需要注入的Bean,这是并不是调用Student的构造方法
		student.setId(-1);  					        //自定义要注入的Bean的属性
		student.setName("Undefined");
		SM.setStudent(student);						//注入Bean
		return SM;							//返回该对象,由@Bean注解将该返回值加入到IOC容器中
	}
}·单例模式
我们是通过写构造方法,并在构造方法中注入Bean来实现Spring的自动依赖注入,但是我们注意这行代码
Student student = Student();看上去我们是调用了Student的构造方法,我们来看刚才写的构造方法
@Bean
	public Student student() {
		return new Student();
	}
好像每次调这个方法都会new一个新的Student对象,但是实际上并不是这样。
Spring实现了一种机制,叫做单例模式
什么叫单例呢?
单例其实就是一个类,只创建一个实例,也就是一个对象
而我们刚才调用这个Student()构造方法的时候,实际上并不会真正去调用Student的构造方法,而是去绑定了Spring为我们创建出来的Student的Bean。Spring实现了一种机制, 能保证这种单例模式存在。
也就是说,在Spring中,构造方法只能被调用一次,以后的构造方法调用都会自动绑定Spring创建的Bean,而不是new新对象。
我们可以看到我们在构造StudentManager对象的时候注入的是一个 id=-1 且 name = Undefined 的Student对象
我们在Main中输出一下
@SpringBootApplication
public class VadaskiSpring1Application {

	public static void main(String[] args) {

		AnnotationConfigApplicationContext context =
				new AnnotationConfigApplicationContext(DIConfig.class);
		StudentManager studentManager = context.getBean(StudentManager.class);    //我们让Spring给我们一个StudentManager的Bean
		studentManager.show();//我们用Show去输出StudentManager管理的的name和id
		Student student = context.getBean(Student.class);                         //我们让Spring给我们一个Student的Bean
		System.out.println(student.getId());                                      //让这个Student的Bean输出一下你的id
		System.out.println(student.getName());                                    //让这个Student的Bean输出一下你的name
		student.setId(1);					                  //我们修改一下Student的Bean的id
		studentManager.show();				                          //让StudentManager去Show一下你依赖的Student
		context.close();
	}
}
我们来看看输出结果
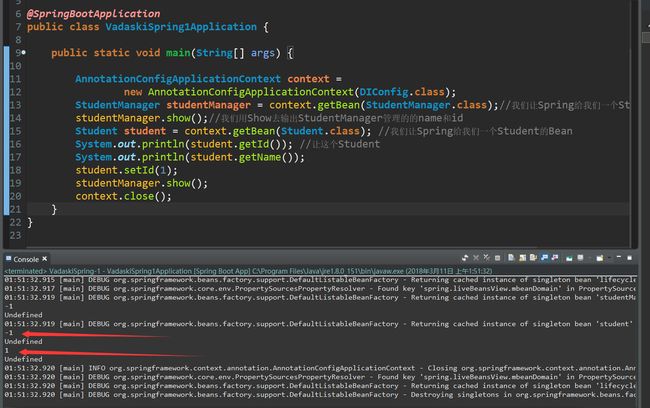
注意:我修改的是Studnt的Bean的id为1,然后让StudentManager的Bean去Show
这里可以看到,StudentManager的Bean依赖的Student Bean的id已经由 -1 变成了 1
那么我们可以证明,Student管理的Bean 和 StudentManager依赖的Bean是同一个Bean
单例模式得以证明。
以上内容就是Spring得依赖注入,那什么是控制反转呢
控制反转得意思是指,调用者不再手动创建一个类得实例(对象/Bean),而是由Spring来帮我们创建。
我们得控制反转其实就是依赖于依赖注入得以实现。我们在上面得Main中,直接使用得getBean(类名.class)来获得一个实例,而这个实例是由Spring来帮我们创建的。这,就是控制反转。
预告:
下一节我们将讲解Spring中的AOP思想,以及如何在Spring中使用AOP