Hexo 博客部署到腾讯云服务器全流程
本文首发于我的个人博客:https://staunchkai.com
原来是部署到 github 和 coding 上的,访问速度较慢,并且图床 七牛云 自 2018年 7月起,测试域名的生命周期只有 30个自然日,这让维护博客造成了很大的麻烦,于是便准备使用服务器来进行部署了。
部署环境
- 本地环境
- Windows10(64bit)
- 环境:
git,Node.js,hexo… - 生成本地静态网站
- 服务器环境
- 腾讯云主机(CentOS 7.5 64bit)
- 环境:
git,Nginx,创建 git 用户 - 使用 git 自动化部署发布
服务器配置
1. 安装 Git (源码包安装)
因为 yum 源仓库的 Git 版本更新不及时,所以采用源码包进行安装。
1.1 安装依赖包
yum install curl-devel expat-devel gettext-devel openssl-devel zlib-devel
yum install  gcc perl-ExtUtils-MakeMaker
通过命令 git --version 可以看到,Git 当前的版本号为 1.8.3.1,太过于陈旧,所以需要先把它移除了。
1.2 卸载旧版本的 Git
yum remove git
1.3 下载并解压
cd /usr/local/src   // 选择文件保存位置
wget https://mirrors.edge.kernel.org/pub/software/scm/git/git-2.19.0.tar.gz   // 下载链接
tar -zxvf git-2.19.0.tar.gz   // 解压
git-2.19.0.tar.gz 是目前最新版本,其他版本以及之后版本可到此进行查看。解压后,会在当前目录下自动生成一个名为 git-2.19.0 的文件夹,里面就是解压出来的文件。可通过命令 ls 进行查看。
1.4 编译安装
cd git-2.19.0   // 进入文件夹
make prefix=/usr/local/git all  // 编译源码
make prefix=/usr/local/git install  // 安装至 /usr/local/git 路径
编译时,由机器配置决定速度,请耐心等待。
打开环境变量配置文件。
vim /etc/profile
在文件底部添加以下配置。
PATH=$PATH:/usr/local/git/bin   // git 的目录
export PATH
两个语句都要加上。
刷新环境变量。
source /etc/profile
最后再使用 git --version 查看版本号,已经为 2.19.0。
2. git 新用户及配置
2.1 创建 git 用户
adduser git
passwd git
chmod 740 /etc/sudoers
vim /etc/sudoers
找到以下内容。
## Allow root to run any commands anywhere
root    ALL=(ALL)       ALL
在它下面添加一行。
git ALL=(ALL) ALL
保存并退出,将权限修改回来。
chmod 400 /etc/sudoers
2.2 密钥配置
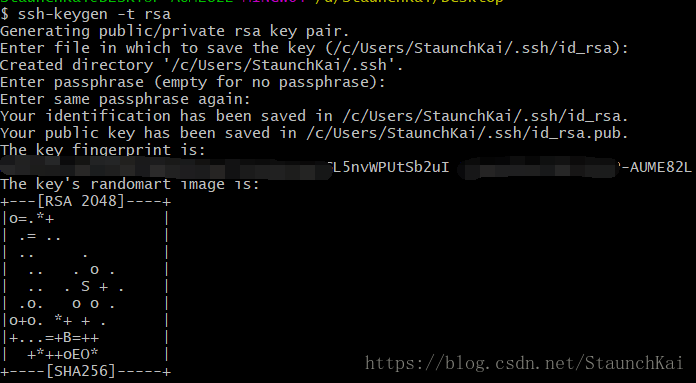
本地中,使用 Git Bash 创建密钥。
# 本地 windows gitBash
ssh-keygen -t rsa
切换至 git 用户,创建 .ssh 文件夹以及 authorized_keys 文件并将本地的 id_rsa.pub 文件内容粘贴到里面。
su git
mkdir ~/.ssh
vim ~/.ssh/authorized_keys
修改权限。
cd ~
chmod 600 .ssh/authorzied_keys
chmod 700 .ssh
2.3 测试
在本地 Windows 上,使用 Git Bash 测试是否能连接上服务器。
ssh -v git@SERVER
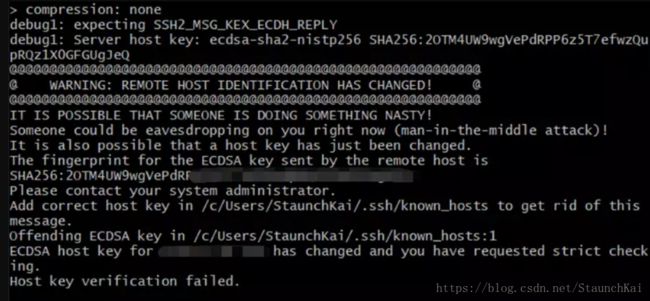
其中 SERVER 为服务器 ip 地址。若出现以下错误提示,检查本地密钥位置是否存在 known_hosts 文件,将其删除重新测试。测试结果为,不需要密码直接进入。
错误提示:

2.4 创建网站目录
创建一个目录用于作为网站的根目录。
su root
mkdir /home/hexo    # 此目录为网站的根目录
赋予权限。
chown git:git -R /home/hexo
3. 安装配置 Nginx
注意需要 root 权限
yum install -y nginx    // 安装
systemctl start nginx.service     // 启动服务
使用 yum 安装的 nginx 在新版的 CentOS 中,需要使用 systemctl,而不是直接使用 service start nginx
此时通过服务器的公网 IP 地址访问,可以看到 nginx 的欢迎页面,表示安装成功,如下图:
3.2 配置 Nginx
使用 nginx -t 命令查看位置,一般为 /etc/nginx/nginx.conf。
使用 vim /etc/nginx/nginx.conf 命令进行编辑,修改配置文件如下:
server {
    listen       80 default_server;
    listen       [::]:80 default_server;
    server_name  staunchkai.com;    # 修改为自己的域名
    root         /home/hexo;    # 修改为网站的根目录

    # Load configuration files for the default server block.
    include /etc/nginx/default.d/*.conf;

    location / {
    }

    error_page 404 /404.html;
        location = /40x.html {
    }

    error_page 500 502 503 504 /50x.html;
        location = /50x.html {
    }
}
root 处的网站目录,需要自己创建,也就是部署上传的位置。
注意使用 nginx -t 命令检查配置文件的语法是否出错。然后使用 systemctl restart nginx.service 命令重启服务即可。
4. 自动化部署
4.1 建立 git 裸库
创建一个裸仓库,裸仓库就是只保存 git 信息的 Repository, 首先切换到 git 用户确保 git 用户拥有仓库所有权,一定要加 --bare,这样才是一个裸库。
su root
cd /home/git   # 在 git 用户目录下创建
git init --bare blog.git
这时,git 用户的 ~ 目录下就存在一个 blog.git 文件夹,可使用 ls 命令查看。再修改 blog.git 的权限。
chown git:git -R blog.git
4.2 使用 git-hooks 同步网站根目录
在这使用的是 post-receive 这个钩子,当 git 有收发的时候就会调用这个钩子。 在 blog.git 裸库的 hooks 文件夹中,新建 post-receive 文件。
vim blog.git/hooks/post-receive
填入以下内容,其中 /home/hexo 为网站目录,根据自己的填入,保存退出。
#!/bin/sh
git --work-tree=/home/hexo --git-dir=/home/git/blog.git checkout -f
保存后,要赋予这个文件可执行权限。
chmod +x /home/git/blog.git/hooks/post-receive
本地配置
在本地中,和部署到 pages 服务一样,需要先 hexo g 命令生成静态文件,通过 hexo s 命令能够正常进行本地访问,并且确保已经安装了 hexo-deployer-git。
配置 _config.yml
hexo 根目录下的 _config.yml 文件,找到 deploy。
deploy:
    type: git
    repo: git@SERVER:/home/git/blog.git     # repository url
    branch: master      # 分支
之后按照正常的流程进行部署即可。
hexo clean
hexo g
hexo d
常见错误
git-receive-pack: 未找到命令
hexo d
bash: git-receive-pack: command not found
fatal: Could not read from remote repository.
解决办法:
sudo ln -s /usr/local/git/bin/git-receive-pack /usr/bin/git-receive-pack
git-upload-pack: 未找到命令
正克隆到 'blog'...
bash: git-upload-pack: command not found
fatal: Could not read from remote repository.
解决办法:
sudo ln -s /usr/local/git/bin/git-upload-pack /usr/bin/git-upload-pack
不是一个 git 仓库
fatal: 'XXXX/blog.git' does not appear to be a git repository
fatal: Could not read from remote repository.
解决办法:
确保 _config.yml 文件中 deploy 处的 repo 路径填写正确。

