Linux---lnmp之nginx
#####################################
######### 高性能Web服务器Nginx #########
#####################################
主机环境: rhel6 selinux and iptables disabled
实验主机: Server1:172.25.27.1 作为Nginx服务器
Server2:172.25.27.2 作为Apache服务端
Server3:172.25.27.3 作为Apache服务端
一、LNMP
LNMP就是Linux系统下Nginx+Mysql+PHP这种网站服务器架构。
Linux是一类Unix计算机操作系统的统称。
Nginx是一个高性能的HTTP和反向代理服务器,也是一个IMAP/POP3/SMTP代理服务器。
Mysql是一个小型关系型数据库管理系统。
PHP是一种在服务器端执行的嵌入HTML文档的脚本语言。
这四种软件均为免费开源软件,组合到一起,成为一个免费、高效、扩展性强的网站服务系统。
二、Nginx
1.Nginx是一个高性能的HTTP和反向代理服务器,也是一个IMAP/POP3/SMTP代理服务器。
作为负载均衡服务器:Nginx既可以在内部直接支持Rails和PHP,也可以支持作为HTTP代理服务器对外进行服务。Nginx用C编写,不论是系统资源开销还是CPU使用效率都比Perlbal要好的多。
作为邮件代理服务器:Nginx同时也是一个非常优秀的邮件代理服务器。
三、Nginx和Apache简单对比:
1.Nginx相对Appaqi的优点:
- 轻量级,同样的web服务,比Apache占用更少的资源和内存;
- 抗并发,Nginx处理请求是异步非阻塞式,而Apache则是阻塞型。在高并发下,Nginx能保持低资源、低消耗、高性能;
- 高度模块化设计,编写模块相对简单;
- 社区活跃,各种高性能模块资源丰富;
- 代理功能强大;
2.Apache相对Nginx的优点:
- 比Nginx的rewrite(服务器的重写脉冲技术、支持URL重写)更强大;
- 模块超多,现有的模块基本能满足所有需求;
- 比Nginx稳定,bug率少。
3.Nginx与Apache应用场景对比:
- Apache适合跑动态,而Nginx适合跑静态和反向,但若静态文件较少,Apache的select模块比Nginx的epoll模块更好;
- Nginx适合于IO密集型服务,Apache适合与CPU密集型服务;
- 最好两者相结合,例如,lnmp架构,Nginx做前端服务器,处理静态文件请求,Apache做后端服务器,当客户发出动态文件请求时,Nginx的反向代理功能将请求转发到Apache。
4.轻量级、高并发原因:
- 对于Apache,每个请求都独占一个工作线程,并发数在几千,占用内存、CPU,降低性能;
- 对于Nginx,一个进程只有一个主线程,通过异步非阻塞事件处理机制,实现了循环处理多个准备好的事件,从而实现轻量级、高并发。
5.直接说明:
Apache属于专一性服务;
Nginx分阶进行,节省时间。
四、Nginx 服务器的搭建及配置
在server1做如下操作:
1.安装
tar zxf nginx-1.12.0.tar.gz # 解压软件包
useradd -M -d /usr/local/lnmp/nginx -s /sbin/nologin -u 800 nginx # 添加nginx用户

2.编译前修改一些文件
cd nginx-1.12.0/src/core/
vim nginx.h # 编辑nginx.h文件
14 #define NGINX_VER "nginx" # 修改此行,为了安全,这样编译后外界无法获取程序的版本号

cd /root/nginx-1.12.0/auto/cc/
vim gcc # 编辑gcc文件
171 # debug
172 #CFLAGS="$CFLAGS -g" # 注释掉这行,去掉 debug 模式编译,编译以后程序只有几百 k


3.编译configure文件
cd nginx-1.12.0
./configure --prefix=/usr/local/lnmp/nginx --user=nginx --group=nginx --with-threads --with-file-aio --with-http_ssl_module --with-http_stub_status_module # 进行编译并制定目录与参数

##########################
--prefix=/usr/local/lnmp/nginx # nginx安装路径,如果没有指定,默认为/usr/local/nginx
--user=nginx # 在nginx.conf中没有指定user指令的情况下,默认的nginx使用的用户。如果没有指定,默认为nobody
--group=nginx # nginx.conf中没有指定user指令的情况下,默认的nginx使用的组。如果没有指定,默认为nobody
--with-http_ssl_module # 开启http_ssl模块,使nginx可以支持https请求。这个模块需要安装openssl
--with-http_stub_status_module # 启用”server status”页
###########################
编译中的报错及解决:<每次解决报错后重新编译>
①./configure: error: the HTTP rewrite module requires the PCRE library.
You can either disable the module by using --without-http_rewrite_module
option, or install the PCRE library into the system, or build the PCRE library
statically from the source with nginx by using --with-pcre=
解决:yum install -y pcre-devel # pcre用于实现rewrite模块的功能,不安装编译无法通过

②./configure: error: SSL modules require the OpenSSL library.
You can either do not enable the modules, or install the OpenSSL library
into the system, or build the OpenSSL library statically from the source
with nginx by using --with-openssl=
解决:yum install -y openssl-devel # 提供ssl加密协议

make && make install # make生成脚本及配置文件,make install安装

cd /usr/local/lnmp/nginx
du -sh
cd sbin/
./nginx # 执行
ln -s /usr/local/lnmp/nginx/sbin/nginx /sbin/ # 软链接,不论在哪个目录下输入nginx都能执行

测试:
curl localhost -I

访问172.25.27.1跳转到nginx主页

五、nginx配置性能优化
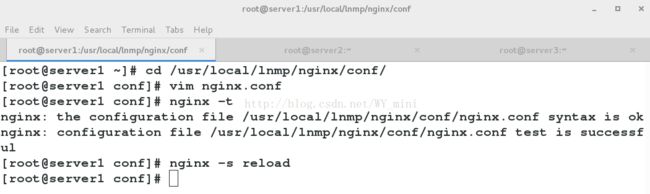
cd /usr/local/lnmp/nginx/conf/
vim nginx.conf
3 worker_processes 2; # 可以指定启动的固定nginx的进程数
4
5 worker_cpu_affinity 01 10; # 为每个进程分配cpu
15 worker_connections 65535; # 每个进程允许的最多连接数,理论上每台nginx服务器的最大连接数为worker_processes*worker_connections

nginx -s reload
sysctl -a | grep file
fs.file-nr = 448 0 188443 # 查看整个系统目前使用的文件句柄数量
fs.file-max = 188443 # 查看系统范围内所有进程可以打开的文件句柄的数量限制

ulimit -a -u nginx

usermod -s /bin/bash nginx
su - nginx
-bash-4.1$ ulimit
unlimited
-bash-4.1$ ulimit -a
core file size (blocks, -c) 0
data seg size (kbytes, -d) unlimited
scheduling priority (-e) 0
file size (blocks, -f) unlimited
pending signals (-i) 14867
max locked memory (kbytes, -l) 64
max memory size (kbytes, -m) unlimited
open files (-n) 65535
pipe size (512 bytes, -p) 8
POSIX message queues (bytes, -q) 819200
real-time priority (-r) 0
stack size (kbytes, -s) 10240
cpu time (seconds, -t) unlimited
max user processes (-u) 1024
virtual memory (kbytes, -v) unlimited
file locks (-x) unlimited

vim /etc/security/limits.conf
nginx - nofile 65535

username:需要被限制的用户名
type:soft 指的是当前系统生效的设置值。hard 表明系统中所能设定的最大值。soft 的限制不能比har 限制高。用 - 就表明同时设置了soft 和hard的值
resource: 表示要限制的资源,nofile - 打开文件的最大数目
su - nginx
-bash-4.1$ ulimit
unlimited
-bash-4.1$ ulimit -a
core file size (blocks, -c) 0
data seg size (kbytes, -d) unlimited
scheduling priority (-e) 0
file size (blocks, -f) unlimited
pending signals (-i) 14867
max locked memory (kbytes, -l) 64
max memory size (kbytes, -m) unlimited
open files (-n) 65535
pipe size (512 bytes, -p) 8
POSIX message queues (bytes, -q) 819200
real-time priority (-r) 0
stack size (kbytes, -s) 10240
cpu time (seconds, -t) unlimited
max user processes (-u) 1024
virtual memory (kbytes, -v) unlimited
file locks (-x) unlimited
usermod -s /sbin/nologin nginx

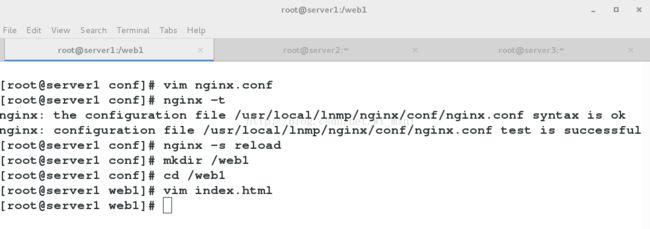
六、搭建虚拟主机
vim nginx.conf
118 server {
119 listen 80; # 监听80端口
120 server_name www.westos.org; # 访问www.westos.org的去下面/web1目录查找
121 location / {
122 root /web1; # 存放目录
123 index index.html; # 默认主页面
124 }
125 }
126 }
nginx -t # 检查语法是否错误
nginx -s reload # 重读配置文件而不用重启nginx服务
mkdir /web1 # 创建虚拟主机目录
cd /web1/
vim index.html # 编辑测试页文件
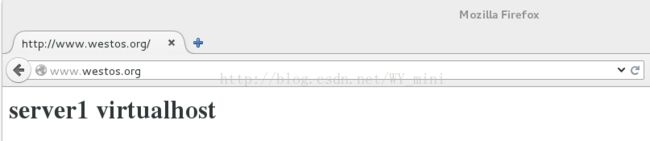
server1 virtualhost


测试:访问www.westos.org的跳转至虚拟主机目录下的测试页
访问172.25.27.1的跳转到nginx主页

七、HTTPS配置:需要生成证书
cd /etc/pki/tls/private/
openssl genrsa 2048 > localhost.key

cd /etc/pki/tls/certs
make cert.pem # 生成自定义证书
Country Name (2 letter code) [XX]:cn
State or Province Name (full name) []:shaanxi
Locality Name (eg, city) [Default City]:xi'an
Organization Name (eg, company) [Default Company Ltd]:westos
Organizational Unit Name (eg, section) []:linux
Common Name (eg, your name or your server's hostname) []:server1
Email Address []:[email protected]


mv cert.pem /usr/local/lnmp/nginx/conf/ # 将生成的证书移到nginx的配置文件目录下
cd /usr/local/lnmp/nginx/conf/
vim nginx.conf
100 server {
101 listen 443 ssl; # 监听端口,这里为https的请求
102 server_name localhost;
103
104 ssl_certificate cert.pem; # 证书
105 ssl_certificate_key cert.pem; # 钥匙
106
107 ssl_session_cache shared:SSL:1m;
108 ssl_session_timeout 5m;
109
110 ssl_ciphers HIGH:!aNULL:!MD5;
111 ssl_prefer_server_ciphers on;
112
113 location / {
114 root html;
115 index index.html index.htm; # 默认发布页文件
116 }
117 }
nginx -t
nginx -s reload
netstat -antlp


访问:https://172.25.27.1/


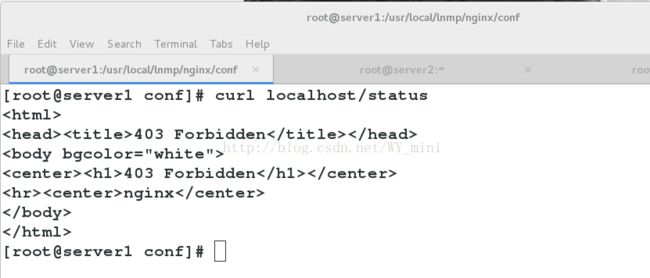
八、stub_status模块
主要用于查看Nginx的一些状态信息
cd /usr/local/lnmp/nginx/conf
vim nginx.conf
50 location /status {
51 stub_status on;
52 access_log off;
53 allow 172.25.27.250; # 加入访问限制
54 deny all;
55 }
nginx -t
nginx -s reload

测试:ip为172.25.27.250的主机可以访问172.25.27.1/status


server1:curl localhost/status访问不到
九、网页重写:
1.
vim nginx.conf
108 server_name www.westos.org;
120 root /web1;
124 server {
125 listen 80;
126 server_name www.westos.org;
127 rewrite ^(.*)$ https://www.westos.org$1 permanent; # permanent返回301永久重定向
128 }
129 }
nginx -t
nginx -s reload


测试:访问https://www.westos.org/

2.
cd /web1/
mkdir admin
cd admin/
vim index.html
admin page


测试:访问https://www.westos.org/admin/

############# 关于重定向 #############
1)301永久重定向
vim nginx.conf
127 rewrite ^(.*)$ https://www.westos.org$1 permanent;

curl www.westos.org -I
HTTP/1.1 301 Moved Permanently

2)302 暂时重定向
vim nginx.conf
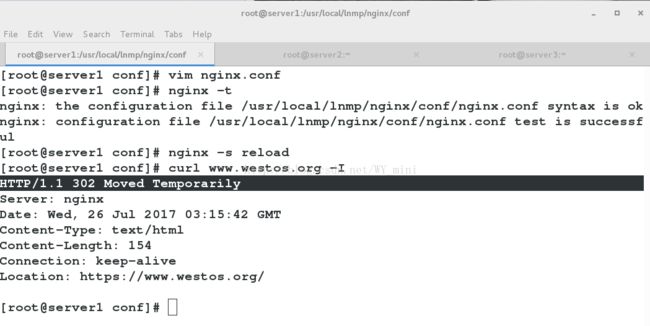
127 rewrite ^(.*)$ https://www.westos.org$1 redirect;

curl www.westos.org -I
HTTP/1.1 302 Moved Temporarily
十、负载均衡
1.upstream是Nginx的HTTP Upstream模块,upstream默认是以轮询的方式实现负载均衡,这种方式中,每个请求按时间顺序逐一分配到不同的后端服务器,如果后端服务器down掉,能自动剔除,使用户访问不受影响。
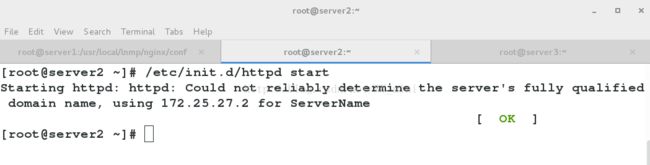
server2:
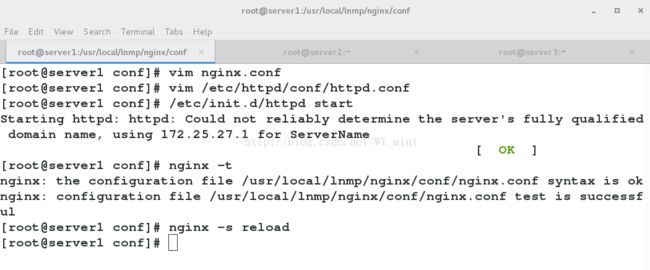
/etc/init.d/httpd start
server3:
vim /etc/httpd/conf/httpd.conf
136 Listen 8080

/etc/init.d/httpd start

server1:
vim nginx.conf
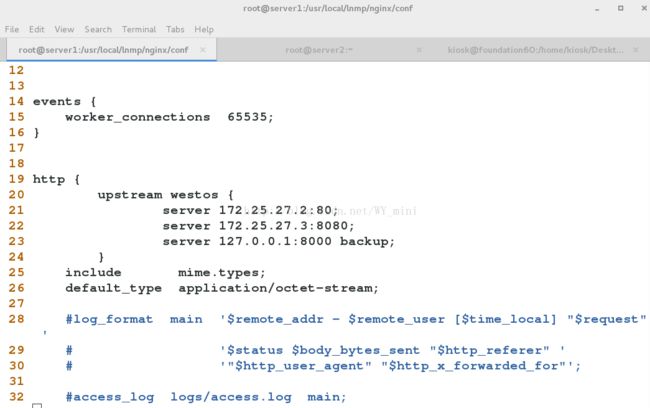
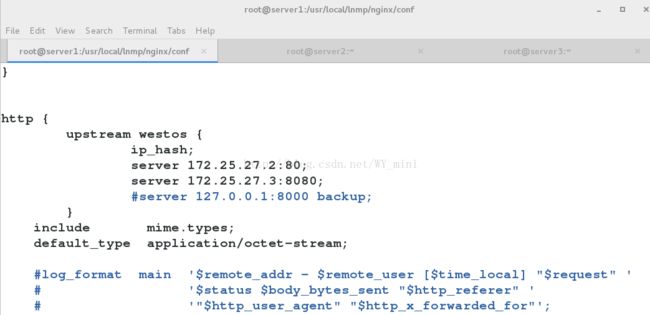
20 upstream westos {
21 server 172.25.27.2:80;
22 server 172.25.27.3:8080;
23 server 127.0.0.1:8000 backup; # backup,预留的备份机器。当其他所有的非backup机器出现故障或者忙的时候,才会请求backup机器,因此这台机器的压力最轻。
24 }
131 # rewrite ^(.*)$ https://www.westos.org$1 redirect;
132 location / {
133 proxy_pass http://westos; # 设置反向代理地址
134 }

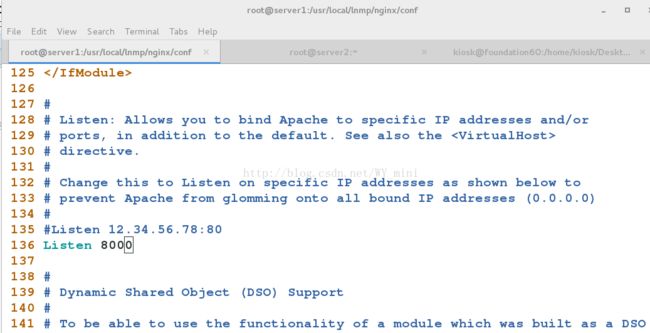
vim /etc/httpd/conf/httpd.conf
136 Listen 8000
/etc/init.d/httpd start
nginx -t
nginx -s reload
cd /var/www/html
vim index.html
系统正在维护。。。
测试:
当server2,3 httpd 服务都 start 时
for i in {1..10}; do curl www.westos.org ; done # 此时server2,server3轮询

当server2 httpd 服务stop时
for i in {1..10}; do curl www.westos.org ; done # 此时只访问server3

当server2,3 httpd 服务都 stop 时
for i in {1..10}; do curl www.westos.org ; done # 此时访问的是backup主机

########## 权重 ##########
vim nginx.conf
21 server 172.25.27.2:80 weight=2; # weight 指定轮询权值,Weight值越大,分配到的访问机率越高,主要用于后端每个服务器性能不均的情况下。
nginx -t
nginx -s reload

for i in {1..10}; do curl www.westos.org ; done

2.ip_hash:每个请求按访问ip的hash结果分配,这样来自同一个IP的访客固定访问一个后端服务器,有效解决了动态网页存在的session共享问题。
vim nginx.conf
22 ip_hash;
23 server 172.25.27.2:80;
24 server 172.25.27.3:8080;
25 # server 127.0.0.1:8000 backup; # 当负载调度算法为ip_hash时,后端服务器在负载均衡调度中的状态不能有backup。
nginx -t
nginx -s reload

测试:
server1:
for i in {1..10}; do curl www.westos.org ; done # 此时只访问server2

真机:
for i in {1..10}; do curl www.westos.org ; done # 此时只访问server3
