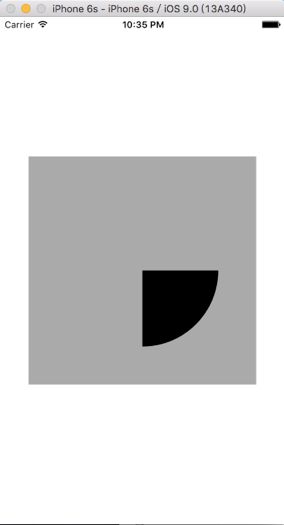
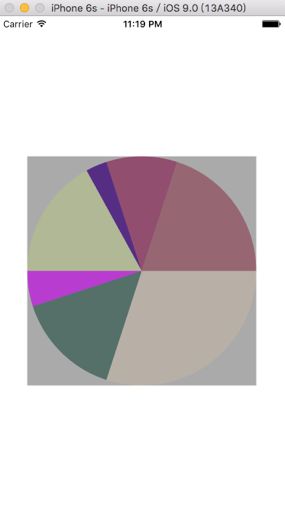
展示效果:
请问:实现的步骤是什么?
第一步,使用UIBezierPath绘制一个扇形图.
第二步,绘制一个饼状图.主要是由无数个扇形图组合而成.具体实现步骤如下:
l1>获取上下文
l2>设置饼状图的数据
l3>遍历数组,计算出总和
l4>计算圆心点注意: (不要直接使用self.center来获取,应该根据宽高的结果进行计算出圆心点)
l5>计算半径
l6>设置起始弧度和终止弧度
l7>循环data中的数据,绘制对应的扇形
l7.1>计算终点弧度
l7.2>创建一个UIBezierPath对象(表示一个扇形)
l7.3>添加一条线段到中心点位置
l7.4>把这个UIBezierPath对象添加到上下文中
l7.5>设置下一个扇形的起始弧度,为上一个扇形的终止弧度
l7.6>随机设置每个扇形的颜色
l7.7>渲染
第三步,在饼状图中间绘制一个小圆.
l8>在中间添加一个小圆
第四步,点击屏幕的时候实现重新绘制.
//第一步代码实现
- (void)drawRect:(CGRect)rect {
// 1.获取"图形上下文"
CGContextRefctx =UIGraphicsGetCurrentContext();
// 2.添加路径
//计算圆心
CGPointcenterP =CGPointMake(rect.size.width*0.5, rect.size.height*0.5);
//半径
CGFloatradius =100;
//绘制一个弧
UIBezierPath*path = [UIBezierPathbezierPathWithArcCenter:centerPradius:radiusstartAngle:0endAngle:M_PI_2clockwise:YES];
//让结束点到圆心点连一条线
[pathaddLineToPoint:centerP];
// 3.把路径添加到上下文中
CGContextAddPath(ctx, path.CGPath);
// 4.渲染
CGContextDrawPath(ctx,kCGPathFill);
}
//第二步代码实现
- (void)drawRect:(CGRect)rect
{
// 1.获取上下文
CGContextRefctx =UIGraphicsGetCurrentContext();
// 2.设置饼状图的数据
NSArray*data =@[@30,@15,@5,@17,@3,@10,@20];
// 3.遍历数组,计算出总和
CGFloatsum =0;
for(inti =0; i < data.count; i++) {
sum += [data[i]floatValue];
}
// 4.计算圆心点
CGPointcenterP =CGPointMake(rect.size.width*0.5, rect.size.height*0.5);
// 5.计算半径
CGFloatradius =MIN(rect.size.width, rect.size.height) *0.5;
// 6.设置起始弧度和终止弧度
CGFloatstart =0;
CGFloatend =0;
// 7.循环data中的数据,绘制对应的扇形
for(inti =0; i < data.count; i++) {
// 7.1计算终点弧度
end = [data[i]floatValue] / sum *M_PI*2+ start;
// 7.2创建一个UIBezierPath对象(表示一个扇形)
UIBezierPath*path = [UIBezierPathbezierPathWithArcCenter:centerPradius:radiusstartAngle:startendAngle:endclockwise:YES];
// 7.3添加一条线段到中心点位置
[pathaddLineToPoint:centerP];
// 7.4把这个UIBezierPath对象添加到上下文中
CGContextAddPath(ctx, path.CGPath);
// 7.5设置下一个扇形的起始弧度,为上一个扇形的终止弧度
start = end;
// 7.6随机设置每个扇形的颜色
[[UIColorcolorWithRed:arc4random_uniform(256) /255.0green:arc4random_uniform(256) /255.0blue:arc4random_uniform(256) /255.0alpha:0.8]set];
// 7.7渲染
CGContextDrawPath(ctx,kCGPathFill);
}
// 8.在中间绘制一个小圆
UIBezierPath*path1 = [UIBezierPathbezierPathWithArcCenter:centerPradius:radius -50startAngle:0endAngle:M_PI*2clockwise:YES];
[self.backgroundColorset];
CGContextAddPath(ctx, path1.CGPath);
CGContextDrawPath(ctx,kCGPathFill);
}
//第三步代码实现
// 8.在中间绘制一个小圆
UIBezierPath *path1 =
[UIBezierPath bezierPathWithArcCenter:centerP radius:radius -50startAngle:0endAngle:M_PI *2clockwise:YES];
[self.backgroundColor set];
CGContextAddPath(ctx,path1.CGPath);
CGContextDrawPath(ctx, kCGPathFill);
//第四步代码实现
- (void)touchesBegan:(NSSet *)touches withEvent:(UIEvent*)event
{
[selfsetNeedsDisplay];
}


