Python学习笔记(一)——linux rhel7下安装python
1.查看是否已经安装Python
[root@localhost bin]# ls python*
python  python2  python2.7
[root@localhost bin]# pwd
/usr/bin
[root@localhost bin]#
可以看到可执行文件python指向python2,python2又指向python2.7也就是说Python命令执行的系统预装的Python2.7。
要安装Python的其他版本先执行mv python python.bak命令备份python文件。
[root@localhost bin]# ls -al python*
lrwxrwxrwx. 1 root root    7 5月  23 00:14 python -> python2
lrwxrwxrwx. 1 root root    9 5月  23 00:14 python2 -> python2.7
-rwxr-xr-x. 1 root root 7136 2月  11 2014 python2.7
2.安装新版本的Python
下载Python新版本https://www.python.org/
[root@localhost bin]# cd /
[root@localhost /]# ls
bin  boot  dev  etc  home  lib  lib64  media  mnt  opt  proc  Python-3.7.0.tgz  root  run  sbin  srv  sys  tmp  usr  var
[root@localhost /]#
可以安装python了,编译过程中会自动包含这些依赖。
解压文件:
[root@localhost /]#  tar -xf Python-3.7.0.tgz
[root@localhost /]# ls
bin  boot  dev  etc  home  lib  lib64  media  mnt  opt  proc  Python-3.7.0  Python-3.7.0.tgz  root  run  sbin  srv  sys  tmp  usr  var
[root@localhost /]# cd Python-3.7.0
[root@localhost Python-3.7.0]#
把python移到/usr/local下面
mv Python-3.7.0 /usr/local
[root@localhost /]# mv Python-3.7.0  /usr/local
[root@localhost /]# ls
bin  boot  dev  etc  home  lib  lib64  media  mnt  opt  proc  Python-3.7.0.tgz  root  run  sbin  srv  sys  tmp  usr  var
[root@localhost /]# cd /usr/local
[root@localhost local]# ls
bin  etc  games  include  lib  lib64  libexec  Python-3.7.0  sbin  share  src
删除旧版本的python依赖
ll /usr/bin | grep python
rm -rf /usr/bin/python
[root@localhost local]# ll /usr/bin | grep python
-rwxr-xr-x. 1 root root      11216 3月   3 2014 abrt-action-analyze-python
lrwxrwxrwx. 1 root root          7 5月  23 00:14 python -> python2
lrwxrwxrwx. 1 root root          9 5月  23 00:14 python2 -> python2.7
-rwxr-xr-x. 1 root root       7136 2月  11 2014 python2.7
[root@localhost local]# rm -rf /usr/bin/python
[root@localhost local]#
进入python目录
cd /usr/local/Python-3.7.0/
配置
./configure
[root@localhost local]# cd Python-3.7.0/
[root@localhost Python-3.7.0]# ./configure
checking build system type... x86_64-pc-linux-gnu
checking host system type... x86_64-pc-linux-gnu
checking for python3.7... no
checking for python3... no
checking for python... no
checking for --enable-universalsdk... no
checking for --with-universal-archs... no
checking MACHDEP... checking for --without-gcc... no
checking for --with-icc... no
checking for gcc... no
checking for cc... no
checking for cl.exe... no
configure: error: in `/usr/local/Python-3.7.0':
configure: error: no acceptable C compiler found in $PATH
See `config.log' for more details
[root@localhost Python-3.7.0]#
[root@localhost /]# vim /usr/bin/yum
[root@localhost /]# vim /usr/libexec/urlgrabber-ext-down
将python重命名为python2,然后将/usr/bin/yum这个文件的首行的python改为python2,也就是说,yum配置的相关文件中的python编译器一定是要跟着python2走的,修改完保存退出即可。
修改第二个文件:/usr/libexec/urlgrabber-ext-down,也是把首行的python改成python2
现在执行yum就可以了。
由于安装Redhat7 想安装gcc 使用yum install gcc 报错:
This system is not registered to Red Hat Subscription Management. You can use subscription-manager to register.
大概意思是是让你先注册一下。
这是redhat 自带的 yum 源需要注册,花钱才能使用把心得写下来!!!
第一步:先卸载原来的yum
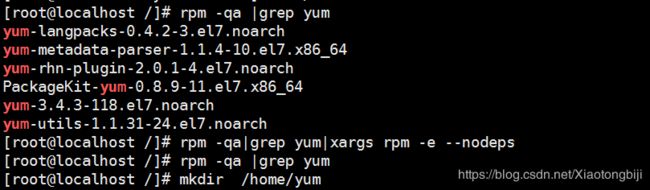
rpm -qa |grep yum 查看原来是否安装
yum-3.4.3-118.el7.noarch
yum-utils-1.1.31-24.el7.noarch
yum-rhn-plugin-2.0.1-4.el7.noarch
PackageKit-yum-0.8.9-11.el7.x86_64
yum-langpacks-0.4.2-3.el7.noarch
yum-metadata-parser-1.1.4-10.el7.x86_64
直接卸载:
rpm -qa|grep yum|xargs rpm -e --nodeps
在次运行 :rpm -qa |grep yum 发现卸载干净了。
第二步 下载 yum 替换包
这里要说明一下,因为要替换,所以一定要是一整套,还有一个rhel-debuginfo.repo文件要配置。部分博客写的就不对了,这个文件配置不对也是不行的,所以把测试好的一套yum包给大家包括配置文件。下载链接:http://mirrors.163.com/centos/7/os/x86_64/Packages/


可以先 mkdir /home/yum 新建一个文件夹
把这几个安装包拷贝到 yum 这个文件下面
执行: rpm -ivh --force --nodeps yum-* 一次性执行依赖包,因为包之间会相互依赖。
第三步 新建配置 .repo 文件
vim /etc/yum.repos.d/CentOS-Base.repo
输入内容如下:
#CentOS-Base.repo
#
# The mirror system uses the connecting IP address of the client and the
# update status of each mirror to pick mirrors that are updated to and
# geographically close to the client.  You should use this for CentOS updates
# unless you are manually picking other mirrors.
#
# If the mirrorlist= does not work for you, as a fall back you can try the
# remarked out baseurl= line instead.
#
#
[base]
name=CentOS-$7 - Base - 163.com
#mirrorlist=http://mirrorlist.centos.org/?release=$7&arch=$basearch&repo=os
baseurl=http://mirrors.163.com/centos/7/os/$basearch/
gpgcheck=1
gpgkey=http://mirrors.163.com/centos/RPM-GPG-KEY-CentOS-7


#released updates
[updates]
name=CentOS-$7 - Updates - 163.com
#mirrorlist=http://mirrorlist.centos.org/?release=$7&arch=$basearch&repo=updates
baseurl=http://mirrors.163.com/centos/7/updates/$basearch/
gpgcheck=1
gpgkey=http://mirrors.163.com/centos/RPM-GPG-KEY-CentOS-7


#additional packages that may be useful
[extras]
name=CentOS-$7 - Extras - 163.com
#mirrorlist=http://mirrorlist.centos.org/?release=$7&arch=$basearch&repo=extras
baseurl=http://mirrors.163.com/centos/7/extras/$basearch/
gpgcheck=1
gpgkey=http://mirrors.163.com/centos/RPM-GPG-KEY-CentOS-7


#additional packages that extend functionality of existing packages
[centosplus]
name=CentOS-$7 - Plus - 163.com
baseurl=http://mirrors.163.com/centos/7/centosplus/$basearch/
gpgcheck=1
enabled=0
gpgkey=http://mirrors.163.com/centos/RPM-GPG-KEY-CentOS-7