STS上的Spring Boot与Spring MVC
Spring MVC的传统配置相当繁琐.
Spring Boot几步搞定, 而且不需要那些web.xml、spring.xml等配置文件.
第一步:
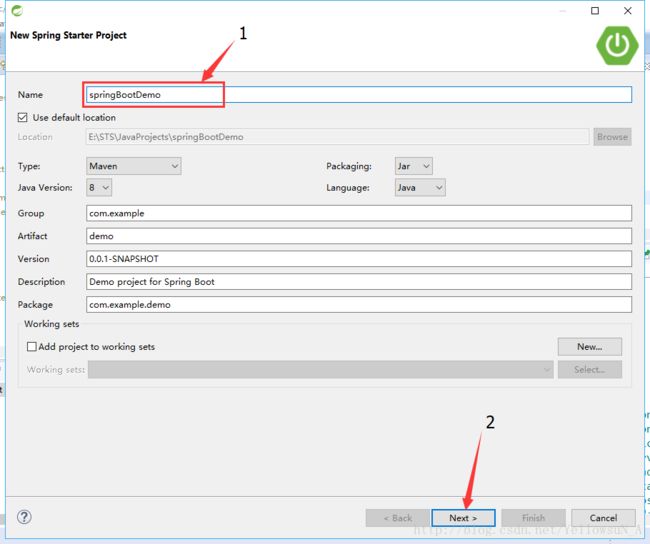
(1)新建Spring Starter Project

(2)这里你加个名字其他可以默认.
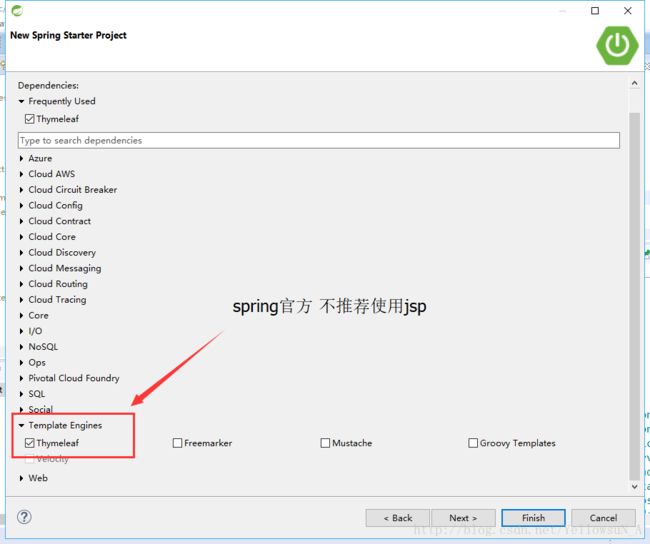
(3)要选择页面的类型, 不能用jsp.
finish. 创建完成.
第二步:
(1)maven项目的标志pom.xml文件相信已经看见了,那我们先配置下jar包.
<dependencies>
        <dependency>
            <groupId>org.springframework.bootgroupId>
            <artifactId>spring-boot-starter-thymeleafartifactId>
        dependency>

        <dependency>
            <groupId>org.springframework.bootgroupId>
            <artifactId>spring-boot-starter-testartifactId>
            <scope>testscope>
        dependency>

        <dependency>
            <groupId>org.springframework.bootgroupId>
            <artifactId>spring-boot-starterartifactId>
        dependency>


        <dependency>
            <groupId>org.springframework.bootgroupId>
            <artifactId>spring-boot-starter-webartifactId>
        dependency>

    dependencies>
后面一个是自己添加的, 有些是已经配置好了, 保存, jar自动进来.
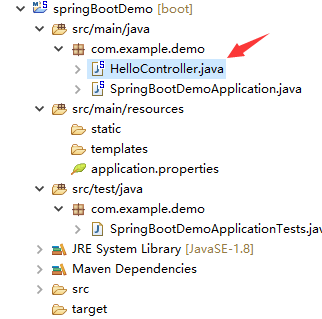
如下内容
package com.example.demo;

import org.springframework.web.bind.annotation.RequestMapping;
import org.springframework.web.bind.annotation.RestController;

@RestController
public class HelloController {

    @RequestMapping("/hello")
    public String show(){
        return "hello world.";
    }

}
请注意看上面的代码, 熟悉Spring MVC的可能第一反应还以为楼主写错了吧, 其实就是这样写的, 往下看它有什么特异功能.
后面我们再来说这个Spring4.0后新加入的注解.
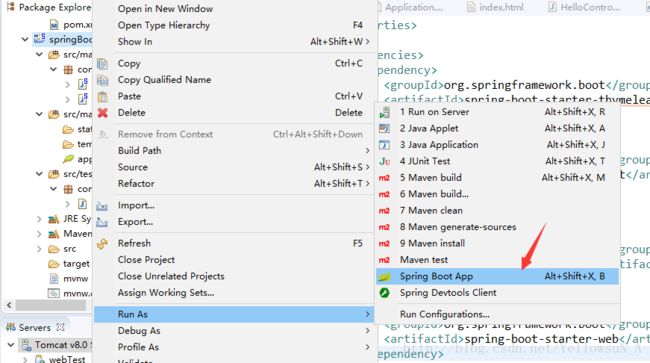
(3)运行测试:
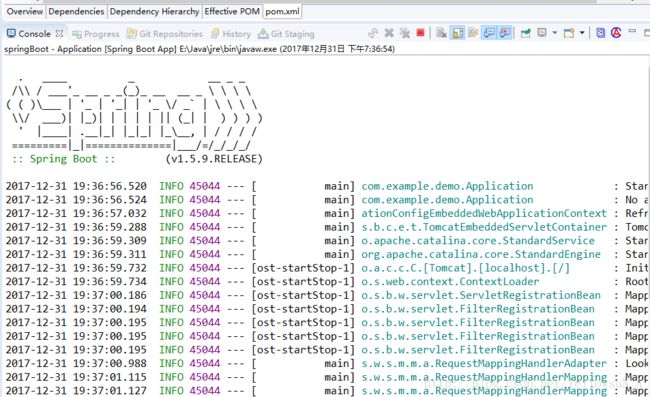
project –> Run as –> Spring Boot App
这个运行什么时候算是启动好了呢, 控制台不动了就OK了.
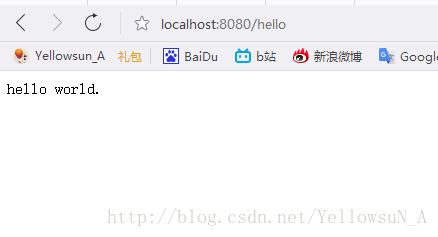
测试下:
在网页输入:
http://localhost:8080/hello
注意, 我们前面只是返回一个字符串, 而没有用json. 这里的效果就跟用json返回一样的, 很厉害有木有.
上面的这些配置就已经实现了Spring MVC的最主要功能:前后端交互.
Spring Boot竟强大如斯, 相见恨晚 ! !
Addition1:
Spring4.0后的注解
@RestController
该注解是Spring4.0之后添加的,功能近似等于
@Controller + @ResonseBody
定义:
@Target(value=TYPE)
@Retention(value=RUNTIME)
@Documented
@Controller
@ResponseBody
public @interface RestController
官方文档:
A convenience annotation that is itself annotated with @Controller and @ResponseBody. Types that carry this annotation are treated as controllers where @RequestMapping methods assume @ResponseBody semantics by default.
@ResponseBody – As of version 4.0 this annotation can also be added on the type level in which case is inherited and does not need to be added on the method level.
@ResponseBody也可以加到类一级,通过继承方法一级不需要添加。
聊到这里了, 那就再聊两个常用注解吧.
@PathVariable, 这个注解可用于处理RESTful web services的请求参数.
@RequestMapping(value="/{id}", method=RequestMethod.GET)
public User getUser(@PathVariable Long id) {
      // 处理"/users/{id}"的GET请求,用来获取url中id值的User信息
      // url中的id可通过@PathVariable绑定到函数的参数中
      return users.get(id);
}
@ModelAttribute 用于绑定前端传过来的参数.
@RequestMapping(value="/", method=RequestMethod.POST)
public String postUser(@ModelAttribute User user) {
        // 处理"/users/"的POST请求,用来创建User
        // 除了@ModelAttribute绑定参数之外,还可以通过@RequestParam从页面中传递参数
        int name= user.getName();
        return name;
    }
Addition2:
当你以tomcat或spring boot app方式 启动时, 可能会出现因为端口号(8080)被占用导致启动失败.
这里给出两种解决方案:
(1) 重启电脑.
重启电脑都不会? 把电脑往水里泡五分钟, 拿出来再开机就可以了.
(2) kill task.
首先查看你的端口被哪个王八蛋占用了, 比如tomcat默认的是8080,
windows命令行下(windows键+r) :
netstat -ano|findstr "8080"这里找第二列的8080, 那个才是你本地的.第三列的那个是通过NAT技术翻译出来的实际上网地址(我猜 ? 猜错就猜错你弄死我…).然后看到最后一列王八蛋进程的PID为 “89828”, 然后干掉它.
先找出来叫什么名字家住哪:
tasklist|findstr "89828"taskkill /f /t /im java.exe大仇得报.
重新运行, 测试通过.
end.
