centos7 x64+nginx1.18+php7.2.30生产环境服务器编译安装
文章目录
- centos7 x64+nginx1.18+php7.2.30生产环境服务器编译安装
- 1.准备工作
- 2.安装nginx
- 3.安装php
- 4.nginx反向代理php-fpm
- 5.php-fpm多实例优雅配置实现负载
centos7 x64+nginx1.18+php7.2.30生产环境服务器编译安装
一般生产环境为确保运行性能,都会要求应用软件进行编译安装。在日常LNMP环境搭建过程都会有很多坑,本文记录一次实操过程。目前一部分php高版本框架要求php版本不能低于7.2,这里选php7.2.30是因为当时我的项目用的这个版本,虽然现在已到7.4.5,但综合评比后个人认为php7.2.30这个版稳定性很不错,要用的功能也够。高版本变动较大,对高版本本文安装方法不会成功,但安装套路是一样的,有兴趣的可以去偿试下填坑。下面开始:
1.准备工作
-
下载相关软件
nginx官网下载
php官网下载
-
centos7 x64初始化配置
本文采用SecureCRT连接centos服务器,自行安装。
a. 关闭防火墙
//查看firewall状态
[root@localhost ~]#systemctl list-unit-files|grep firewalld.service

//停止firewall
[root@localhost ~]#systemctl stop firewalld.service

//禁止firewall开机启动
[root@localhost ~]#systemctl disable firewalld.service
b. 关闭SELINUX
//将SELINUX=enforcing改为SELINUX=disabled
[root@localhost ~]#vi /etc/selinux/config

//设置为permissive模式,临时生效
[root@localhost ~]#setenforce 0
c. 安装上传下载软件:
[root@localhost ~]#yum install lrzsz -y -
上传安装包
[root@localhost ~]#rz //回车后就可以选择刚才下载的nginx和php安装文件上传,等待完成如下:
rz waiting to receive.
Starting zmodem transfer.  Press Ctrl+C to cancel.
Transferring nginx-1.18.0.tar.gz...
  100%    1015 KB    1015 KB/sec    00:00:01       0 Errors
Transferring php-7.4.5.tar.gz...
  100%   16096 KB    16096 KB/sec    00:00:01       0 Errors
2.安装nginx
-
tar文件解压
//解压 [root@localhost ~]#tar xf nginx-1.18.0.tar.gz //改名 [root@localhost ~]#mv nginx-1.18.0 nginx //进入目录 [root@localhost ~]#cd nginx -
安装依赖
//编译工具 [root@localhost nginx]#yum install gcc gcc-c++ -y //正则表达式库 [root@localhost nginx]#yum install pcre pcre-devel -y //进行安全通信的库 [root@localhost nginx]#yum install openssl openssl-devel -y -
创建用户及用户组
//突然想起大学男女混合宿舍楼的307房,好!就用你了.. [root@localhost nginx]#groupadd -r -g 307 nginx [root@localhost nginx]#useradd -g 307 -r -u 307 nginx -
configure配置
[root@localhost nginx]#./configure \ --group=nginx \ --user=nginx \ --prefix=/usr/local/nginx \ --sbin-path=/usr/sbin/nginx \ --conf-path=/etc/nginx/nginx.conf \ --error-log-path=/var/log/nginx/error.log \ --http-log-path=/var/log/nginx/access.log \ --http-client-body-temp-path=/tmp/nginx/client_body \ --http-proxy-temp-path=/tmp/nginx/proxy \ --http-fastcgi-temp-path=/tmp/nginx/fastcgi \ --pid-path=/var/run/nginx.pid \ --lock-path=/var/lock/nginx \ --with-http_stub_status_module \ --with-http_ssl_module \ --with-http_gzip_static_module \ --with-pcre //出现以下内容,表示成功 Configuration summary + using system PCRE library + using system OpenSSL library + using system zlib library nginx path prefix: "/usr/local/nginx" nginx binary file: "/usr/sbin/nginx" nginx modules path: "/usr/local/nginx/modules" nginx configuration prefix: "/etc/nginx" nginx configuration file: "/etc/nginx/nginx.conf" nginx pid file: "/var/run/nginx.pid" nginx error log file: "/var/log/nginx/error.log" nginx http access log file: "/var/log/nginx/access.log" nginx http client request body temporary files: "/tmp/nginx/client_body" nginx http proxy temporary files: "/tmp/nginx/proxy" nginx http fastcgi temporary files: "/tmp/nginx/fastcgi" nginx http uwsgi temporary files: "uwsgi_temp" nginx http scgi temporary files: "scgi_temp" -
make编译
[root@localhost nginx]#make //出现以下内容,表示编译成功 -ldl -lpthread -lcrypt -lpcre -lssl -lcrypto -ldl -lpthread -lz \ -Wl,-E sed -e "s|%%PREFIX%%|/usr/local/nginx|" \ -e "s|%%PID_PATH%%|/var/run/nginx.pid|" \ -e "s|%%CONF_PATH%%|/etc/nginx/nginx.conf|" \ -e "s|%%ERROR_LOG_PATH%%|/var/log/nginx/error.log|" \ < man/nginx.8 > objs/nginx.8 make[1]: Leaving directory `/root/nginx' -
安装
[root@localhost nginx]#make install -
设置自启动
//创建自启动脚本 [root@localhost nginx]#vi /etc/rc.d/init.d/nginx //输入以下内容保存 #!/bin/sh # # nginx - this script starts and stops the nginx daemon # # chkconfig: - 85 15 # description: Nginx is an HTTP(S) server, HTTP(S) reverse \ # proxy and IMAP/POP3 proxy server # processname: nginx # config: /etc/nginx/nginx.conf # config: /etc/sysconfig/nginx # pidfile: /var/run/nginx.pid # Source function library. . /etc/rc.d/init.d/functions # Source networking configuration. . /etc/sysconfig/network # Check that networking is up. [ "$NETWORKING" = "no" ] && exit 0 nginx="/usr/sbin/nginx" prog=$(basename $nginx) NGINX_CONF_FILE="/etc/nginx/nginx.conf" [ -f /etc/sysconfig/nginx ] && . /etc/sysconfig/nginx lockfile=/var/lock/subsys/nginx make_dirs() { # make required directories user=`nginx -V 2>&1 | grep "configure arguments:" | sed 's/[^*]*--user=\([^ ]*\).*/\1/g' -` options=`$nginx -V 2>&1 | grep 'configure arguments:'` for opt in $options; do if [ `echo $opt | grep '.*-temp-path'` ]; then value=`echo $opt | cut -d "=" -f 2` if [ ! -d "$value" ]; then # echo "creating" $value mkdir -p $value && chown -R $user $value fi fi done } start() { [ -x $nginx ] || exit 5 [ -f $NGINX_CONF_FILE ] || exit 6 make_dirs echo -n $"Starting $prog: " daemon $nginx -c $NGINX_CONF_FILE retval=$? echo [ $retval -eq 0 ] && touch $lockfile return $retval } stop() { echo -n $"Stopping $prog: " killproc $prog -QUIT retval=$? echo [ $retval -eq 0 ] && rm -f $lockfile return $retval } restart() { configtest || return $? stop sleep 1 start } reload() { configtest || return $? echo -n $"Reloading $prog: " killproc $nginx -HUP RETVAL=$? echo } force_reload() { restart } configtest() { $nginx -t -c $NGINX_CONF_FILE } rh_status() { status $prog } rh_status_q() { rh_status >/dev/null 2>&1 } case "$1" in start) rh_status_q && exit 0 $1 ;; stop) rh_status_q || exit 0 $1 ;; restart|configtest) $1 ;; reload) rh_status_q || exit 7 $1 ;; force-reload) force_reload ;; status) rh_status ;; condrestart|try-restart) rh_status_q || exit 0 ;; *) echo $"Usage: $0 {start|stop|status|restart|condrestart|try-restart|reload|force-reload|configtest}" exit 2 esac //为此脚本赋予执行权限 [root@localhost nginx]#chmod +x /etc/rc.d/init.d/nginx //设置开机自启动 [root@localhost nginx]#chkconfig --add nginx [root@localhost nginx]#chkconfig nginx on -
启动测试
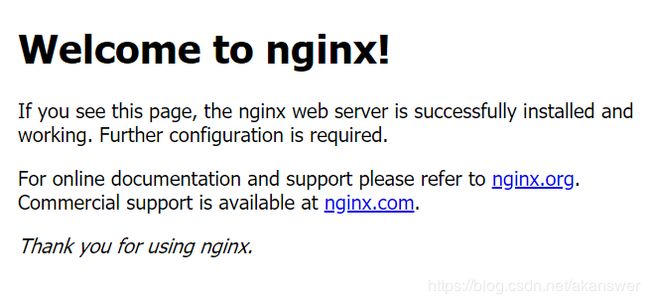
[root@localhost nginx]#systemctl start nginx浏览器输入服务器IP回车,出现下图内容则安装成功
3.安装php
-
tar文件解压(默认系统自带tar软件,若无则安装见上)
//回到root目录 [root@localhost ~]#cd //解压 [root@localhost ~]#tar xf php-7.2.30.tar.gz //改名 [root@localhost ~]#mv php-7.2.30 php //进入目录 [root@localhost ~]#cd php -
安装依赖
//有些依赖包在虚拟机安装可能会找不到yum源,需要更新下yum源 [root@localhost php]#yum install epel-release -y [root@localhost php]#yum update -y //单机安装的话,以下两个上边已装过,就不必再装了,如果你执行了也会自动跳过 [root@localhost php]#yum install gcc gcc-c++ -y [root@localhost php]#yum install openssl openssl-devel -y //依赖包就不一一介绍了,可以百度 [root@localhost php]#yum install cmake3 -y [root@localhost php]#yum install libzip bzip2 bzip2-devel -y [root@localhost php]#yum install libpng libpng-devel libjpeg libjpeg-devel -y [root@localhost php]#yum install freetype freetype-devel -y [root@localhost php]#yum install libxslt-devel libXpm-devel gmp-devel -y [root@localhost php]#yum install curl curl-devel -y [root@localhost php]#yum install libmcrypt libmcrypt-devel mcrypt mhash -y //如果是32位的系统,就需要把那个x86_64修改为i386 [root@localhost php]#yum install openldap.x86_64 openldap-clients.x86_64 openldap-devel.x86_64 openldap-servers.x86_64 -y //64位系统还需做以下工作 [root@localhost php]#cp -frp /usr/lib64/libldap* /usr/lib/ -
configure配置
//这个配置适应大多数开发及生产 [root@localhost php]#./configure \ --prefix=/usr/local/php \ --with-config-file-path=/etc \ --enable-mbstring \ --with-freetype-dir=/usr/lib64 \ --with-jpeg-dir=/usr/lib64 \ --with-png-dir=/usr/lib64 \ --enable-zip \ --enable-bcmath \ --enable-pcntl \ --enable-ftp \ --enable-exif \ --enable-calendar \ --enable-sysvmsg \ --enable-sysvsem \ --enable-sysvshm \ --enable-wddx \ --with-curl \ --enable-soap \ --with-mhash \ --with-ldap \ --with-ldap-sasl \ --with-iconv \ --with-gmp \ --with-gd \ --with-zlib-dir \ --enable-libxml \ --enable-xml \ --with-xpm-dir=/usr \ --enable-gd-jis-conv \ --with-openssl \ --enable-mysqlnd \ --with-gettext \ --with-zlib \ --with-bz2 \ --with-pdo-mysql \ --enable-sockets \ --enable-shmop \ --enable-inline-optimization \ --enable-opcache \ --enable-mbregex \ --enable-fpm \ --with-xmlrpc \ --enable-session \ --enable-ctype //出现以下内容,表示成功 Generating files configure: creating ./config.status creating main/internal_functions.c creating main/internal_functions_cli.c +--------------------------------------------------------------------+ | License: | | This software is subject to the PHP License, available in this | | distribution in the file LICENSE. By continuing this installation | | process, you are bound by the terms of this license agreement. | | If you do not agree with the terms of this license, you must abort | | the installation process at this point. | +--------------------------------------------------------------------+ Thank you for using PHP. config.status: creating php7.spec config.status: creating main/build-defs.h config.status: creating scripts/phpize config.status: creating scripts/man1/phpize.1 config.status: creating scripts/php-config config.status: creating scripts/man1/php-config.1 config.status: creating sapi/cli/php.1 config.status: creating sapi/fpm/php-fpm.conf config.status: creating sapi/fpm/www.conf config.status: creating sapi/fpm/init.d.php-fpm config.status: creating sapi/fpm/php-fpm.service config.status: creating sapi/fpm/php-fpm.8 config.status: creating sapi/fpm/status.html config.status: creating sapi/phpdbg/phpdbg.1 config.status: creating sapi/cgi/php-cgi.1 config.status: creating ext/phar/phar.1 config.status: creating ext/phar/phar.phar.1 config.status: creating main/php_config.h config.status: executing default commands -
make编译
//编译前先填个坑: [root@localhost php]#vi Makefile //找到'EXTRA_LIBS'开头这一行修改:64位系统加-llber,32位系统加-llber -liconv EXTRA_LIBS = -lcrypt -lz -lresolv -lcrypt -lrt -lldap -lgmp -lX11 -lXpm -lpng -lz -ljpeg -lbz2 -lz -lrt -lm -ldl -lnsl -lxml2 -lz -lm -ldl -lssl -lcrypto -lcurl -lxml2 -lz -lm -ldl -lssl -lcrypto -lfreetype -lxml2 -lz -lm -ldl -lxml2 -lz -lm -ldl -lcrypt -lxml2 -lz -lm -ldl -lxml2 -lz -lm -ldl -lxml2 -lz -lm -ldl -lxml2 -lz -lm -ldl -lxml2 -lz -lm -ldl -lssl -lcrypto -lcrypt -llber //保存后编译 [root@localhost php]#make //出现以下内容,表示成功 Generating phar.php Generating phar.phar PEAR package PHP_Archive not installed: generated phar will require PHP's phar extension be enabled. directorytreeiterator.inc invertedregexiterator.inc directorygraphiterator.inc clicommand.inc pharcommand.inc phar.inc Build complete. Don't forget to run 'make test'. -
安装
[root@localhost php]#make install //出现以下内容,表示安装成功 Installing shared extensions: /usr/local/php/lib/php/extensions/no-debug-non-zts-20170718/ Installing PHP CLI binary: /usr/local/php/bin/ Installing PHP CLI man page: /usr/local/php/php/man/man1/ Installing PHP FPM binary: /usr/local/php/sbin/ Installing PHP FPM defconfig: /usr/local/php/etc/ Installing PHP FPM man page: /usr/local/php/php/man/man8/ Installing PHP FPM status page: /usr/local/php/php/php/fpm/ Installing phpdbg binary: /usr/local/php/bin/ Installing phpdbg man page: /usr/local/php/php/man/man1/ Installing PHP CGI binary: /usr/local/php/bin/ Installing PHP CGI man page: /usr/local/php/php/man/man1/ Installing build environment: /usr/local/php/lib/php/build/ Installing header files: /usr/local/php/include/php/ Installing helper programs: /usr/local/php/bin/ program: phpize program: php-config Installing man pages: /usr/local/php/php/man/man1/ page: phpize.1 page: php-config.1 Installing PEAR environment: /usr/local/php/lib/php/ [PEAR] Archive_Tar - installed: 1.4.9 [PEAR] Console_Getopt - installed: 1.4.3 [PEAR] Structures_Graph- installed: 1.1.1 [PEAR] XML_Util - installed: 1.4.4 warning: pear/PEAR dependency package "pear/Archive_Tar" installed version 1.4.9 is not the recommended version 1.4.4 warning: pear/PEAR dependency package "pear/XML_Util" installed version 1.4.4 is not the recommended version 1.4.3 [PEAR] PEAR - installed: 1.10.11 Wrote PEAR system config file at: /usr/local/php/etc/pear.conf You may want to add: /usr/local/php/lib/php to your php.ini include_path /root/php/build/shtool install -c ext/phar/phar.phar /usr/local/php/bin ln -s -f phar.phar /usr/local/php/bin/phar Installing PDO headers: /usr/local/php/include/php/ext/pdo/ -
配置
//配置ini文件 [root@localhost php]#cp php.ini-development /etc/php.ini //配置php-fpm自启动 [root@localhost php]#cp sapi/fpm/init.d.php-fpm /etc/init.d/php-fpm [root@localhost php]#chmod +x /etc/init.d/php-fpm [root@localhost php]#chkconfig --add php-fpm [root@localhost php]#chkconfig php-fpm on //配置php-fpm的conf [root@localhost php]#cp /usr/local/php/etc/php-fpm.conf.default /usr/local/php/etc/php-fpm.conf [root@localhost php]#cp /usr/local/php/etc/php-fpm.d/www.conf.default /usr/local/php/etc/php-fpm.d/www.conf //配置环境变量 [root@localhost php]#echo "export PATH=/usr/local/php/bin:$PATH" >> /etc/bashrc [root@localhost php]#source /etc/bashrc -
启动测试
//启动
[root@localhost php]#systemctl start php-fpm

//php测试
[root@localhost php]#php -v
PHP 7.2.30 (cli) (built: Apr 23 2020 22:52:33) ( NTS )
Copyright (c) 1997-2018 The PHP Group
Zend Engine v3.2.0, Copyright (c) 1998-2018 Zend Technologies

//php-fpm进程和线程池查看
[root@localhost php]#ps aux|grep php-fpm
root      66559  0.0  0.3 232128  6476 ?        Ss   23:19   0:00 php-fpm: master process (/usr/local/php/etc/php-fpm.conf)
nobody    66560  0.0  0.3 232128  6012 ?        S    23:19   0:00 php-fpm: pool www
nobody    66561  0.0  0.3 232128  6012 ?        S    23:19   0:00 php-fpm: pool www
root      66570  0.0  0.0 112716   964 pts/0    R+   23:26   0:00 grep --color=auto php-fpm
4.nginx反向代理php-fpm
-
修改nginx.conf
[root@localhost php]#vi /etc/nginx/nginx.conf //修改内容如下,已部分优化,用的时候可以自已调,都有说明 #user nobody; worker_processes 4; #CPU核心数 worker_cpu_affinity 0001 0010 0100 1000; #动态分配核心 #error_log logs/error.log; #error_log logs/error.log notice; #error_log logs/error.log info; #pid logs/nginx.pid; events { use epoll; #epoll是多路复用IO worker_connections 1024; #单个后台worker process进程的最大并发链接数 } http { include mime.types; default_type application/octet-stream; #log_format main '$remote_addr - $remote_user [$time_local] "$request" ' # '$status $body_bytes_sent "$http_referer" ' # '"$http_user_agent" "$http_x_forwarded_for"'; #access_log logs/access.log main; #sendfile指令指定nginx是否调用sendfile函数(zero copy方式)来输出文件 #一般设为on,如果用来进行下载等应用磁盘IO重负载应用,可设置为 off,降低系统的uptime sendfile on; tcp_nopush on; tcp_nodelay on; keepalive_timeout 65; #连接超时时间 #上传文件时最大值 client_max_body_size 10m; #gzip on; include /etc/nginx/vhost.conf; } -
创建vhost.conf
[root@localhost php]#vi /etc/nginx/vhost.conf //输入以下测试配置 server { listen 80; server_name localhost; root html; location / { index index.html index.htm index.php; } error_page 500 502 503 504 /50x.html; location = /50x.html { } location ~ \.php$ { fastcgi_pass 127.0.0.1:9000; fastcgi_index index.php; fastcgi_param SCRIPT_FILENAME $document_root$fastcgi_script_name; include fastcgi_params; } } -
测试
//创建测试页
[root@localhost php]#vi /usr/local/nginx/html/phpinfo.php

//输入以下测试内容保存


//重起nginx
[root@localhost php]#systemctl restart nginx

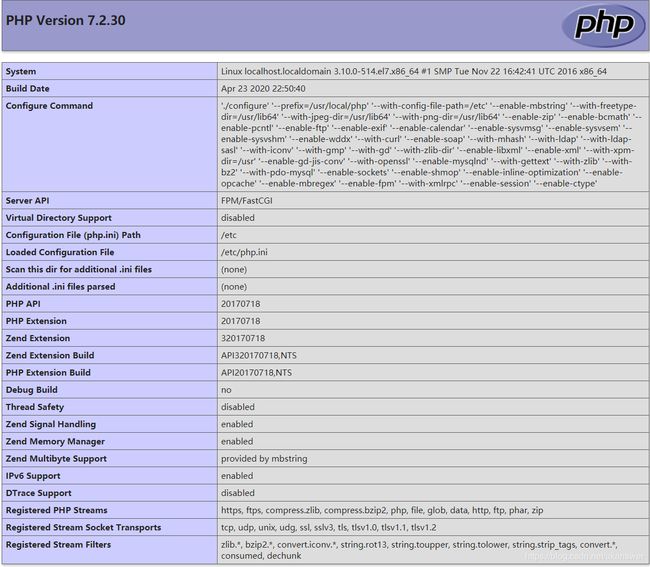
//在浏览器里输入ip地址/phpinfo.php回车,看到下图表示成功!
5.php-fpm多实例优雅配置实现负载
-
添加php-fpm多实例配置(这里就先加两个吧)
//添加www-1.conf [root@localhost php]#cd /usr/local/php/etc/php-fpm.d [root@localhost php-fpm.d]#cp www.conf www-1.conf [root@localhost php-fpm.d]#sed -i 's#listen = 127.0.0.1:9000#listen = 127.0.0.1:9001#' www-1.conf [root@localhost php-fpm.d]#sed -i 's#\[www\]#\[www-1\]#' www-1.conf //添加www-2.conf [root@localhost php-fpm.d]#cp www.conf www-2.conf [root@localhost php-fpm.d]#sed -i 's#listen = 127.0.0.1:9000#listen = 127.0.0.1:9002#' www-2.conf [root@localhost php-fpm.d]#sed -i 's#\[www\]#\[www-2\]#' www-2.conf -
修改nginx.conf
[root@localhost php-fpm.d]#vi /etc/nginx/nginx.conf //修改内容如下,已部分优化,用的时候可以自已调,都有说明 #user nobody; worker_processes 4; #CPU核心数 worker_cpu_affinity 0001 0010 0100 1000; #动态分配核心 #error_log logs/error.log; #error_log logs/error.log notice; #error_log logs/error.log info; #pid logs/nginx.pid; events { use epoll; #epoll是多路复用IO worker_connections 1024; #单个后台worker process进程的最大并发链接数 } http { include mime.types; default_type application/octet-stream; #log_format main '$remote_addr - $remote_user [$time_local] "$request" ' # '$status $body_bytes_sent "$http_referer" ' # '"$http_user_agent" "$http_x_forwarded_for"'; #access_log logs/access.log main; #sendfile指令指定nginx是否调用sendfile函数(zero copy方式)来输出文件 #一般设为on,如果用来进行下载等应用磁盘IO重负载应用,可设置为 off,降低系统的uptime sendfile on; tcp_nopush on; tcp_nodelay on; keepalive_timeout 65; #连接超时时间 #上传文件时最大值 client_max_body_size 10m; #gzip on; #添加php-fpm-pool池,负载默认轮询 upstream php-fpm-pool { server 127.0.0.1:9000; #如果有远程的,换IP和端口即可,需要其他负载参考文档设置 server 127.0.0.1:9001; server 127.0.0.1:9002; } include /etc/nginx/vhost.conf; } -
修改vhost.conf
[root@localhost php-fpm.d]#vi /etc/nginx/vhost.conf //输入以下测试配置 server { listen 80; server_name localhost; root html; location / { index index.html index.htm index.php; } error_page 500 502 503 504 /50x.html; location = /50x.html { } location ~ \.php$ { #fastcgi_pass 127.0.0.1:9000; fastcgi_pass php-fpm-pool; fastcgi_index index.php; fastcgi_param SCRIPT_FILENAME $document_root$fastcgi_script_name; include fastcgi_params; } } -
重启服务测试
[root@localhost php-fpm.d]#systemctl restart php-fpm
[root@localhost php-fpm.d]#systemctl restart nginx

[root@localhost php-fpm.d]#ps aux|grep php-fpm
//你会发现php-fpm线程池已全部启动
root      66937  0.0  0.3 232144  6604 ?        Ss   00:39   0:00 php-fpm: master process (/usr/local/php/etc/php-fpm.conf)
nobody    66938  0.0  0.4 232192  7788 ?        S    00:39   0:00 php-fpm: pool www-1
nobody    66939  0.0  0.3 232128  6020 ?        S    00:39   0:00 php-fpm: pool www-1
nobody    66940  0.0  0.3 232128  6020 ?        S    00:39   0:00 php-fpm: pool www-2
nobody    66941  0.0  0.4 232192  7784 ?        S    00:39   0:00 php-fpm: pool www-2
nobody    66942  0.0  0.4 232192  7784 ?        S    00:39   0:00 php-fpm: pool www
nobody    66943  0.0  0.4 232192  7788 ?        S    00:39   0:00 php-fpm: pool www
root      67050  0.0  0.0 112716   968 pts/0    R+   00:40   0:00 grep --color=auto php-fpm
对于LNMP环境还差一个mysql,请参考我的另一个文章centos7 x64+mysql8生产环境部署

