官网安装部署文档:https://prestodb.io/docs/current/installation/deployment.html
中文网安装部署文档:http://prestodb-china.com/docs/current/installation/deployment.html
环境准备
- 操作系统:CentOS 6.8
- JDK版本:java version "1.8.0_77"
安装Presto
下载最新版Presto,并解压:
wget https://repo1.maven.org/maven2/com/facebook/presto/presto-server/0.166/presto-server-0.166.tar.gz
tar xzvf presto-server-0.166.tar.gz
配置Presto
在presto-server-0.166目录下创建etc目录,并创建以下文件:
node.properties:每个节点的环境配置jvm.config:jvm 参数config.properties:配置 Presto Server 参数log.properties:配置日志等级Catalog Properties:Catalog 的配置
配置etc/node.properties
node.environment=production
node.id=ffffffff-ffff-ffff-ffff-ffffffffffff
node.data-dir=/var/presto/data
参数说明:
- node.environment: 集群名称。所有在同一个集群中的Presto节点必须拥有相同的集群名称。
- node.id: 每个Presto节点的唯一标示。每个节点的node.id都必须是唯一的。在Presto进行重启或者升级过程中每个节点的node.id必须保持不变。如果在一个节点上安装多个Presto实例(例如:在同一台机器上安装多个Presto节点),那么每个Presto节点必须拥有唯一的node.id。
- node.data-dir: 数据存储目录的位置(操作系统上的路径)。Presto将会把日期和数据存储在这个目录下。
配置etc/jvm.config
-server
-Xmx16G
-XX:+UseG1GC
-XX:G1HeapRegionSize=32M
-XX:+UseGCOverheadLimit
-XX:+ExplicitGCInvokesConcurrent
-XX:+HeapDumpOnOutOfMemoryError
-XX:OnOutOfMemoryError=kill -9 %p
配置etc/config.properties
Presto的配置文件:etc/config.properties包含了Presto server的所有配置信息。 每个Presto server既是一个coordinator也是一个worker。 但是在大型集群中,处于性能考虑,建议单独用一台机器作为 coordinator。
一个coordinator的etc/config.properties应该至少包含以下信息:
coordinator=true
node-scheduler.include-coordinator=false
http-server.http.port=8080
query.max-memory=50GB
query.max-memory-per-node=1GB
discovery-server.enabled=true
discovery.uri=http://example.net:8080
以下是最基本的worker配置:
coordinator=false
http-server.http.port=8080
query.max-memory=50GB
query.max-memory-per-node=1GB
discovery.uri=http://example.net:8080
但是如果你用一台机器进行测试,那么这一台机器将会即作为coordinator,也作为worker。配置文件将会如下所示:
coordinator=true
node-scheduler.include-coordinator=true
http-server.http.port=8080
query.max-memory=5GB
query.max-memory-per-node=1GB
discovery-server.enabled=true
discovery.uri=http://example.net:8080
对配置项解释如下:
- coordinator:指定是否运维Presto实例作为一个coordinator(接收来自客户端的查询情切管理每个查询的执行过程)。
- node-scheduler.include-coordinator:是否允许在coordinator服务中进行调度工作。对于大型的集群,在一个节点上的Presto server即作为coordinator又作为worke将会降低查询性能。因为如果一个服务器作为worker使用,那么大部分的资源都不会被worker占用,那么就不会有足够的资源进行关键任务调度、管理和监控查询执行。
- http-server.http.port:指定HTTP server的端口。Presto 使用 HTTP进行内部和外部的所有通讯。
- query.max-memory:在一个集群中一个查询作业设置的最大分布式内存大小。
- query.max-memory-per-nod:每个节点一个查询作业设置的最大内存大小。
- discovery-server.enabled:Presto 通过Discovery 服务来找到集群中所有的节点。为了能够找到集群中所有的节点,每一个Presto实例都会在启动的时候将自己注册到discovery服务。Presto为了简化部署,并且也不想再增加一个新的服务进程,Presto coordinator 可以运行一个内嵌在coordinator 里面的Discovery 服务。这个内嵌的Discovery 服务和Presto共享HTTP server并且使用同样的端口。
- discovery.uri:Discovery server的URI。由于启用了Presto coordinator内嵌的Discovery 服务,因此这个uri就是Presto coordinator的uri。修改example.net:8080,根据你的实际环境设置该URI。注意:这个URI一定不能以“/“结尾。
配置etc/log.properties
com.facebook.presto=INFO
配置Catalog
关于 Catalog 的配置,首先需要创建 etc/catalog 目录,然后根据你想使用的连接器来创建对应的配置文件,比如,你想使用 jmx 连接器,则创建 jmx.properties:
connector.name=jmx
如果你想使用 hive 的连接器,则创建 hive.properties:
connector.name=hive-cdh5
hive.metastore.uri=thrift://cdh1:9083  #修改为 hive-metastore 服务所在的主机名称,这里我是安装在 cdh1节点
hive.config.resources=/etc/hadoop/conf/core-site.xml,/etc/hadoop/conf/hdfs-site.xml
更多连接器查看Connectors的详细配置选项。
运行Presto
你可以使用下面命令后台启动:
bin/launcher start
也可以前台启动,观察输出日志:
bin/launcher run
另外,你也可以通过下面命令停止:
bin/launcher stop
更多命令,你可以通过 --help 参数来查看。
启动之后,你可以观察 /var/presto/data/ 目录:
[root@node06 data]# tree
.
├── etc -> /opt/presto-server-0.166/etc
├── plugin -> /opt/presto-server-0.166/plugin
└── var
    ├── log
    │   ├── http-request.log
    │   ├── launcher.log
    │   └── server.log
    └── run
        └── launcher.pid

5 directories, 4 files
在 /var/presto/data/var/log 目录可以查看日志:
launcher.log:启动日志server.log:Presto Server 输出日志http-request.log:HTTP 请求日志
测试 Presto CLI
下载 presto-cli-0.166-executable.jar 并将其重命名为 presto-cli(你也可以重命名为 presto),然后添加执行权限。
wget https://repo1.maven.org/maven2/com/facebook/presto/presto-cli/0.166/presto-cli-0.166-executable.jar
运行下面命令进行测试:
[root@cdh1 bin]# ./presto-cli --server localhost:8080 --catalog hive --schema default
presto:default> show tables;
 Table
-------
(0 rows)

Query 20150126_062137_00012_qgwvy, FINISHED, 1 node
Splits: 2 total, 2 done (100.00%)
0:00 [0 rows, 0B] [0 rows/s, 0B/s]
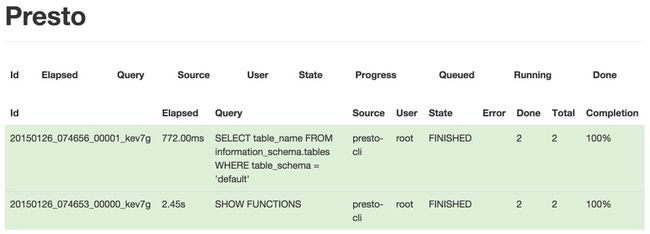
在 执行 show tables 命令之前,你可以查看 http://node06.bigdata.com:8080/ 页面:
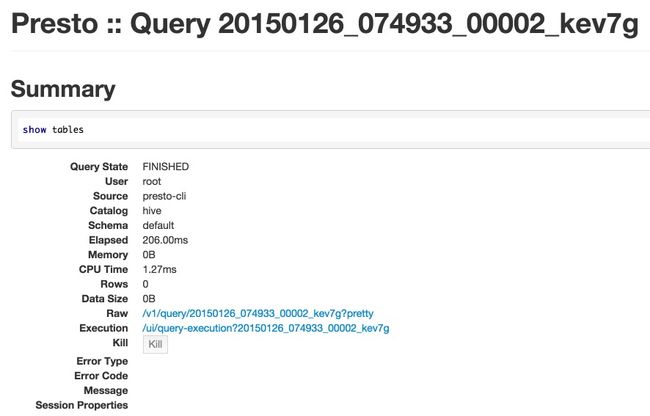
然后在执行该命令之后再观察页面变化。单击第一行记录,会跳转到明细页面:
可以运行 --help 命令查看更多参数,例如你可以在命令行直接运行下面命令:
./presto-cli --server localhost:8080 --catalog hive --schema default --execute "show tables;"
默认情况下,Presto 的查询结果是使用 less 程序分页输出的,你可以通过修改环境变量 PRESTO_PAGER 的值将其改为其他命令,如 more,或者将其置为空以禁止分页输出。

