前言 :
最近在重构公司的项目,在这个过程中发现很多简单的动画都零散的分部在VC或者View里面,不仅造成代码增多,还不容易管理,特别是购物车动画, 借着这个机会重新整理一下。
- 坐标转换
- UIBezierPath+ CAKeyframeAnimation关键帧动画
- 利用坐标转换+关键帧动画实现一个购物车动画
1.坐标转换
- (CGRect)convertRect:(CGRect)rect toView:(UIView *)view;
字面的意思就是将视图A中的rect转换到B视图,返回在B视图对应的rect,在心董儿的 iOS convertRect熟悉吗?文中总结出这样一句话
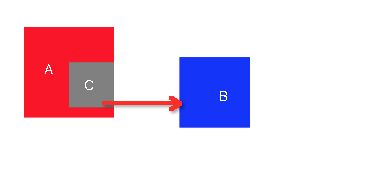
“计算源上的被操作的对象相对于目标的frame”。 我们在开发中经常遇到根据某个特殊条件把A视图(源)的C视图(操作对象)添加到B视图(目标)(例如:点赞动画、加入购物车动画,查看头像大图),这个方法就派上用场了。
怎么用坐标转换
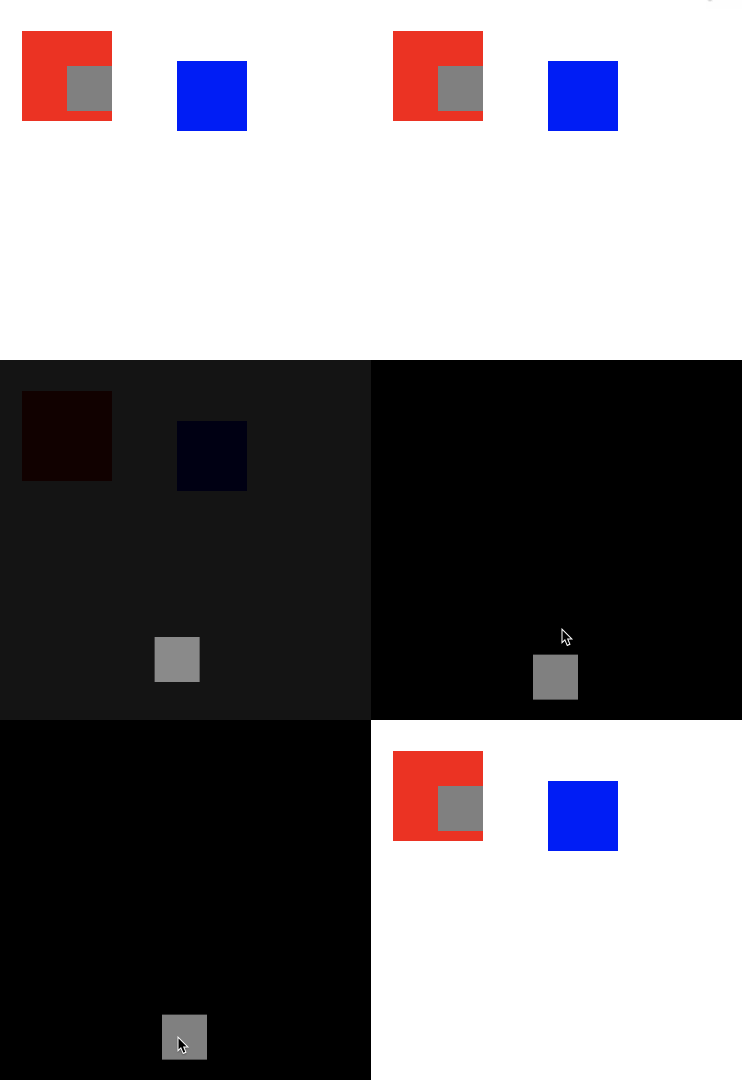
我们先看一个简单的效果 ,将C视图移动到window中间,点击屏幕返回原来的位置.
整个过程可以分解为三步.
第一步先获取C视图在window上的位置
  CGRect targetframe = [target.superview convertRect:target.frame toView:toView];
    target.frame = targetframe;
第二步将c视图移动到window的中间
target.frame = CGRectMake((toView.frame.size.width-target.frame.size.width)*0.5, (toView.frame.size.height-target.frame.size.height)*0.5, target.frame.size.width, target.frame.size.height);
第三步获取C视图在A视图的位置,返回到原来的位置。
 CGRect targetframe = [m_pGrayView. superview convertRect:m_pGrayView.frame toView:m_pRedView];
  m_pGrayView.frame = targetframe;
2.UIBezierPath+ CAKeyframeAnimation
在不太会用UIBezierPath的时候,一直在想这个到底能干什么,在开发应用的过程中渐渐了解到了UIBezierPath可以做很多的事情,但是总的来说都是为某个目标提供路径。我个人用到的比较多有一下几点
- 画圆角(不考虑离屏渲染)
- 画虚线
- 画路径结合CAKeyframeAnimation实现关键帧动画
画圆角(不考虑离屏渲染)
/*
+ (instancetype)bezierPathWithRoundedRect:(CGRect)rect  byRoundingCorners:(UIRectCorner)corners cornerRadii:(CGSize)cornerRadii;
*/
    m_pRedView=[[UIView alloc] initWithFrame:CGRectMake(25, 120, 90, 90)];
    [m_pRedView setBackgroundColor:[UIColor redColor]];
    UIBezierPath *layerPath= [UIBezierPath bezierPathWithRoundedRect:m_pRedView.bounds byRoundingCorners: UIRectCornerAllCorners cornerRadii: CGSizeMake(5, 5)];
    CAShapeLayer *layer=[CAShapeLayer layer];
    layer.path =layerPath.CGPath;
    layer.frame = m_pRedView.bounds;
    m_pRedView.layer.mask =layer;
画虚线
/**
@param pattern 画虚线的规格
@param count 要画多少个这样的规格的虚线
@param phase  离起始点偏移
- (void)setLineDash:(nullable const CGFloat *)pattern count:(NSInteger)count phase:(CGFloat)phase;
*/
  UIBezierPath *dashPath=[UIBezierPath bezierPathWithRect:CGRectMake(0,  (self.frame.size.height-8)*0.5, self.frame.size.width, 5)];
  CGFloat dash[] = {3.0, 1.0};
  dashPath.lineWidth = 0.5;
  [dashPath setLineDash:dash count:20 phase:3];
  [[UIColor blueColor] setFill];
  [dashPath stroke];
画路径结合CAKeyframeAnimation实现关键帧动画
     UIBezierPath *layerPath=[UIBezierPath bezierPathWithArcCenter:self.view.center radius:60 startAngle:-M_PI*0.5 endAngle:M_PI*1.5 clockwise:YES];
    layerPath.lineWidth = 3.5;
    CAShapeLayer  *shaperLayer=[CAShapeLayer layer];
    shaperLayer.frame = CGRectMake(self.view.frame.size.width*0.5-2.5, self.view.frame.size.height*0.5-60, 5.0, 5.0);
    shaperLayer.backgroundColor = [UIColor blueColor].CGColor;
    [self.view.layer addSublayer:shaperLayer];

    CAKeyframeAnimation * KeyframeAnimation=[CAKeyframeAnimation animationWithKeyPath:@"position"];
    KeyframeAnimation.path =layerPath.CGPath;
    KeyframeAnimation.rotationMode =  kCAAnimationRotateAuto;
    KeyframeAnimation.calculationMode = kCAAnimationLinear;
    KeyframeAnimation.repeatCount = MAXFLOAT;
    KeyframeAnimation.duration  = 0.5;
    KeyframeAnimation.autoreverses =NO;
    [shaperLayer addAnimation:KeyframeAnimation forKey:@"KeyframeAnimation"];
3.利用坐标转换+关键帧动画实现一个购物车动画
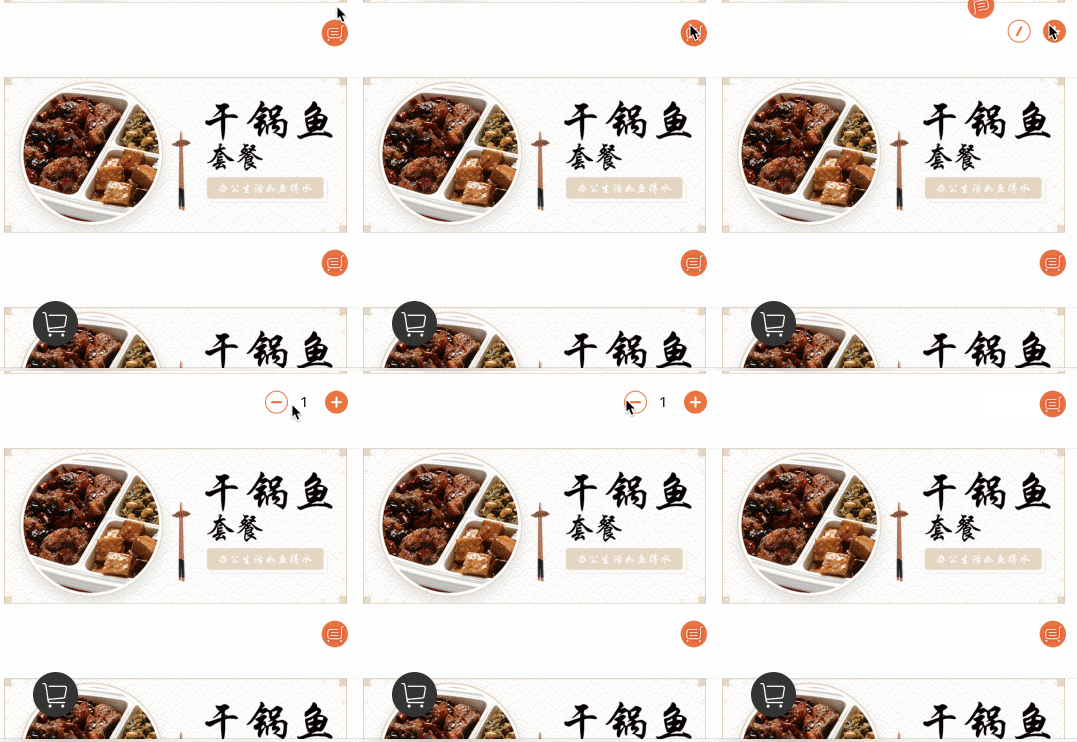
我们首先看一下效果(录制的gif有点卡,在电脑上没有问题的)
我们可以看到整个流程大致上可以分为三个步骤,更详细的请到demo中查看。
- 第一步利用坐标转换计算出fromPoint 和toPoint
- 第二步根据第一步获取的坐标点画抛物线
- 第三步CAKeyframeAnimation沿路径运动
关键代码部分如下
//layer
    CALayer *layer = [CALayer layer];
    layer.frame = CGRectMake(fromPoint.x-object.size.width*0.5, fromPoint.y-object.size.height*0.5, object.size.width, object.size.height);
    layer.contentsScale =[UIScreen mainScreen].scale;
    layer.contentsGravity = kCAGravityResizeAspectFill;
    layer.contents = (__bridge id _Nullable)(object.CGImage);

    //path
    UIBezierPath *movePath=[UIBezierPath bezierPath];
    [movePath moveToPoint:fromPoint];
    [movePath addQuadCurveToPoint:CGPointMake(toPoint.x-object.size.width*0.5, toPoint.y-object.size.height*0.5) controlPoint:CGPointMake(fromPoint.x-130, fromPoint.y-120)];

    CAKeyframeAnimation *keyframeAnimation=[CAKeyframeAnimation animationWithKeyPath:@"position"];
    keyframeAnimation.path =  movePath.CGPath;
    keyframeAnimation.rotationMode = kCAAnimationRotateAuto;

    CABasicAnimation  *rorationAnimation=[CABasicAnimation animationWithKeyPath:@"transfom.roration"];
    rorationAnimation.fromValue =@(0);
    rorationAnimation.toValue =@(M_PI*2);
    rorationAnimation.repeatCount = MAXFLOAT;
    rorationAnimation.timingFunction = [CAMediaTimingFunction functionWithName:kCAMediaTimingFunctionLinear];
    CAAnimationGroup *group = [CAAnimationGroup animation];
    group.duration = duration;
    group.removedOnCompletion =NO;
    group.animations  =@[keyframeAnimation,rorationAnimation];
    group.duration =duration;
    group.fillMode=kCAFillModeForwards;
    [layer addAnimation:group forKey:@"group"];
    [inView.layer addSublayer:layer];

    dispatch_after(dispatch_time(DISPATCH_TIME_NOW, (int64_t)(duration * NSEC_PER_SEC)), dispatch_get_main_queue(), ^{
        [layer removeFromSuperlayer];
        if (completion) {
            completion(YES);
        }
    });
GitHub地址
小结:
- 在开发中要明确 源 操作 对象目标,分不清三者的关系,最后将导致UI布局错乱,还得从头开始。
- 动画结束时要记得移除,CAAnimation的代理是强引用的,这个不小心就造成循环引用。
参考部分
iOS convertRect熟悉吗?
iOS绘图出现的错误


