一、实验要求
-
找一个系统调用,系统调用号为学号最后2位相同的系统调用
-
通过汇编指令触发该系统调用
-
通过gdb跟踪该系统调用的内核处理过程
-
重点阅读分析系统调用入口的保存现场、恢复现场和系统调用返回,以及重点关注系统调用过程中内核堆栈状态的变化
二、实验环境
发行版本:Deepin 15.11
内核版本:Linux 4.15.0-30deepin-generic x86_64
三、实验步骤
1. 99号系统调用
本人学号最后两位为99,查阅arch/x86/entry/syscalls/syscall_64.tbl可知,99号系统调用为sysinfo,其代码入口为__x64_sys_sysinfo。
在vscode中搜索sysinfo,可以在include/linux/syscalls.h文件中找到函数签名。
asmlinkage long sys_sysinfo(struct sysinfo __user *info);
查阅
struct sysinfo {
    long uptime;             /* Seconds since boot */
    unsigned long loads[3];  /* 1, 5, and 15 minute load averages */
    unsigned long totalram;  /* Total usable main memory size */
    unsigned long freeram;   /* Available memory size */
    unsigned long sharedram; /* Amount of shared memory */
    unsigned long bufferram; /* Memory used by buffers */
    unsigned long totalswap; /* Total swap space size */
    unsigned long freeswap;  /* Swap space still available */
    unsigned short procs;    /* Number of current processes */
    unsigned long totalhigh; /* Total high memory size */
    unsigned long freehigh;  /* Available high memory size */
    unsigned int mem_unit;   /* Memory unit size in bytes */
    char _f[20-2*sizeof(long)-sizeof(int)];
    /* Padding to 64 bytes */
};
而该系统调用的实现则定义在kernel/sys.c源文件中。对于系统调用,Linux一般都是借助宏定义的。SYSCALL_DEFINE1表示接受1个参数的系统调用函数,其本身接受2个参数。经预处理展开后,第一个参数sysinfo便参与生成实际的内核函数名。
SYSCALL_DEFINE1(sysinfo, struct sysinfo __user *, info)
{
    struct sysinfo val;

    do_sysinfo(&val);

    if (copy_to_user(info, &val, sizeof(struct sysinfo)))
        return -EFAULT;

    return 0;
}
可以看到,该函数调用的具体工作交由do_sysinfo完成。而后者主所做的就是将各种统计数据填充到结构体参数中。
static int do_sysinfo(struct sysinfo *info)
{
    // ...

    info->mem_unit = 1;
    info->totalram <<= bitcount;
    info->freeram <<= bitcount;
    info->sharedram <<= bitcount;
    info->bufferram <<= bitcount;
    info->totalswap <<= bitcount;
    info->freeswap <<= bitcount;
    info->totalhigh <<= bitcount;
    info->freehigh <<= bitcount;

out:
    return 0;
}
2. 汇编进行系统调用
为了研究Linux系统调用过程,我们以99号系统调用sysinfo为例,通过汇编直接触发该调用。此处我们编写一个简单的程序syscall99.c,通过内联汇编的方式,设置系统调用号为99,这里我们使用syscall快速系统调用指令。它会使执行流跳转到entry_SYSCALL_64处(后面会讲到),这是系统调用中断例程的入口点。入口地址在内核启动时便会初始化到一个特殊的寄存器MSR中。可以看出,syscall指令所做的本质上就是跳转到MSR所存储的地址执行。想了解更多x86体系下系统调用指令,请戳这篇
int main()
{
  asm volatile (
      "movq $0x63, %rax\n\t"
      "syscall\n\t"
      );
  return 0;
}
-
下载busybox并配置busybox编译选项,启用Build static binary (no shared libs)。
编译完成后依次执行以下命令。
$ mkdir rootfs
$ cd rootfs
$ cp ../busybox-1.31.1/_install/* ./ -rf
$ mkdir dev proc sys home
$ sudo cp -a /dev/{null,console,tty,tty1,tty2,tty3,tty4} dev/
在rootfs下创建init脚本,内容如下。
#!/bin/sh
mount -t proc none /proc
mount -t sysfs none /sys
echo "Wellcome ROS!"
echo "-------------"
cd home
/bin/sh
-
$ find . -print0 | cpio --null -ov --format=newc | gzip -9 > ../rootfs.cpio.gz
-
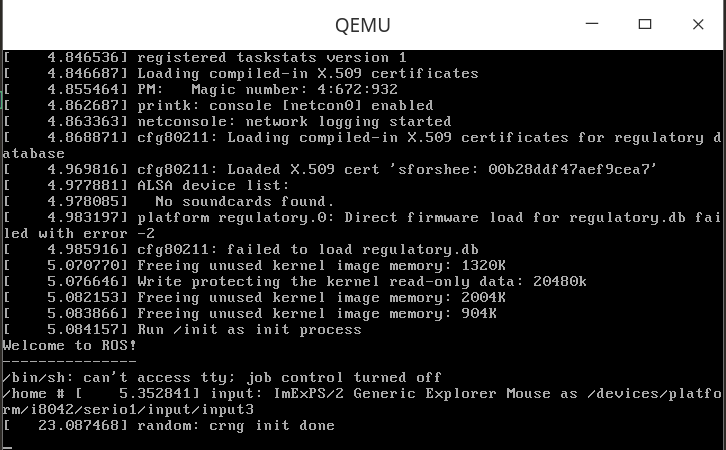
指定内存根文件系统,并启动内核
$ qemu-system-x86_64 -kernel linux-5.4.34/arch/x86/boot/bzImage -initrd rootfs.cpio.gz
最后编译程序(注意--static参数),并将其打包至根文件系统。
$ gcc syscall99.c -o syscall99 --static
$ cp syscall99 rootfs/home/
$ find . -print0 | cpio --null -ov --format=newc | gzip -9 > rootfs.cpio.gz
下面,我们将通过gdb来验证系统调用被真正执行。
在此之前,我们先准备好GDB跟踪调试环境。
-
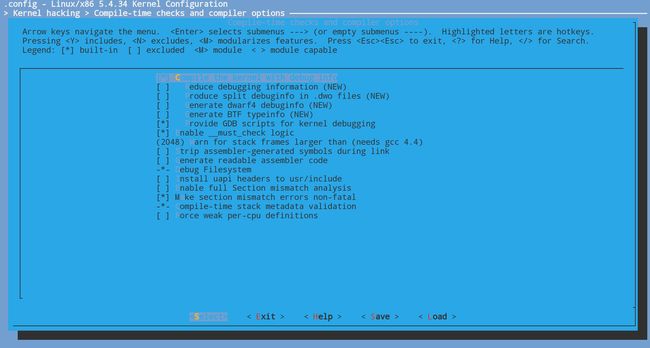
配置内核编译选项
启用Compile the kernel with debug info、Provide GDB scripts for kernel debugging 以及Kernel debugging。关闭Randomize the address of the kernel image (KASLR)
-
-
安装GDB
由于
--- gdb/remote.c      2016-04-14 11:13:49.962628700 +0300
+++ gdb/remote.c    2016-04-14 11:15:38.257783400 +0300
@@ -7181,8 +7181,28 @@
   buf_len = strlen (rs->buf);

   /* Further sanity checks, with knowledge of the architecture.  */
+// HACKFIX for changing architectures for qemu. It's ugly. Don't use, unless you have to.
+  // Just a tiny modification of the patch of Matias Vara (http://forum.osdev.org/viewtopic.php?f=13&p=177644)
   if (buf_len > 2 * rsa->sizeof_g_packet)
-    error (_("Remote 'g' packet reply is too long: %s"), rs->buf);
+    {
+      warning (_("Assuming long-mode change. [Remote 'g' packet reply is too long: %s]"), rs->buf);
+      rsa->sizeof_g_packet = buf_len ;
+
+      for (i = 0; i < gdbarch_num_regs (gdbarch); i++)
+        {
+          if (rsa->regs[i].pnum == -1)
+            continue;
+
+          if (rsa->regs[i].offset >= rsa->sizeof_g_packet)
+            rsa->regs[i].in_g_packet = 0;
+          else
+            rsa->regs[i].in_g_packet = 1;
+        }
+
+      // HACKFIX: Make sure at least the lower half of EIP is set correctly, so the proper
+      // breakpoint is recognized (and triggered).
+      rsa->regs[8].offset = 16*8;
+    }

   /* Save the size of the packet sent to us by the target.  It is used
      as a heuristic when determining the max size of packets that the
$ qemu-system-x86_64 -kernel linux-5.4.34/arch/x86/boot/bzImage -initrd rootfs.cpio.gz -S –s
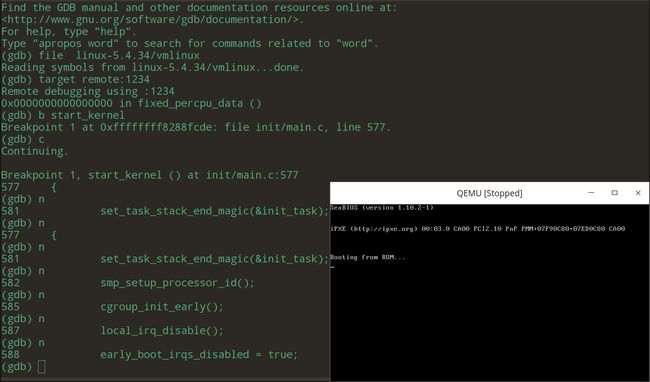
运行gdb依次执行以下命令:
(gdb) file linux-5.4.34/vmlinux
(gdb) target remote:1234
(gdb) b start_kernel
调式环境准备就绪。我们继续在内核函数__x64_sys_sysinfo处打断点。执行程序,可以看到断点被成功捕捉到。
ENTRY(entry_SYSCALL_64) /* ... */ swapgs /* ... */ /* Construct struct pt_regs on stack */ pushq $__USER_DS /* pt_regs->ss */ pushq PER_CPU_VAR(cpu_tss_rw + TSS_sp2) /* pt_regs->sp */ pushq %r11 /* pt_regs->flags */ pushq $__USER_CS /* pt_regs->cs */ pushq %rcx /* pt_regs->ip */ GLOBAL(entry_SYSCALL_64_after_hwframe) pushq %rax /* pt_regs->orig_ax */ /* ... */ /* IRQs are off. */ movq %rax, %rdi movq %rsp, %rsi call do_syscall_64 /* returns with IRQs disabled */ /* ... */ USERGS_SYSRET64 END(entry_SYSCALL_64)
#ifdef CONFIG_X86_64 __visible void do_syscall_64(unsigned long nr, struct pt_regs *regs) { struct thread_info *ti; enter_from_user_mode(); local_irq_enable(); ti = current_thread_info(); if (READ_ONCE(ti->flags) & _TIF_WORK_SYSCALL_ENTRY) nr = syscall_trace_enter(regs); if (likely(nr < NR_syscalls)) { nr = array_index_nospec(nr, NR_syscalls); regs->ax = sys_call_table[nr](regs); #ifdef CONFIG_X86_X32_ABI } else if (likely((nr & __X32_SYSCALL_BIT) && (nr & ~__X32_SYSCALL_BIT) < X32_NR_syscalls)) { nr = array_index_nospec(nr & ~__X32_SYSCALL_BIT, X32_NR_syscalls); regs->ax = x32_sys_call_table[nr](regs); #endif } syscall_return_slowpath(regs); } #endif
四、实验总结
此次实验中,我们以99号系统调用为例,结合gdb内核调试,对系统调用的流程进行了验证和梳理。通过实践,我们对Linux系统调用有了更深的理解。


