Vue实战032:axios使用get和post发送各种请求
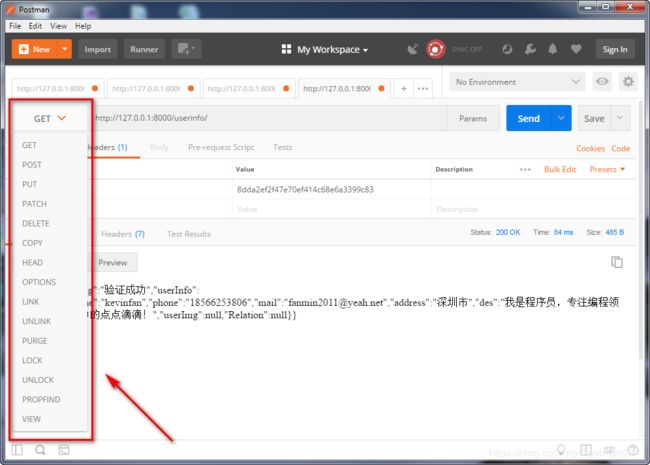
在前端中,提交数据的方式有很多种,如GET、POST、PUT、PATCH、DELETE、COPY、HEAD、OPTIONS、LINK、UNLINK、PURGE、LOCK、UNLOCK、PROPFIND、VIEW等请求方法,比较常用的有GET、POST、PUT、DELETE,今天主要分享下axios如何使用get和post发送请求。
什么是GET和POST请求
GET:向指定路径资源发送请求,通常用于获取数据
POST:向指定路径资源提交数据进行处理请求,通常用于提交表单或者上传文件
GET和POST请求的区别
1,GET一般是从服务器上获取数据,POST是向服务器提交数据。
2,GET通过URL提交数据,数据在URL中可以看到,POST则是在HEADER内提交。
3,GET提交的数据不能大于2KB,而POST不受限制。
4,GET数据容易泄露,POST较为安全
Content-Type
Content-Type是指发送信息至服务器时的内容编码类型,常见的表单提交或上传文件的常用的资源类型有application/x-www-form-urlencoded、multipart/form-data、 application/json、 application/xml,默认情况下为application/x-www-form-unlencoded。
axios发送GET请求
get发送请求时参数附在URL上,已键值对的形式呈现,如http://localhost:8000/test/?name=kevinfan&&age=18,这里传递的就是name=kevinfan&&age=18两个参数。
class test(APIView): //简单的测试接口,如果用户名存在则返回成功
    authentication_classes = []
    def get(self, request):
        res = {'code': 403, 'msg': ''}
        name = request.GET.get('name')
        age = request.GET.get('age')
        if(name):
            res['code'] = 200
            res['msg'] = '我收到了'
            res['name'] = name
            res['age'] = age
        return Response(res)
那么axios发送请求的时候就可以这样写,这里需要注意的是,如果你在url发送动态的参数name和age时,请用符号“`”包裹(这个是键盘esc下面那个按键的符号),而不是符号“"”。
test(){
  let name='kevinfan'
  let age='18'
  let url=`http://localhost:8000/test/?name=${name}&&age=${age}`
  // let url="http://localhost:8000/test/?name=kevinfan&&age=18" 也可以这样写
  this.$axios.get(url)
  .then(res=>{
    console.log(res)
  })
  .catch(err => console.log(err))
}
get除了可以发送一些简单的参数也可以携带请求头参数,比如说我想把token通过请求头的形式发送至后台,这里我在headers中定义了Authorization=token,通过验证token来获取用户信息。
getuserinfo(){
    let token=localStorage.getItem('token')
    this.$axios.get('http://127.0.0.1:8000/userinfo/',{
        headers: {
            'Authorization': token
        }
    }).then(res=>{
        console.log("res=======",res)
    }).catch(err => console.log(err))
}
后台接受请求头信息时应该用request.META.get('HTTP_AUTHORIZATION'),而且这里我们需要注意的是,前端发过来的字段是Authorization,而后台接受时确是HTTP_AUTHORIZATION。
class TokenAuth(BaseAuthentication):
    def authenticate(self, request):
        # 规定token用请求头传递
        token = request.META.get('HTTP_AUTHORIZATION')
        token_obj = UserToken.objects.filter(token=token).first()
        if not token_obj:
            raise AuthenticationFailed('用户认证失败')
        return (token_obj.user, token_obj)
axios发送POST请求
post发送请求时参数放在HEADER的请求体中,axios默认发送数据时,数据格式是Request Payload(请求头 Content-Type: application/json),而我们常用的是Form Data(请求头 Content-Type: application/x-www-form-urlencoded)格式。
this.$axios.post('http://127.0.0.1:8000/login/',{
    username:this.uname,
    password:this.password,
})
.then(res =>{
   //***省略****
}).catch(err => console.log(err))
如果我们直接将如上所示的数据发送给Django后台的话收到的数据会是None,这里我们可以看到发送的数据格式为Request Payload(请求头 Content-Type: application/json),这时我们就不能以json形式传参,而是通过键值对形式传参。
解决办法:axios中提供了qs模块,可以对数据格式进行转换,在axios中引入this.$qs.stringify(),这样在传参前将数据自动处理成键值对形式,这里我们可以看到发送的数据格式为Form Data(请求头 Content-Type: application/x-www-form-urlencoded),后台也正常接收到了数据。
this.$axios.post('http://127.0.0.1:8000/login/',this.$qs.stringify({
    username:this.uname,
    password:this.password,
}))
.then(res =>{
   //***省略****
}).catch(err => console.log(err))
axios通过POST传文件
POST除了可以发送数据之后,还可以用于发送文件(如传图片等),那么这时文件就是个对象而并不是参数。这是我们就需要申明一个FormData对象,以formData.append('键',对象)形式将对象添加到formData中然后传递。
let url='http://127.0.0.1:8000/uploadimage/'
let formData = new FormData()  //创建FormData实例
formData.append('img',blobInfo.blob())   //这是tinymce编辑器中的传图
this.$axios.post(url,formData)
.then(response =>{
   //***省略***
}).catch(err => console.log(err))
欢迎关注本人的公众号:编程手札,文章也会在公众号更新


