TangramBus (事件总线)
用于组件和 Controller、Layout、TangramView 之间的通信。个人感觉实现上像是 Target-Action 。下面我们来看下内部的实现逻辑:
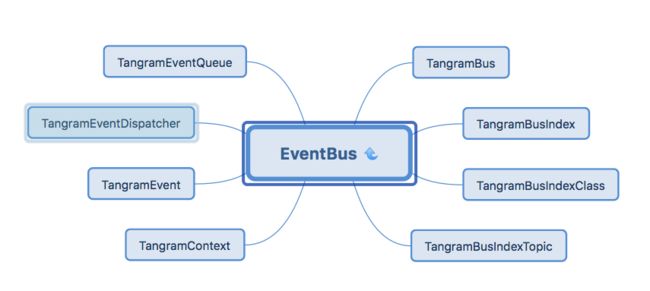
一、在了解具体流程前,先看一下Bus相关的类
1)TangramBus
/**  派发事件
  *  1.将 event 加入派发队列,队列上可能有多个event需要执行
  *  2.派发事件,遍历event,执行dispatcher中的dispatchEvent(参考TangramEventDispatcher)
  */
- (void)postEvent:(nonnull TangramEvent *)event;

/**  注册事件 (register有多个带参方法,只粘贴了一个参数最少的)
 *  @param action 事件行为,类似target-action中的action
 *  @param executer 执行者,类似target-action中的target
 *  @param topic 主题,可以将多个事件归为一类主题
 *  @param identifier 发起者id(可选,写nil表示不关注发起者是谁)
 */
- (void)registerAction:(nonnull NSString *)action ofExecuter:(nonnull id)executer onEventTopic:(nonnull NSString *)topic;

//代理
@protocol TangramActionProtocol
//执行事件
- (void)executeWithContext:(nonnull TangramContext *)context;
@end
2)TangramEventDispatcher 和 TrangramBusIndex 相关类
TangramEventDispatcher 是真正的注册和分发类。它内部有 TangramBusIndexClass 和 TangramBusIndexTopic 实例(我个人翻译为总线索引),2个索引主要用于保存 action 事件。首先看 TangramEventDispatcher 的代码:
/**  真正的注册事件
  *  内部根据是否有identifier来选择使用topic或者class类型索引。
  *  区别主要是:classIndex除了关注topic的类型,还关注发起者的identifier
  */
- (void)registerAction:(TangramAction *)action onEventTopic:(NSString *)topic andIdentifier:(NSString *)identifier;

/**  真正的派发事件
  *  从两个 busIndex中取出actionList。遍历执行executeWithContext(参考TangramAction)
  */
- (void)dispatchEvent:(TangramEvent *)event;
BusIndex 内部的具体实现:
//维护了一张哈希表, key=topic(or topic_identifier), value=actionArray(相同topic的action放在一个数组中)
@property   (nonatomic, strong) NSMutableDictionary     *index;

- (void)addAction:(TangramAction *)action forTopic:(NSString *)topic andPoster:(NSString *)identifier;
3)TangramEvent 和 TangramAction (TangramAction放在了TangramBusIndex类中实现)
TangramAction 主要用于封装 action,register 的时候会先把参数赋值给新的 action 实例,便于后续调用。主要代码如下:
@property   (nonatomic, weak)  id  target;
@property   (nonatomic, unsafe_unretained)  SEL  selector;
@property   (nonatomic, strong)  dispatch_queue_t  executeQueue;

//执行Context中存放的selector (即真正执行了action事件)
- (void)executeWithContext:(TangramContext *)context;
TangramEvent 是事件触发时,Bus 上派发的内容。为了更好的理解它,我们从 Demo 出发看代码。
① 我们新增的一个组件(为了支持事件,继承自UIControl),初始化时增加点击事件 clickedOnElement
② 在 clickedOnElement 中,我们需要新生成一个event,用于通知关注者(事件触发了,关注者你可以做你要做的事情了)。这也是bus总线的根本用途,用于组件和 Controller、Layout、TangramView 之间的通信,代码如下:
- (void)clickedOnElement
{
    TangramEvent *event = [[TangramEvent alloc]initWithTopic:@"jumpAction" withTangramView:self.inTangramView posterIdentifier:@"singleImage" andPoster:self];
    [event setParam:self.action forKey:@"action"];
    [self.tangramBus postEvent:event];  //介绍TangramBus类的时候介绍过这个方法
}
4)TangramContext
它包含了 TangramView,event 实例和发起者 poster 三者的弱引用,在执行 executeWithContext 时作为参数传入,方便我们获取上下文相关的内容。
5)TangramQueue
它内部维护了一个数组 queue,用堆栈的管理方式管理event
二、梳理一下Bus总线的逻辑
1.注册事件
在初始化TangramView的时候需要注册事件。注册事件有两种,一种是关注发起者,一种是不关注发起者。
① 关注发起者,是指需要关心是那一个组件发起的事件,可以根据registAction时候的identifier来区分
② 不关注发起者,任何组件抛出的同一种topic事件都可以接收,比如点击
2.绑定总线
组件内写一个 weak 的对 TangramBus 的引用,实现 setTangramBus 这个方法。 使用 Helper 类提供的方法,方法内部会将TangramBus绑定到view上。
3.派发事件
生成 event,view类中的TangramBus可以调用postEvent来发起事件。这也是为什么要在view中生成一个Bus的弱引用的原因。
4.响应事件
event 通过 dispatcher 分发,找到对应的 BusIndex,最后得到执行。执行的时候还可以通过 Context 拿到上下文相关的信息。
三、总结
总线的基本原理其实并不复杂,为什么要选择这种方式让view和其它层交互,它的优势和劣势还值得探讨。在深入的学习中,我们将继续思考这个问题!
参考文章:
官方资料1
官方资料2