openshift 中部署springboot项目并增量更新
最新公司准备应用openshift,于是安排我学习openshift,通过好几天的学习,尝试,踩过无数个坑,终于搭建起了一个Mater,一个Node的openshift环境:
公司后端项目是基于springboot,openshift没有提供现有的is,所以需要通过s2i自己制作is,现记录过程如下:
1. 下载s2i,过程略过...
2. 通过s2i创建镜像:
s2i create springboot-s2i springboot-s2i
s2i目录下为S2I脚本。
其中:
assemble:负责源代码的编译、构建以及构建产出物的部署。
run:S2I流程生成的最终镜像将以这个脚本作为容器的启动命令。
usage:打印帮助信息,一般作为S2I Builder镜像的启动命令。
save-artifacts:为了实现增量构建。稍后对针对springboot的增量更新做详细说明
3. 编辑Dockfile文件:
#springboot-s2i
FROM maven:3.6-jdk-8

# TODO: Put the maintainer name in the image metadata
LABEL maintainer="huabing.li"

# TODO: Rename the builder environment variable to inform users about application you provide them
ENV MAVEN_CONFIG=.m2

# TODO: Set labels used in OpenShift to describe the builder image
LABEL io.openshift.s2i.scripts-url="image:///usr/libexec/s2i" \
      io.openshift.s2i.destination="/opt/s2i/destination"
#LABEL io.k8s.description="Platform for building xyz" \
#      io.k8s.display-name="builder x.y.z" \
#      io.openshift.expose-services="8080:http" \
#      io.openshift.tags="builder,x.y.z,etc."

# TODO: Install required packages here:
WORKDIR /opt

RUN useradd -m deploy -u 1001 && \
    chmod -R 777 /opt && \
    mkdir -p /opt/s2i/destination && \
    chmod -R 777 /opt/s2i/destination

# TODO: Copy the S2I scripts to /usr/libexec/s2i, since openshift/base-centos7 image
# sets io.openshift.s2i.scripts-url label that way, or update that label
COPY ./s2i/bin/ /usr/libexec/s2i

# TODO: Drop the root user and make the content of /opt/app-root owned by user 1001
RUN chown -R 1001:1001 /opt && \
    chown -R 1001:1001 /var

# This default user is created in the openshift/base-centos7 image
USER 1001

# TODO: Set the default port for applications built using this image
# EXPOSE 8080

# TODO: Set the default CMD for the image
# CMD ["/usr/libexec/s2i/usage"]
4. 编辑s2i/bin/assemble文件:
#!/bin/bash -e
#
# S2I assemble script for the 'springboot-s2i' image.
# The 'assemble' script builds your application source so that it is ready to run.
#
# For more information refer to the documentation:
#       https://github.com/openshift/source-to-image/blob/master/docs/builder_image.md
#

# If the 'springboot-s2i' assemble script is executed with the '-h' flag, print the usage.
if [[ "$1" == "-h" ]]; then
        exec /usr/libexec/s2i/usage
fi

# Restore artifacts from the previous build (if they exist).
#
if [ "$(ls -A /opt/s2i/destination/artifacts/ 2>/dev/null)" ]; then
  echo "---> Restoring build artifacts..."
  # ls -la /opt/s2i/destination/artifacts/home/deploy/.m2
  mv /opt/s2i/destination/artifacts/home/deploy/.m2 $HOME/.m2
fi

echo "---> Installing application source..."

cp -Rf /opt/s2i/destination/src/. ./

mvn compile -Dmaven.test.skip=true package

find . -type f -name '*.tar.gz'|xargs -i tar zxvf {}

echo "---> Building application from source..."
# TODO: Add build steps for your application, eg npm install, bundle install, pip install, etc.
5. 编辑s2i/bin/run文件
#!/bin/bash -e
#
# S2I run script for the 'springboot-s2i' image.
# The run script executes the server that runs your application.
#
# For more information see the documentation:
#       https://github.com/openshift/source-to-image/blob/master/docs/builder_image.md
#
# bash -c "java -jar financial-assistant.jar"

bash -c "bin/single.sh start ${SPRING_PROFILES_ACTIVE}"
tail -f logs/stdout.log
bin/single.sh脚本为项目定制启动脚本,此处可以换成具体的启动命令;${SPRING_PROFILES_ACTIVE}是环境变量,表示项目启动时应用那个profile。
6. 编辑增量文件
#!/bin/sh -e

tar cf - $HOME/.m2
7.编译,并把创建的镜像推到私有仓库
1. make
2. docker tag springboot-s2i master.openshift.com:5000/springboot-s2i
3. docker push master.openshift.com:5000/springboot-s2i
4. oc import-image master.openshift.com:5000/springboot-s2i -n openshift --confirm --insecure
执行第4步需要登陆openshift并拥有管理员权限。
8. 编辑is,使得openshift能够识别刚导入的is
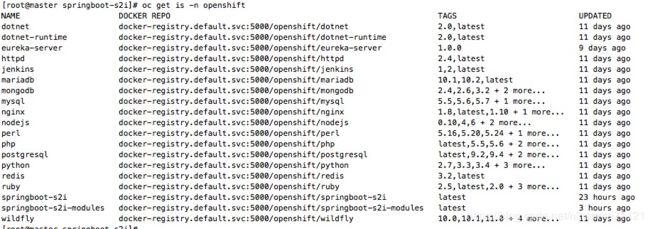
9.操作完成后,就能在openshfit console中看到刚创建的is了,如图:
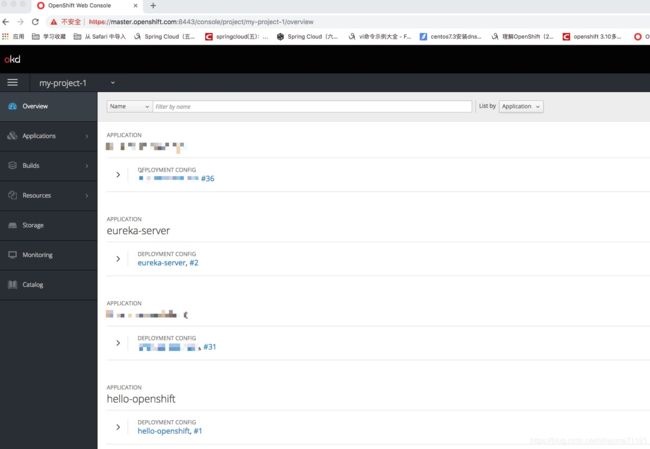
 10.根据刚生成的springboot-s2i,我们尝试部署一下系统:
中间绿色表示的当次构建成功,所以刚才构建的springboot-s2i是能够使用的。
11. 现在讲解一下增量更新
a. 首先说一下增量更新的原理:
1. 当标记Builds 需要增量更新时,openshift会已上一次成功构建的镜像启动,然后执行s2i/bin/save-artifacts脚本,打包需要保存的内容至标准输出流,上第<6>步骤只保存了.m2下的本地仓库;
2. 执行s2i/bin/assemble脚本,判断是否是增量构建:第<4>步中判断目标目录中是否有从上一个容器中复制的文件来判断是否需要执行复制/移动操作:
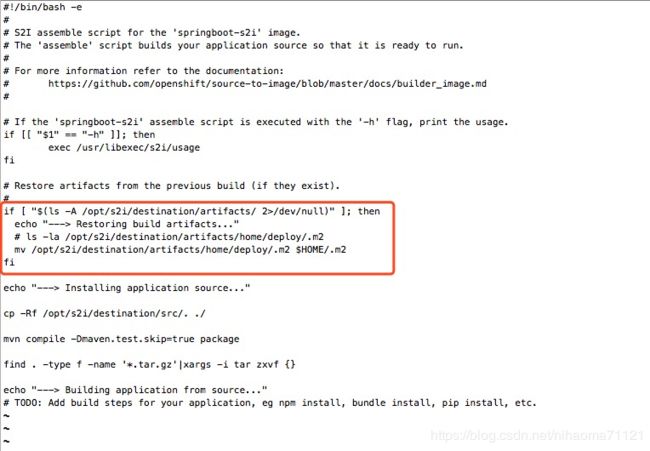
图中圈中部分脚本就是增量更新时执行逻辑,/opt/s2i/destination目录为Dockerfile 中定义的Label,大概意思是增量更新时,从save-artifacts脚本打包的内容解压到定义的artifacts目录下。
3. 需要增量更新,还需要配置Build config:
点击保存之后,重新构建,查看maven仓库是否重新下载,判断增量更新是否起作用:
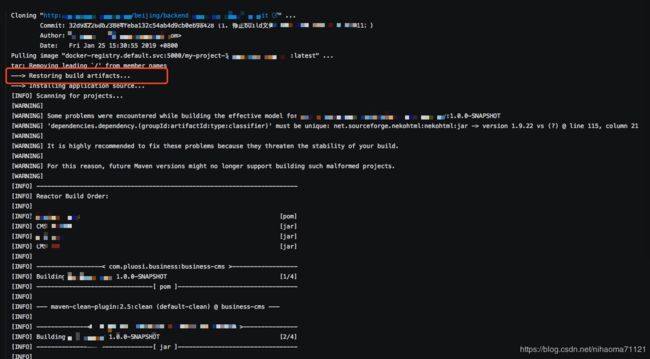
通过查看日志,可以看到,再进行新一次构建过程中并没有重新下载依赖,所以增量更新成功。
查看构建历史,可以看到最后配置了增量更新后的构建耗时明显由于没有配置增量构建之前的构建的。
在搭建环境和操作过程中,遇到了很多坑,就不一一列出来了,有问题的可以留言讨论。


