参考教程:陈木鑫老师的《Spring Security 实战》
创建spring boot项目
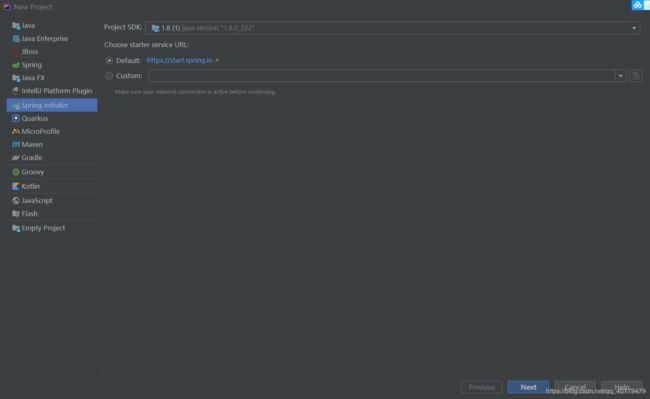
通过Intellij IDEA创建Spring Boot项目的方式有许多种,其中最简单的方式就是使用Spring Initializr
工具。
Spring Initializr 允许我们提前选定一些常用的项目依赖,此处我们选择 Security 作为构建Spring
Security项目的最小依赖,选择Web作为Spring Boot构建Web应用的核心依赖。
maven 引用
在自动构建的Spring Security 项目中,Spring Initializr 为我们引入了以下依赖:
            org.springframework.boot
            spring-boot-starter-security
我们点开spring-boot-starter-security可以看到,其包含了以下依赖:
      org.springframework.boot
      spring-boot-starter
      2.3.1.RELEASE
      compile


      org.springframework
      spring-aop
      compile


      org.springframework.security
      spring-security-config
      compile


      org.springframework.security
      spring-security-web
      compile
其中 spring-security-web和spring-security-config两个核心模块,正是官方建议引入的Spring Security最小依赖。
声明controller
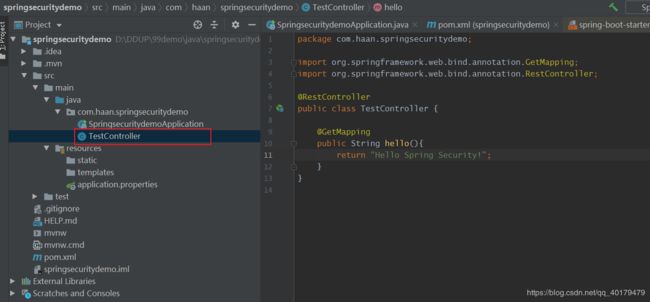
在项目中声明一个测试路由TestController:
package com.haan.springsecuritydemo;

import org.springframework.web.bind.annotation.GetMapping;
import org.springframework.web.bind.annotation.RestController;

@RestController
public class TestController {

    @GetMapping
    public String hello(){
        return "Hello Spring Security!";
    }
}
运行SpringsecuritydemoApplication
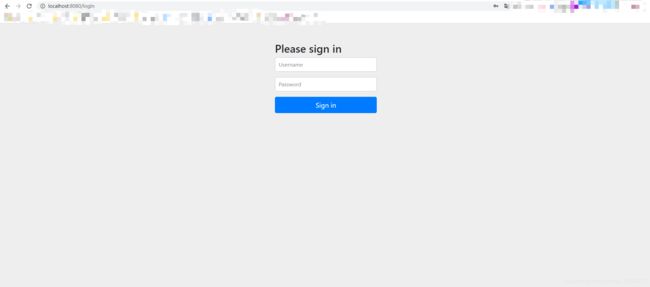
运行SpringsecuritydemoApplication,默认启动 8080 端口,打开浏览器,访问localhost:8080,我们发现页面跳转到了localhost:8080/login:
修改登录信息
基本表单认证中,用户名和密码都是可以配置的,最常见的就是在resources下的application配置文件中修改:
spring.security.user.name=user02
spring.security.user.password=aaaaaa
重新启动程序,发现控制台不再打印默认密码串了,此时使用我们自定义的用户名和密码即可登录。
WebSecurityConfigurerAdapter
    protected void configure(HttpSecurity http) throws Exception {
        this.logger.debug("Using default configure(HttpSecurity). If subclassed this will potentially override subclass configure(HttpSecurity).");
        ((HttpSecurity)((HttpSecurity)((AuthorizedUrl)http.authorizeRequests().anyRequest()).authenticated().and()).formLogin().and()).httpBasic();
    }
可以看到 WebSecurityConfigurerAdapter 已经默认声明了一些安全特性:
- 验证所有请求。
- 允许用户使用表单登录进行身份验证(Spring Security 提供了一个简单的表单登录页面)。
- 允许用户使用HTTP 基本认证。
spring boot 默认定义了DefaultConfigurerAdapter ,由@ConditionalOnMissingBean可知当没有其他WebSecurityConfigurerAdapter被定义时,将使用DefaultConfigurerAdapter:
@Configuration(
    proxyBeanMethods = false
)
@ConditionalOnClass({WebSecurityConfigurerAdapter.class})
@ConditionalOnMissingBean({WebSecurityConfigurerAdapter.class})
@ConditionalOnWebApplication(
    type = Type.SERVLET
)
public class SpringBootWebSecurityConfiguration {
    public SpringBootWebSecurityConfiguration() {
    }

    @Configuration(
        proxyBeanMethods = false
    )
    @Order(2147483642)
    static class DefaultConfigurerAdapter extends WebSecurityConfigurerAdapter {
        DefaultConfigurerAdapter() {
        }
    }
}
自定义表单登录页
Spring boot提供了WebSecurityConfigurerAdapter 的默认实现DefaultConfigurerAdapter,能够提供基本表单登录认证。
虽然自动生成的表单登录页可以方便、快速地启动,但是大多数应用程序更希望提供自己的表单登录页,此时就需要我们提供自己的WebSecurityConfigurerAdapter来代替DefaultConfigurerAdapter,覆写WebSecurityConfigurerAdapter的configure方法:
@EnableWebSecurity
public class MyWebSecurityConfiguration extends WebSecurityConfigurerAdapter {

    @Override
    protected void configure(HttpSecurity http) throws Exception {
        http.authorizeRequests()
                .anyRequest().authenticated()
                .and()
                .formLogin()
                .loginPage("/myLogin.html")    //指明登录页面
                .permitAll()    //指明登录页允许所有进行访问
                .and()
                .csrf().disable();
    }
}-
authorizeRequests()方法实际上返回了一个 URL 拦截注册器,我们可以调用它提供的anyRequest()、antMatchers()和regexMatchers()等方法来匹配系统的URL,并为其指定安全策略。 -
formLogin()方法和httpBasic()方法都声明了需要Spring Security提供的表单认证方式,分别返回对应的配置器。其中formLogin().loginPage("/myLogin.html")指定自定义的登录
页 /myLogin.html,同时,Spring Security会用/myLogin.html注册一个POST路由,用于接收登录请求。
-
csrf()方法是Spring Security提供的跨站请求伪造防护功能,当我们继承WebSecurityConfigurer Adapter时会默认开启csrf()方法。
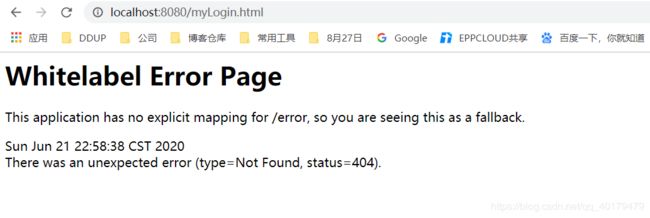
访问localhost:8080 ,我们发现,页面就跳转到了localhost:8080/myLogin.html,由于我们静态文件中并没有myLogin.html 文件,所以提示了一个404的white page:
我们在resources/static 文件夹下创建页面myLogin.html:
    Hello Security!


    登录页
其他表单配置项
指定登录处理URL
在自定义表单登录页之后,处理登录请求的URL也会相应改变,默认情况下,
如果只配置loginPage而不配置loginProcessingUrl的话那么loginProcessingUrl默认就是loginPage,如果需要自定义登录请求的URL,需要配置loginProcessingUrl:
重启登录,我们发现中间访问了localhost:8080/myLogin
补充:
loginPage和loginProcessingUrl
- 两者都不配置:默认都是
/login- 两者都配置:按自己的来
- 只配置
loginProcessingUrl:loginPage默认/login- 只配置
loginPage:loginProcessingUrl默认就是loginPage
设置登录成功处理
此时,有些读者可能会有疑问,因为按照惯例,在发送登录请求并认证成功之后,页面会跳转回原访问页。在某些系统中的确是跳转回原访问页的,但在部分前后端完全分离、仅靠JSON完成所有交互的系统中,一般会在登录时返回一段 JSON 数据,告知前端成功登录成功与否,由前端决定如何处
理后续逻辑,而非由服务器主动执行页面跳转。这在Spring Security中同样可以实现。
表单登录配置模块提供了 successHandler()和 failureHandler()两个方法,分别处理登录成功和登录失败的逻辑。
-
successHandler()方法带有一个Authentication参数,携带当前登录用户名及其角色等信息; -
failureHandler()方法携带一个AuthenticationException异常参数。具体处理方式需按照系统的情况自定义。
@EnableWebSecurity
public class MyWebSecurityConfiguration extends WebSecurityConfigurerAdapter {

    @Override
    protected void configure(HttpSecurity http) throws Exception {
        http.authorizeRequests()
                .anyRequest().authenticated()
                .and()
                .formLogin()
                .loginPage("/myLogin.html") //指明登录页面
                .loginProcessingUrl("/myLogin")   //指明处理登陆的URL路径,即登陆表单提交请求
                .successHandler(new AuthenticationSuccessHandler() {        // 设置登录成功的处理器
                    @Override
                    public void onAuthenticationSuccess(HttpServletRequest httpServletRequest, HttpServletResponse httpServletResponse, Authentication authentication) throws IOException, ServletException {
                        PrintWriter responseWriter = httpServletResponse.getWriter();
                        String name = authentication.getName();
                        responseWriter.write(name+" login success!");
                    }
                })
                .failureHandler(new AuthenticationFailureHandler() {        // 设置登录失败的处理器
                    @Override
                    public void onAuthenticationFailure(HttpServletRequest httpServletRequest, HttpServletResponse httpServletResponse, AuthenticationException e) throws IOException, ServletException {
                        PrintWriter responseWriter = httpServletResponse.getWriter();
                        responseWriter.write("login error!");
                    }
                })
                .permitAll()    //指明登录页允许所有进行访问
                .and()
                .csrf().disable();
    }
}

