ZYNQ-Linux配置休眠(Suspend)和唤醒(wake-up)
Linux下配置zynq的休眠和唤醒
- 说明
- 开发环境
- 休眠和唤醒介绍
- 关于Sleep Mode
- 关于Wake-up
- 裸机下休眠和唤醒
- Enter sleep mode
- Exit sleep mode
- Linux下休眠和唤醒
- Linux下Suspend
- Linux下Wake-up
- Wake on UART
- Wake on GPIO
- GPIO-Keys Driver
- 总结
说明
Zynq-7000 SoC是针对大多数嵌入式应用的器件,凭借ARM处理与FPGA逻辑之间的高集成度以及I/O可编程性,借助Xilinx提供的开发工具试的软硬件工程师能够更好的协调工作,缩短开发时间。
借助Petalinux工具能够让zynq很方便的在Linux工作,在Linux下唯一不太友好的就是zynq的功耗高,芯片发热较大,所以让zynq合理的休眠显得尤为重要。
开发环境
- PC:Windows 10;
- 虚拟机:Ubuntu 16.04;
- Vivado:2018.2;
- PetaLinux:2018.2;
- 硬件环境:zynq7010;
休眠和唤醒介绍
参照UG585资料里关于Sleep Mode 以及Wake-up介绍
关于Sleep Mode
Sleep Mode
Sleep mode is defined at the system level to include the APU in standby mode and multiple controllers being held in reset without a clock.
Going into sleep mode can greatly reduce power consumption. In sleep mode, most function clock groups are turned off or powered off. The only required active devices are one CPU, the snoop control unit (SCU), and a wake-up device. Ideally, the only devices causing dynamic power consumption should be the SCU and the wake-up peripheral device. The wake-up device can be UART, GPIO, or any device that can generate an interrupt.
If the wake-up device is an AXI bus master, which can start transactions targeting the DRAM,additional limitations apply. Because the whole interconnect and the DDR memory are in low power modes and inaccessible, it must be assured that the CPU goes through the full wake-up process before any transactions to the DRAM take place. This guarantees that potential transactions targeting the DRAM are served correctly.
文中提到进入休眠模式可以大大降低功耗, 在睡眠模式下,大多数功能时钟组均已关闭。 唯一需要的活动设备是一个CPU,侦听控制单元(SCU)和唤醒设备。 理想情况下,引起动态功耗的唯一设备应该是SCU和唤醒外围设备。 唤醒设备可以是UART,GPIO或任何可以产生中断的设备。
关于Wake-up
Setup Wake-up Events
Every interrupt signaled to the PS can be used as a wake-up event. To make this happen, the wanted interrupt must be enabled in the peripheral and the GIC. A wake-up device must be able to generate the interrupt in sleep mode, which means, that its clocks might not be gated off. See GPIO as Wake-up Event, page 389 for more information.
Refer to the respective chapter for information about available interrupts and how to configure the peripherals to generate them.
能够通知PS端的每个中断都可以用作唤醒事件。 为此,必须在外围设备和GIC中启用所需的中断。 唤醒设备必须能够在睡眠模式下产生中断,这意味着其时钟可能不会被关闭。
裸机下休眠和唤醒
Enter sleep mode
Enter Sleep Mode
A CPU must execute the following steps to enter sleep mode from normal run mode:
- Disable interrupts. Execute cpsid if.
- Configure wake-up device.
- Enable L2 cache dynamic clock gating. Set l2cpl310.reg15_power_ctrl[dynamic_clk_gating_en] = 1.
- Enable SCU standby mode. Set mpcore.SCU_CONTROL_REGISTER[SCU_standby_enable] = 1.
- Enable topswitch clock stop. Set slcr.TOPSW_CLK_CTRL[CLK_DIS] = 1.
- Enable Cortex-A9 dynamic clock gating. Set
cp15.power_control_register[dynamic_clock_gating] = 1.- Put the external DDR memory into self-refresh mode. Refer to section 10.9.6 DDR Power Reduction.
- Put the PLLs into bypass mode. Set slcr.{ARM, DDR, IO}_PLL_CTRL[PLL_BYPASS_FORCE] = 1.
- Shut down the PLLs. Set slcr.{ARM, DDR, IO}_PLL_CTRL[PLL_PWRDWN] = 1.
- Increase the clock divisor to slow down the CPU clock. Set slcr.ARM_CLK_CTRL[DIVISOR] = 0x3f.
- Execute the wfi instruction to enter WFI mode.
Exit sleep mode
Exiting sleep mode is triggered by the configured interrupt occurring. The interrupt wakes up the CPU which resumes execution. The newly starting activity also triggers the topswitch, SCU, and L2 cache controller to leave their idle states and continue normal operation. The procedure for waking up is outlined below.
To exit from sleep mode:
- Restore CPU clock divisor setting. Set slcr.ARM_CLK_CTRL[DIVISOR] = original value.
- Power on the PLLs. Set slcr.{ARM, DDR, IO}_PLL_CTRL[PLL_PWRDWN] = 0.
- Wait for PLL power-on and lock. Wait for slcr.PLL_STATUS[{ARM, DDR, IO}_PLL_LOCK] = 1.
- Disable PLL bypass mode. Set slcr.{ARM, DDR, IO}_PLL_CTRL[PLL_BYPASS_FORCE] = 0.
- Disable L2 cache dynamic clock gating. Set l2cpl310.reg15_power_ctrl[dynamic_clk_gating_en] = 0.
- Disable SCU standby mode. Set mpcore.SCU_CONTROL_REGISTER[SCU_standby_enable] = 0.
- Disable Interconnect clock stop. Set slcr.TOPSW_CLK_CTRL[CLK_DIS] = 0.
- Disable Cortex-A9 dynamic clock gating. Set cp15.power_control_register[dynamic_clock_gating] = 0.
- Enable all required peripheral devices, including DDR controller clocks.
- Re-enable and serve interrupts. Execute cpsie if.
裸机下进入休眠需要按照步骤配置各个寄存器的状态。显得比较繁琐,在linux下相对简单一些,通过正确配置内核,采用指令形式进入休眠状态。
Linux下休眠和唤醒
参照Xilinx的wiki手册,Linux下通过配置内核,很容易进入休眠状态。唤醒方式同上面一样,通过指定的Uart或者GPIO唤醒。
Linux下Suspend
通过配置内核命令
petalinux-config -c kernel
使能如下的内核选项配置
- CONFIG_THERMAL
- CONFIG_CPU_THERMAL
- CONFIG_CPU_FREQ
- CONFIG_CPU_FREQ_GOV_PERFORMANCE
- CONFIG_CPU_FREQ_GOV_POWERSAVE
- CONFIG_CPU_FREQ_GOV_USERSPACE
- CONFIG_CPU_FREQ_GOV_ONDEMAND
- CONFIG_CPU_FREQ_GOV_CONSERVATIVE
- CONFIG_CPU_FREQ_STAT
- CONFIG_CPU_FREQ_STAT_DETAILS
- CONFIG_CPUFREQ_DT
- CONFIG_CPU_IDLE
- CONFIG_CPU_IDLE_GOV_LADDER
- CONFIG_CPU_IDLE_GOV_MENU
- CONFIG_PM_SLEEP
配置完成后保存退出。
执行petalinux-build编译工程,编译完成后,把BOOT.BIN和zynq_fsbl.elf文件烧写到目标板。
启动目标板,执行
echo mem > /sys/power/state
Linux下Wake-up
Wake on UART
先通过命令指定一路uart为唤醒设备,当指定的uart上有中断产生,zynq被唤醒。本文通过使能调试串口uart0为唤醒设备进行测试,正常休眠之后,因为uart0会有中断产生,zynq会马上被唤醒。
先使能uart0为唤醒设备:
echo enabled > /sys/devices/soc0/amba/e0000000.serial/tty/ttyPS0/power/wakeup
再执行休眠指令:
echo mem > /sys/power/state
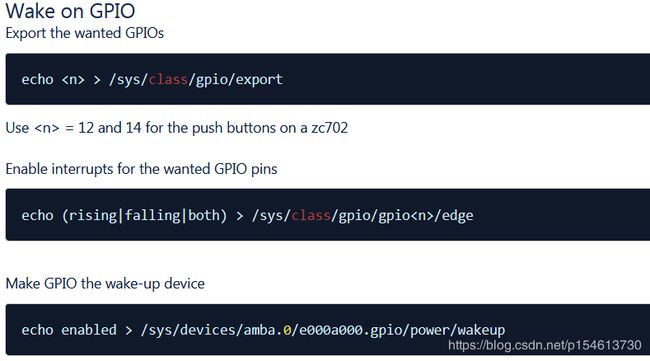
Wake on GPIO
GPIO-Keys Driver
在wiki/Linux Drivers/Linux GPIO Driver下查找到GPIO-Keys Driver,里面提到:
- Using gpio-key,wakeup will enable the GPIO to wake the system from suspend.
可以通过在Device Tree里面添加GPIO-Keys的方式来使能GPIO唤醒zynq。
参照wiki往设备树文件(project-spec/meta-user/recipes-bsp/device-tree/files/system-user.dtsi)添加gpio-keys
gpio-keys {
    compatible = "gpio-keys";
    #address-cells = <1>;
    #size-cells = <0>;
    autorepeat;
    sw14 {
        label = "sw14";
        gpios = <&gpio0 39 0>;
        linux,code = <108>; /* down */
        gpio-key,wakeup;
        autorepeat;
    };
};
注: gpios = <&gpio0 39 0>;
第二个参数39表示配置MIO39为GPIO,本次测试在MIO39接入按键来测试。
修改完成后,执行petalinux-build命令编译工程,完成后烧写指定文件到目标板。
启动目标板,通过串口进入到设备树目录下,可以看到新添加的gpio-keys目录
![]() 指定gpio-keys为唤醒设备:
指定gpio-keys为唤醒设备:
 执行休眠指令,zynq进入休眠状态,同时通过接入MIO39的按键触发来唤醒zynq。
 通过GPIO唤醒设备的功能基本上也完成了。
总结
实际测试加入休眠功能后,zynq的整体功耗有一定的下降,对嵌入式设备的发热有一定的改善,但相对于跑裸机而言,功耗还是要高不少,对嵌入式设备而言,zynq的导热一定要做好。同时测试过程中,发现PS在唤醒的瞬间,PL端的逻辑出现过紊乱现象,建议PS在唤醒之后,需要马上对PL进行复位操作,重新配置相关寄存器。


