java利用springboot搭建restful风格的web service
0、前言
传统的web请求:一个操作一个url,难以维护。而什么是restful呢?RESTFUL是一种网络应用程序的设计风格和开发方式,基于HTTP,可以使用XML格式定义或JSON格式定义。RESTFUL适用于移动互联网厂商作为业务使能接口的场景,实现第三方OTT调用移动网络资源的功能,动作类型为新增、变更、删除所调用资源。说的还是不明白。简而言之,同一类事物的操作只使用一个url,而具体的操作是根据请求的类型决定。如get、post、delete、put分别对应查询、增加、删除、修改等。
1、创建spring boot项目
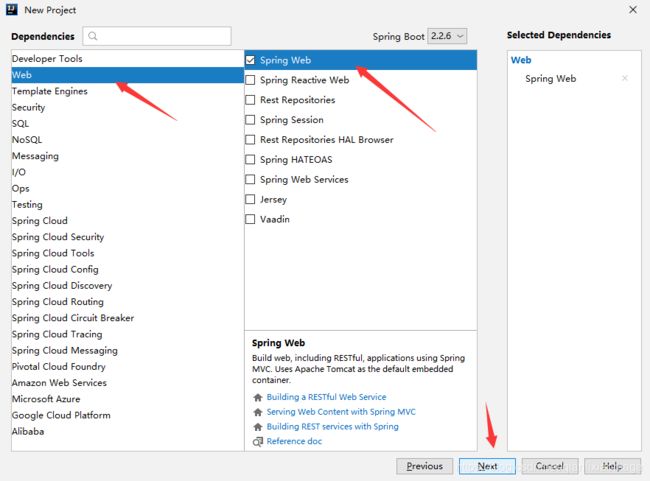
(1)打开idea,创建一个工程
点击下一步
点击next
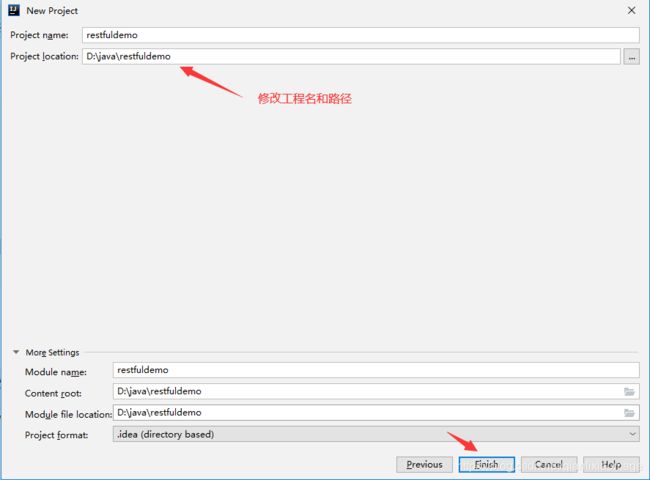
继续next
点击finish
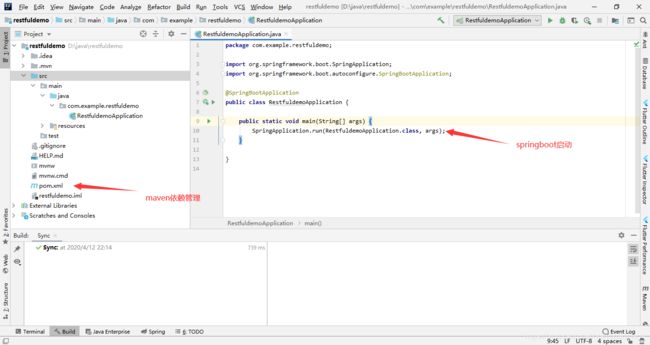 (2)新建一个User实体类
package com.example.restfuldemo;

/**
 * @Description
 * @ClassName User
 * @Author User
 * @date 2020.04.12 22:18
 */
public class User {
    private String name;
    private Integer age;

    public User(String name, Integer age){
        this.name = name;
        this.age = age;
    }

    public Integer getAge() {
        return age;
    }

    public String getName() {
        return name;
    }

    public void setAge(Integer age) {
        this.age = age;
    }

    public void setName(String name) {
        this.name = name;
    }
}
(3)新建UserController类
package com.example.restfuldemo;

import org.springframework.web.bind.annotation.*;

import java.util.concurrent.atomic.AtomicInteger;
import java.util.concurrent.atomic.AtomicLong;

/**
 * @Description
 * @ClassName UserController
 * @Author User
 * @date 2020.04.12 22:21
 */
@RestController
@RequestMapping("/api/v1")
public class UserController{
    private static final String template = "hello,%s!";
    private final AtomicInteger counter = new AtomicInteger();

    // get请求
    @GetMapping("/user")
    public User getUser(@RequestParam(value="name",defaultValue = "游客") String name) {
        return new User(String.format(template, name), counter.incrementAndGet());
    }

    // post请求 请求参数为params
    @PostMapping("/user")
    public String addUser(@RequestParam(value="name") String name, @RequestParam(value = "age", required = false) Integer age) {
        System.out.println("my name is "+name+" I am "+age+" years old");
        return "add success";
    }

    // put请求 json参数直接映射到实体类
    @PutMapping("/user")
    public String addUserObj(@RequestBody User user) {
        System.out.println("my name is "+user.getName()+" I am "+user.getAge()+" years old");
        return "update success";
    }
}
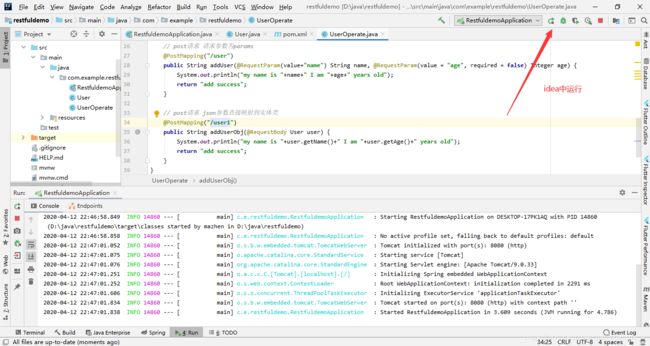
(4)启动程序的方式
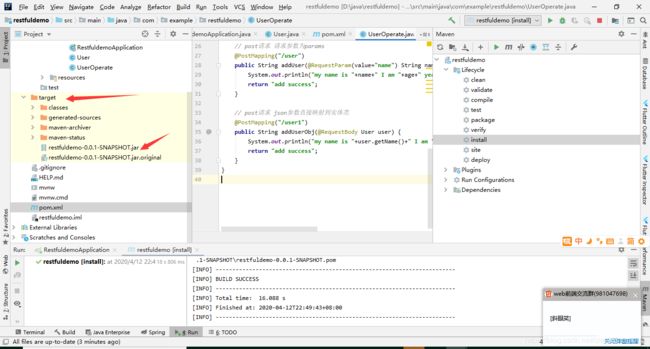
执行maven install生成jar包,然后java -jar project.jar运行
然后右键运行 jar,也是可以的 。
- 生成war包放置tomcat服务器
最后这种需要修改配置pom.xml
            org.springframework.boot
            spring-boot-starter-tomcat

            provided
这个是为了去除spring boot默认的tomcat
                org.springframework.boot
                spring-boot-maven-plugin


        demo
修改生成war的名字
0.0.1-SNAPSHOT
    war
demo
接下来就要重写主类(很重要,否则访问时会报错,请求不到资源等错误)
package com.example;

import org.springframework.boot.SpringApplication;
import org.springframework.boot.autoconfigure.SpringBootApplication;
import org.springframework.boot.builder.SpringApplicationBuilder;
import org.springframework.boot.web.servlet.support.SpringBootServletInitializer;

@SpringBootApplication
public class RestfuldemoApplication extends SpringBootServletInitializer {

    public static void main(String[] args) {
        SpringApplication.run(RestfuldemoApplication.class, args);
    }

    @Override
    protected SpringApplicationBuilder configure(SpringApplicationBuilder application){
        return application.sources(RestfuldemoApplication.class);
    }

}
配置生成war,默认为jar,完事后将war放置再tomcat服务器的webapp目录下,利用工具http://localhost:8080/demo/api/v1/user?name=name进行访问
2、Java 中 JSON 的使用(该部分引用自菜教)
类库选择
Java中并没有内置JSON的解析,因此使用JSON需要借助第三方类库。
下面是几个常用的 JSON 解析类库:
- Gson: 谷歌开发的 JSON 库,功能十分全面。
- FastJson: 阿里巴巴开发的 JSON 库,性能十分优秀。
- Jackson: 社区十分活跃且更新速度很快。
以下教程基于 FastJson 讲解。
环境配置
在 Maven 构建的项目中,在 pom.xml 文件中加入以下依赖即可。
    com.alibaba
    fastjson
    1.2.47
编码与解码
编码
从 Java 变量到 JSON 格式的编码过程如下:
实例
public void testJson() {
JSONObject object = new JSONObject();
//string
object.put("string","string");
//int
object.put("int",2);
//boolean
object.put("boolean",true);
//array
List integers = Arrays.asList(1,2,3);
object.put("list",integers);
//null
object.put("null",null);
System.out.println(object);
} 在上例中,首先建立一个 JSON 对象,然后依次添加字符串、整数、布尔值以及数组,最后将其打印为字符串。
输出结果如下:
{"boolean":true,"string":"string","list":[1,2,3],"int":2}解码
从 JSON 对象到 Java 变量的解码过程如下:
实例
public void testJson2() {
JSONObject object = JSONObject
.parseObject("{\"boolean\":true,\"string\":\"string\",\"list\":[1,2,3],\"int\":2}");
//string
String s = object.getString("string");
System.out.println(s);
//int
int i = object.getIntValue("int");
System.out.println(i);
//boolean
boolean b = object.getBooleanValue("boolean");
System.out.println(b);
//list
List integers = JSON.parseArray(object.getJSONArray("list").toJSONString(),Integer.class);
integers.forEach(System.out::println);
//null
System.out.println(object.getString("null"));
} 在上例中,首先从 JSON 格式的字符串中构造一个 JSON 对象,之后依次读取字符串、整数、布尔值以及数组,最后分别打印,打印结果如下:
string
2
true
1
2
3
null
JSON 对象与字符串的相互转化
| 方法 | 作用 |
|---|---|
JSON.parseObject() |
从字符串解析 JSON 对象 |
JSON.parseArray() |
从字符串解析 JSON 数组 |
JSON.toJSONString(obj/array) |
将 JSON 对象或 JSON 数组转化为字符串 |
实例
//从字符串解析JSON对象
JSONObject obj = JSON.parseObject("{\"runoob\":\"菜鸟教程\"}");
//从字符串解析JSON数组
JSONArray arr = JSON.parseArray("[\"菜鸟教程\",\"RUNOOB\"]\n");
//将JSON对象转化为字符串
String objStr = JSON.toJSONString(obj);
//将JSON数组转化为字符串
String arrStr = JSON.toJSONString(arr);
3、postman进行接口测试
get:
post:(非json数据)
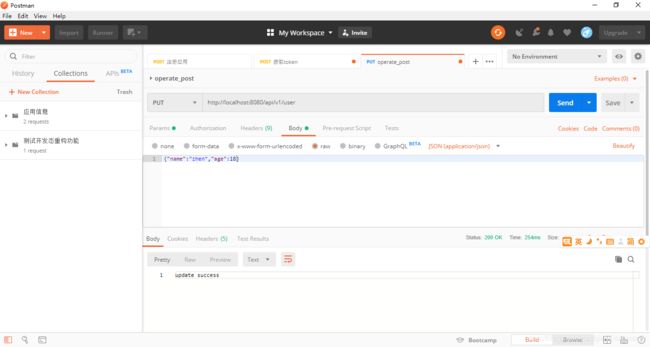
put:(json数据)
4、demo源码
github:点击下载
5、结束
本文介绍了使用springboot框架搭建restful风格的restful服务的基本流程,目的在于学过的东西记录一下方便复习。也希望能帮到各位初步接触java,想要设计restful接口的小伙伴。


