dlib-19.8+vs2015+cuda9.1+cmake在windows10配置经验
本文基于dlib-19.8+ vs2015 + cuda9.1 + cudnn7.0.5 + cmake在windows10配置,使用GPU大大加快了DNN网络的训练速度,显卡是GTX1060。本文也参考了网上很多博客,在这里就不一一列出了。在配置dlib的过程中用过vs2013,vs2015,vs2017,最终还是回到了vs2015,主要还是为了运行DNN相关的代码,因为官网有如下说明:
http://dlib.net/faq.html#WhycantIusetheDNNmodulewithVisualStudio
Why can't I use the DNN module with Visual Studio?
You can, but you need to use VisualStudio 2015 Update 3 or newer since prior versions had bad C++11 support.To make this as confusing as possible, Microsoft has released multipledifferent versions of "Visual Studio 2015 Update 3". As of October2016, the version available from the Microsoft web page has good enough C++11support to compile the DNN tools in dlib. So make sure you have a version noolder than October 2016.
However, as of this writing, the newest version of Visual Studio isVisual Studio 2017, which has WORSE C++11support that Visual Studio 2015. In particular, if you try to use the DNNtooling in Visual Studio 2017 the compiler will just hang. So use Visual Studio2015.
It should also be noted that not even Visual Studio 2015 has perfectC++11 support. Specifically, the larger and more complex imagenet and metriclearning training examples don't compile in Visual Studio 2015.
具体步骤如下:
1. 下载dlib-19.8源码,截止目前最新版本已经是dlib-19.9。
2. 下载cmake。我下载的是cmake-3.10.2-win64-x64.zip,解压后运行bin/cmake-gui.exe即可。
3. 下载安装cuda9.1。
4. 下载与cuda对应版本的cudnn。解压后为cuda文件夹。将cuda/bin和cuda/lib/x64以及cuda/include添加到环境变量Path中。
5. 将下载的dlib压缩包解压,我这里是G:\dlib-19.8。
6. 运行cmake-gui.exe。添加source code目录G:/dlib-19.8/dlib,生成目录G:/dlib-19.8/build
点击左下角configure。框中显示如下:
The C compiler identification is MSVC 19.0.24210.0
The CXX compiler identification is MSVC 19.0.24210.0
Check for working C compiler: C:/Program Files (x86)/Microsoft VisualStudio 14.0/VC/bin/x86_amd64/cl.exe
Check for working C compiler: C:/Program Files (x86)/Microsoft VisualStudio 14.0/VC/bin/x86_amd64/cl.exe -- works
Detecting C compiler ABI info
Detecting C compiler ABI info - done
Check for working CXX compiler: C:/Program Files (x86)/MicrosoftVisual Studio 14.0/VC/bin/x86_amd64/cl.exe
Check for working CXX compiler: C:/Program Files (x86)/MicrosoftVisual Studio 14.0/VC/bin/x86_amd64/cl.exe -- works
Detecting CXX compiler ABI info
Detecting CXX compiler ABI info - done
Detecting CXX compile features
Detecting CXX compile features - done
Looking for sys/types.h
Looking for sys/types.h - found
Looking for stdint.h
Looking for stdint.h - found
Looking for stddef.h
Looking for stddef.h - found
Check size of void*
Check size of void* - done
Enabling SSE2 instructions
Searching for BLAS and LAPACK
Searching for BLAS and LAPACK
Looking for pthread.h
Looking for pthread.h - not found
Found Threads: TRUE
A library with BLAS API not found. Please specify library location.
LAPACK requires BLAS
Found CUDA:C:/Program Files/NVIDIA GPU Computing Toolkit/CUDA/v9.1 (found suitable version"9.1", minimum required is "7.5")
Looking for cuDNN install...
Found cuDNN:G:/Deeplearning/cuda/lib/x64/cudnn.lib
Building a CUDA test project to see if your compiler is compatiblewith CUDA...
Checking if you have the right version of cuDNN installed.
Enabling CUDA support for dlib. DLIB WILL USE CUDA
表明CUDA可用。
下图中的第一项CMAKE_INSTALL_PREFIX,是lib和include文件生成路径,在这里将C盘路径改为了E盘,原因是编译时可能需要管理员权限而失败。下图中的最后一项DLIB_USE_CUDA,确保打上钩。如果不使用GPU,就将钩子去掉。
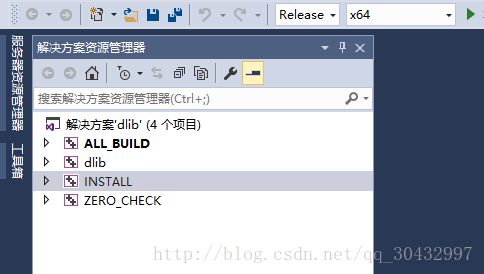
7. 点击左下角Generate,然后点击Open project打开解决方案。将配置和平台改为Release和×64,右键项目INSTALL生成。
生成完毕后,在第六步设置的目录得到include和lib文件夹。
8. 新建一个C++控制台空项目,添加一个例程cpp,这里加入的是dnn_metric_learning_on_images.cpp,训练人脸识别网络。同样将配置和平台改为Release和×64。
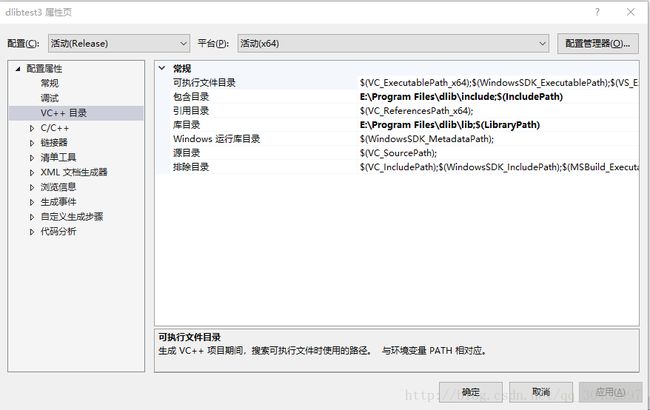
9. 右键项目-属性,包含目录和库目录设置为第七步生成的include和lib文件夹。
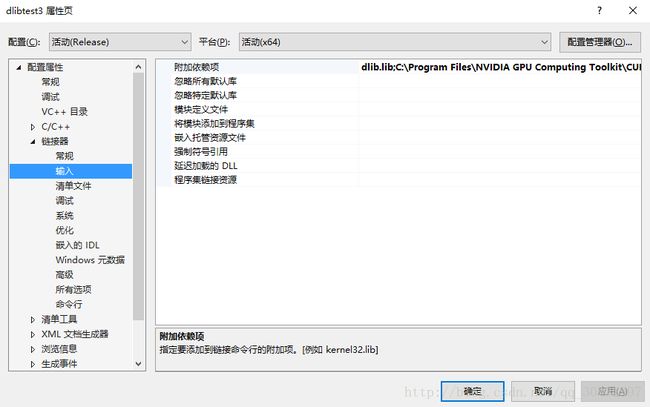
10. 设置附加依赖项,加入
dlib.lib
C:\Program Files\NVIDIA GPU ComputingToolkit\CUDA\v9.1\lib\x64\cudart_static.lib
C:\Program Files\NVIDIA GPU ComputingToolkit\CUDA\v9.1\lib\x64\cublas.lib
C:\Program Files\NVIDIA GPU ComputingToolkit\CUDA\v9.1\lib\x64\cublas_device.lib
C:\Program Files\NVIDIA GPU ComputingToolkit\CUDA\v9.1\lib\x64\curand.lib
C:\Program Files\NVIDIA GPU ComputingToolkit\CUDA\v9.1\lib\x64\cusolver.lib
G:\Deeplearning\cuda\lib\x64\cudnn.lib
依自己的cuda和cudnn目录修改
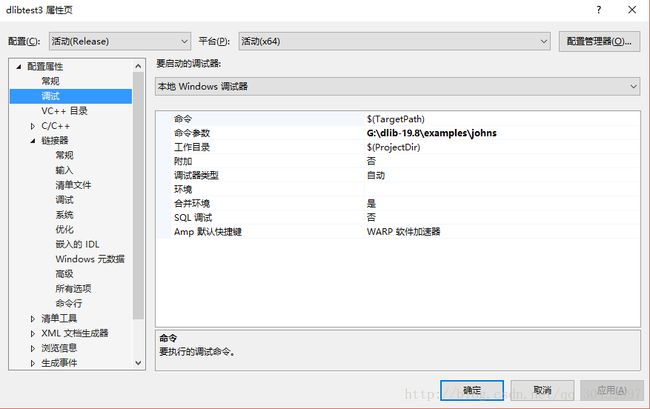
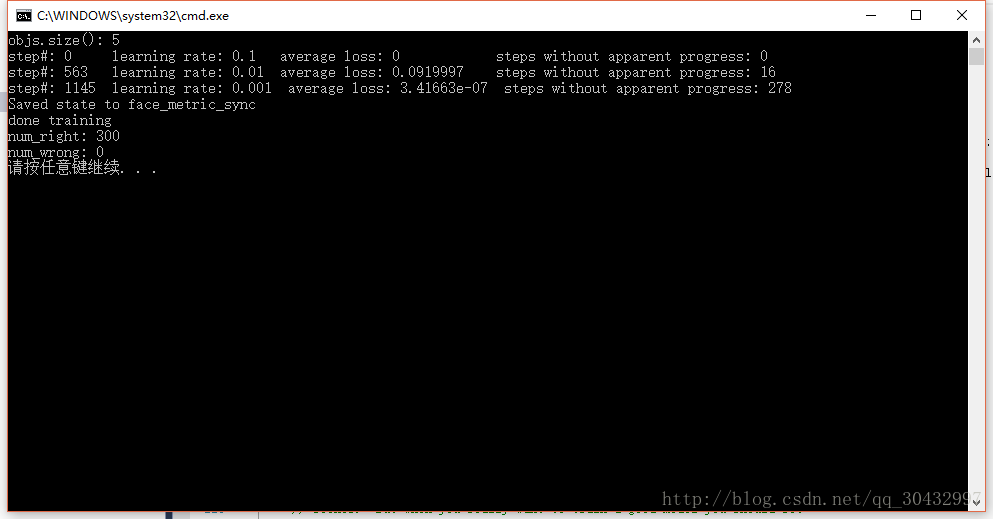
11. 在调试中加入命令参数,为训练图片的文件夹。然后开始执行。
训练速度非常快,用CPU训练几十个小时的过程在GPU只需几分钟!! !

