Harbor私有仓库搭建并配置本地自签名证书
Harbor私有仓库搭建并配置本地自签名证书
- Harbor私有镜像仓库搭建
- 1.harbor介绍
- 2.docker-ce安装
- 3.安装docker-compose
- 4.Harbor私有仓库的安装
- 5.生成本地自签名证书
- 6.为harbor生成配置文件
- 7.启动Harbor
- 8.测试
Harbor私有镜像仓库搭建
1.harbor介绍
Docker容器应用的开发和运行离不开可靠的镜像管理,虽然Docker官方也提供了公共的镜像仓库,但是从安全和效率等方面考虑,部署我们私有环境内的Registry也是非常必要的。Harbor是由VMware公司开源的企业级的Docker Registry管理项目,它包括权限管理(RBAC)、LDAP、日志审核、管理界面、自我注册、镜像复制和中文支持等功能。
2.docker-ce安装
Step 1:安装一些必要的系统工具
yum install -y yum-utils device-mapper-persistent-data lvm2
Step 2:添加docker镜像源
yum-config-manager --add-repo http://mirrors.aliyun.com/docker-ce/linux/centos/docker-ce.repo
Step 3: 安装 Docker-CE
yum -y install docker-ce
Step 4: 开启Docker服务
systemctl start docker.server
3.安装docker-compose
curl -L https://github.com/docker/compose/releases/download/1.18.0/docker-compose-`uname -s`-`uname -m` -o /usr/local/bin/docker-compose
chmod +x /usr/local/bin/docker-compose
#查看版本
docker-compose version
4.Harbor私有仓库的安装
从 github harbor 官网 release 页面下载指定版本的安装包。
#推荐使用第二种,因为第一种在线安装可能由于官网源的网络波动导致安装失败。
1、在线安装包
wget https://github.com/vmware/harbor/releases/download/v1.1.2/harbor-online-installer-v1.1.2.tgz
tar xvf harbor-online-installer-v1.1.2.tgz
2、离线安装包
wget https://github.com/vmware/harbor/releases/download/v1.1.2/harbor-offline-installer-v1.1.2.tgz
tar xvf harbor-offline-installer-v1.1.2.tgz
配置harbor
cd harbor && vim harbor.cfg
修改如下内容
## Configuration file of Harbor
...
#DO NOT use localhost or 127.0.0.1, because Harbor needs to be accessed by external clients.
# 这里是访问地址
hostname = 192.168.50.84

#The protocol for accessing the UI and token/notification service, by default it is http.
#It can be set to https if ssl is enabled on nginx.
# 设置https访问
ui_url_protocol = https

...
#修改默认密码
#Change the admin password from UI after launching Harbor.
harbor_admin_password = qiyuesuo&harbor
启动harbbor
docker-compose up -d
5.生成本地自签名证书
因为harbor使用的是基于官方registy:v2,官方默认使用https,否则无法进行正常的login,pull和push操作
Step1:创建证书存放目录
mkdir -p /data/cert && cd /data/cert
Step2:创建自己的CA证书(不使用第三方权威机构的CA来认证)
openssl genrsa -out ca.key 2048 #生成根证书私钥(无加密)
Step3: 生成自签名证书(使用已有私钥ca.key自行签发根证书)
openssl req -x509 -new -nodes -key ca.key -days 10000 -out ca.crt -subj "/CN=Harbor-ca"

req     产生证书签发申请命令
-x509   签发X.509格式证书命令。X.509是最通用的一种签名证书格式。
-new    生成证书请求
-key     指定私钥文件
-nodes   表示私钥不加密
-out    输出
-subj    指定用户信息
-days    有效期
Step4:生成服务器端私钥和CSR签名请求
openssl req -newkey rsa:4096 -nodes -sha256 -keyout server.key -out server.csr
Step5:签发服务器证书
echo subjectAltName = IP:192.168.88.128 > extfile.cnf
openssl x509 -req -in server.csr -CA ca.crt -CAkey ca.key -CAcreateserial -days 365 -extfile extfile.cnf -out server.crt
x509           签发X.509格式证书命令。
-req           表示证书输入请求。
-days          表示有效天数
-extensions    表示按OpenSSL配置文件v3_req项添加扩展。
-CA            表示CA证书,这里为ca.crt
-CAkey         表示CA证书密钥,这里为ca.key
-CAcreateserial表示创建CA证书序列号
-extfile      指定文件
Step6:设置docker证书
# 如果如下目录不存在,请创建,如果有域名请按此格式依次创建
mkdir -p /etc/docker/certs.d/192.168.50.84
# mkdir -p /etc/docker/certs.d/[IP2]
# mkdir -p /etc/docker/certs.d/[example1.com]
# 如果端口为443,则不需要指定。如果为自定义端口,请指定端口
# /etc/docker/certs.d/yourdomain.com:port

# 将ca根证书依次复制到上述创建的目录中
cp ca.crt /etc/docker/certs.d/192.168.50.84/
6.为harbor生成配置文件
#首先重启下docker
service docker restart
#为Harbor生成配置文件
./prepare
7.启动Harbor
docker-compose up -d
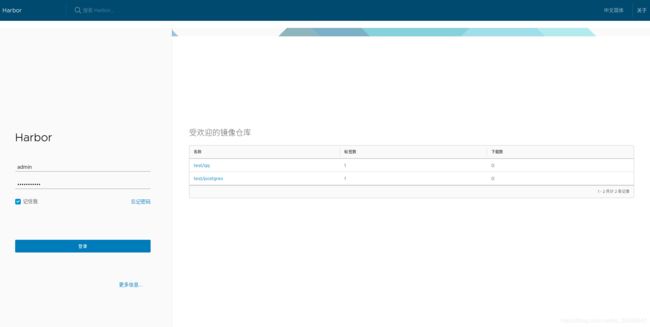
访问:192.168.50.84:80进入登录页面(在docker-compose.yml文件中修改端口)

8.测试
Step1:登录192.168.50.84,创建项目test
Step2:push
#1.admin登录
docker login 192.168.50.84
Username:admin
Password:
Login Succeeded
#2.给镜像打tag
docker tag postgres:9.4 192.168.50.84/test/postgres:test
#3.push
docker push  192.168.50.84/test/postgres:test
