C#函数实现窗体圆角
备注:Visual Studio使用的是2013版本
1、新建窗体应用程序
2、窗体Text默认为Form1,双击窗体,跳转到后台代码
3、添加自定义函数Type(),此函数为实现窗体边框圆角的函数
(1)代码:
private void Type(Control sender, int p_1, double p_2)//圆角函数
{
GraphicsPath oPath = new GraphicsPath();
oPath.AddClosedCurve(
new Point[] {
new Point(0, sender.Height / p_1),
new Point(sender.Width / p_1, 0),
new Point(sender.Width - sender.Width / p_1, 0),
new Point(sender.Width, sender.Height / p_1),
new Point(sender.Width, sender.Height - sender.Height / p_1),
new Point(sender.Width - sender.Width / p_1, sender.Height),
new Point(sender.Width / p_1, sender.Height),
new Point(0, sender.Height - sender.Height / p_1) },
(float)p_2);
sender.Region = new Region(oPath);
}
(2)效果
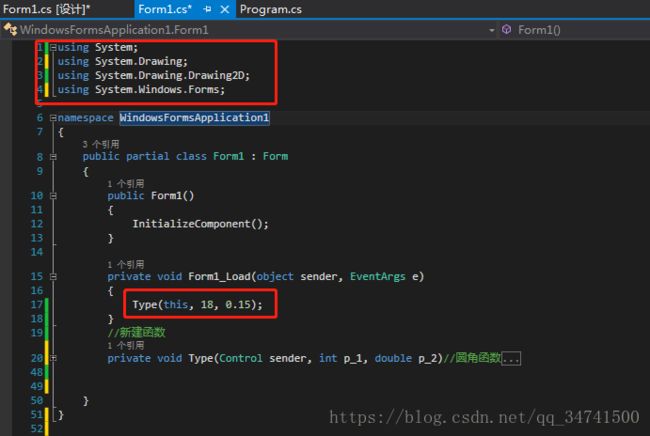
4、需要引用GraphicsPath 对象的命名空间,添加方式
1)在命名空间添加代码“using System.Drawing.Drawing2D;”
2)鼠标放在GraphicsPath,右键—解析—选择“using System.Drawing.Drawing2D”
3)Alt+Shift+F10,enter,选择后添加(推荐这一种,毕竟命名空间太长了)
4)鼠标放于GraphicsPath报错的红线左侧,靠近蓝色小横线后出现小图标,点击图标,选择对应命名空间
小技巧:如果有其他多余的命名空间,想要去掉多余的代码,可以将鼠标放到随意一个命名空间,鼠标右键—“组织using(O)”—移除和排序(A),就可以去掉多余的命名空间。
5、Form1_Load()中调用自定义函数Type(),添加代码,“Type(this, 18, 0.15);”,函数的三个参数可以自行设置
6、F5调试,效果如下
7、效果看起来不是很美观,不要紧。一般圆角函数大都是和无边框窗体(扁平化)效果一起实现。实现窗体无边框效果,可以查看:https://blog.csdn.net/qq_34741500/article/details/82828887


