SpringBoot连接数据库SQL语句编写(注解与配置文件)
首先我们需要进行一些配置,让项目可以连接我们的数据库(这里我数据库用的mySql)
1、引入jar
            org.mybatis.spring.boot
            mybatis-spring-boot-starter
            2.0.1


            mysql
            mysql-connector-java
            8.0.16


            com.alibaba
            druid
            1.1.16
2、配置properties文件
#配置数据库信息
#配置数据库驱动名称
spring.datasource.driver-class-name=com.mysql.jdbc.Driver
#JDBC连接的URL
spring.datasource.url=jdbc:mysql://localhost:3306/muzi?serverTimezone=GMT%2B8&useUnicode=true&characterEncoding=UTF-8
#配置数据库账号及密码
spring.datasource.username=root
spring.datasource.password=muzi

#数据源druid
spring.datasource.type=com.alibaba.druid.pool.DruidDataSource

#为我们定义的实体类文件夹下的实体类自动起别名
mybatis.type-aliases-package=com.muzi.book.Pojo


#开启驼峰命名
mybatis.configuration.map-underscore-to-camel-case=true
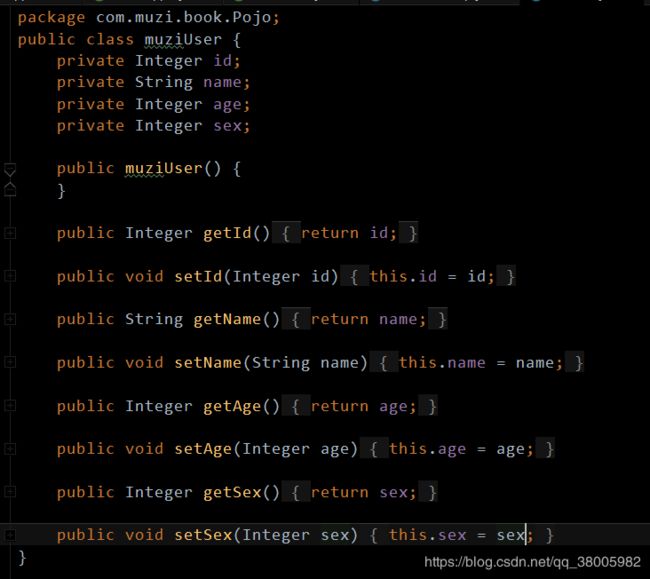
3、数据库建表,以及创建对象实体类
//==============================================================================//
4、接下来我们先编写注解的方法
mapper:
import org.apache.ibatis.annotations.Mapper;
import org.apache.ibatis.annotations.Select;

@Mapper    //必须要声明的,不然系统不知道这个类是作为底层交互的
public interface UserMapper {
    @Select("insert into muzi_user(name,age,sex) values (#{name},#{age},#{sex})")
    void insertUser(String name,int age ,int sex);
}
Service:
package com.muzi.book.Service;

import com.muzi.book.Pojo.muziUser;

public interface UserService {
    void insertUser(muziUser muziUser);
}
ServiceImpl:
package com.muzi.book.Service.ServiceImpl;

import com.muzi.book.Pojo.muziUser;
import com.muzi.book.Service.UserService;
import com.muzi.book.mapper.UserMapper;
import org.springframework.beans.factory.annotation.Autowired;
import org.springframework.stereotype.Service;

@Service    //必须声明的,不然系统不知道此为逻辑层
public class UserServiceImpl implements UserService {
    @Autowired
    private UserMapper userMapper;

    @Override
    public void insertUser(muziUser muziUser) {
        userMapper.insertUser(muziUser.getName(),muziUser.getAge(),muziUser.getSex());
    }
}
Controller:
package com.muzi.book.Controller;

import com.muzi.book.Pojo.muziUser;
import com.muzi.book.Service.UserService;
import org.springframework.beans.factory.annotation.Autowired;
import org.springframework.stereotype.Controller;
import org.springframework.web.bind.annotation.RequestMapping;

@Controller
@RequestMapping("/user")
public class UserController {
    @Autowired
    private UserService userService;

    /**
     * 跳转到用户注册页面
     */
    @RequestMapping("/showUser")
    public String showUser(){
        muziUser muziUser=new muziUser();
        muziUser.setAge(4);
        muziUser.setName("4");
        muziUser.setSex(4);
        userService.insertUser(muziUser);
        return null;
    }
}
我新写了一个项目用于测试:
结果:插入成功
//==============================================================================//
//==============================================================================//
//==============================================================================//
接下来进行配置文件的编写
只需要改动mapper即可
1、首先我们修改mapper的注解,将sql注解语句删除
package com.muzi.book.mapper;


import org.apache.ibatis.annotations.Mapper;
import org.apache.ibatis.annotations.Select;

@Mapper
public interface UserMapper {
    //@Select("insert into muzi_user(name,age,sex) values (#{name},#{age},#{sex})")
    void insertUser(String name,int age ,int sex);
}
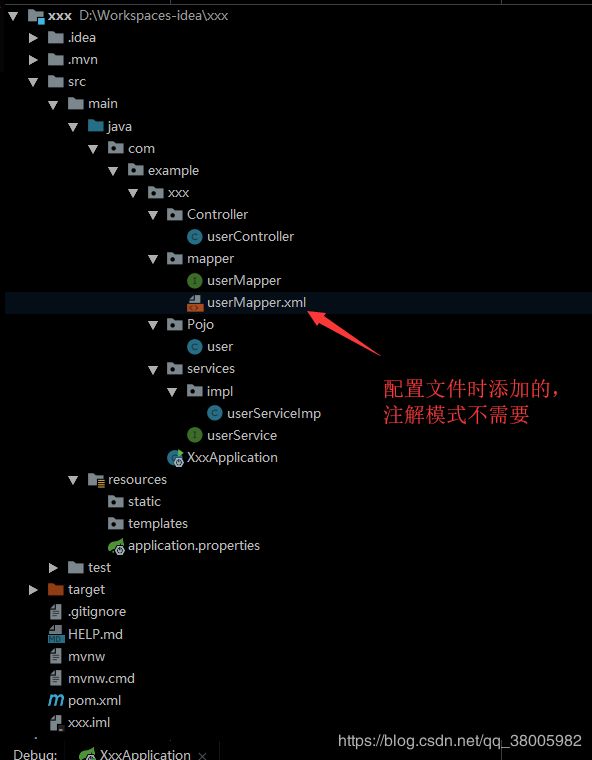
2、我们删除了注解模式就需要引入配置文件模式,在mapper下创建一个配置文件.xml
请注意parameterType定义的是类的路径,因为我在properties中定义好了mybatis.type-aliases-package所以只需要写类名就好,系统会自动拼接
insert into muzi_user(name,age,sex) values (#{name},#{age},#{sex})
3、如果报错无法找到xxxx的配置文件,优先检查自己的xml配置的路径,文件名等是否不一致,如果确定一致请参考:
https://blog.csdn.net/qq_38005982/article/details/90375414
4、数据库插入成功


