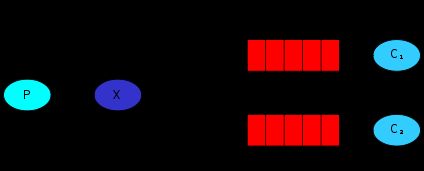
SpringBoot整合RabbitMQ——Topic交换机
文章目录
- SpringBoot整合RabbitMQ——Topic交换机
- 前言
- 简介
- 依赖
- application.yml配置
- 消息生产者(发送端)配置,端口9002
- 消费者(接收端)配置,端口8003
- 消息生产者(发送端)
- SendConfig.java配置信息
- Controller层
- Service层
- 消费者(接收端)
- 测试
- 代码地址
- 参考
SpringBoot整合RabbitMQ——Topic交换机
前言
使用SpringBoot对RabbitMQ进行整合,模拟生产者服务器(9002)向消费者服务器(8003)发送消息的过程,消息生产者通过接受Http请求向消息队列发送消息(Controller层、Service层),接收端则直接监听队列接收消息。这里的Demo分别设置有三个接口,每个接口向不同绑定路由规则的队列发送消息,观察消费者端接收情况。
关于RabbitMQ的搭建及搭建中常见的问题参考连接:RabbitMQ搭建及问题
简介
Topic交换机与Direct相似,通过与交换机绑定队列的路由键进行消息分发。不同的是Topic可以通过使用通配符( * 和 #)将消息分发到一个或者多个队列当中
| 通配符 | 说明 | 示例 |
|---|---|---|
| * | 匹配一个或多个内容 | bigdata. * 可以匹配到bigdata.spark或者 bigdata.hadoop.hive等 |
| # | 匹配一个内容 | bigdata.# 只能匹配到bigdata.spark或者bigdata.hadoop |
依赖
在pom.xml文件中添加依赖,主要是springboot中web和amqp的starter
<parent>
        <groupId>org.springframework.bootgroupId>
        <artifactId>spring-boot-starter-parentartifactId>
        <version>2.1.0.RELEASEversion>
    parent>

    <dependencies>
        <dependency>
            <groupId>org.springframework.bootgroupId>
            <artifactId>spring-boot-starterartifactId>
        dependency>
        <dependency>
            <groupId>org.springframework.bootgroupId>
            <artifactId>spring-boot-starter-webartifactId>
        dependency>
        <dependency>
            <groupId>org.springframework.bootgroupId>
            <artifactId>spring-boot-starter-amqpartifactId>
        dependency>
    dependencies>
application.yml配置
消息生产者(发送端)配置,端口9002
server:
  port: 9002
spring:
  application:
    name: topic-sender
  rabbitmq:
    username: admin
    password: admin
    host: 192.168.108.128
    port: 5672
消费者(接收端)配置,端口8003
server:
  port: 8003
spring:
  application:
    name: topic-receiver
  rabbitmq:
    username: admin
    password: admin
    host: 192.168.108.128
    port: 5672
消息生产者(发送端)
SendConfig.java配置信息
在配置信息中创建三个队列分别为topic.queue.1、topic.queue.2、topic.queue.3,并且绑定到交换机上的路由键分别为topic.message.rabbit、topic.message.*、topic.#
@Component
public class SendConfig {
    public static final String TOPIC_QUEUE_1 = "topic.queue.1";
    public static final String TOPIC_QUEUE_2 = "topic.queue.2";
    public static final String TOPIC_QUEUE_3 = "topic.queue.3";
    public static final String TOPIC_EXCHANGE = "topic.exchange";
    public static final String TOPIC_ROUTING_KEY_1 = "topic.message.rabbit";
    public static final String TOPIC_ROUTING_KEY_2 = "topic.message.*";
    public static final String TOPIC_ROUTING_KEY_3 = "topic.#";

    @Bean
    public Queue queue1() {
        return new Queue(TOPIC_QUEUE_1);
    }

    @Bean
    public Queue queue2() {
        return new Queue(TOPIC_QUEUE_2);
    }

    @Bean
    public Queue queue3() {
        return new Queue(TOPIC_QUEUE_3);
    }

    @Bean
    public TopicExchange topicExchange() {
        return new TopicExchange(TOPIC_EXCHANGE);
    }

    @Bean
    public Binding binding1() {
        return BindingBuilder.bind(queue1()).to(topicExchange()).with(TOPIC_ROUTING_KEY_1);
    }

    @Bean
    public Binding binding2() {
        return BindingBuilder.bind(queue2()).to(topicExchange()).with(TOPIC_ROUTING_KEY_2);
    }

    @Bean
    public Binding binding3() {
        return BindingBuilder.bind(queue3()).to(topicExchange()).with(TOPIC_ROUTING_KEY_3);
    }

}
Controller层
demo中有三个接口发送消息,分别发送消息到三个不同的路由键上,用于观察哪些接收端接收到了对应消息
@RestController
@RequestMapping("/topic")
public class SendController {
    @Autowired
    private TopicService topicService;

    @GetMapping("/send1/{msg}")
    public void send1(@PathVariable String msg) {
        topicService.send1(msg);
    }

    @GetMapping("/send2/{msg}")
    public void send2(@PathVariable String msg) {
        topicService.send2(msg);
    }

    @GetMapping("/send3/{msg}")
    public void send3(@PathVariable String msg) {
        topicService.send3(msg);
    }
}
Service层
- send1方法发送信息到路由键topic.message.rabbit
- send2方法发送信息到路由键topic.message.kafka
- send3方法发送信息到路由键topic
@Service
public class TopicServiceImpl implements TopicService {
    @Autowired
    private RabbitTemplate rabbitTemplate;

    @Override
    public void send1(String msg) {
        System.out.println("路由键 topic.message.rabbit 发送消息:"+msg);
        rabbitTemplate.convertAndSend(SendConfig.TOPIC_EXCHANGE, "topic.message.rabbit", msg);
    }

    @Override
    public void send2(String msg) {
        System.out.println("路由键 topic.message.kafka 发送消息:"+msg);
        rabbitTemplate.convertAndSend(SendConfig.TOPIC_EXCHANGE, "topic.message.kafka", msg);
    }

    @Override
    public void send3(String msg) {
        System.out.println("路由键 topic 发送消息:"+msg);
        rabbitTemplate.convertAndSend(SendConfig.TOPIC_EXCHANGE, "topic", msg);
    }
}
消费者(接收端)
@Component
public class TopicReceive {

    @RabbitListener(queues = "topic.queue.1")
    public void receiveTopic1(String msg) {
        System.out.println("topic.queue.1 接收到数据:" + msg);
    }

    @RabbitListener(queues = "topic.queue.2")
    public void receiveTopic2(String msg) {
        System.out.println("topic.queue.2 接收到数据:" + msg);
    }

    @RabbitListener(queues = "topic.queue.3")
    public void receiveTopic3(String msg) {
        System.out.println("topic.queue.3 接收到数据:" + msg);
    }
}
测试
1.调用接口send1,发送到路由键topic.message.rabbit
http://127.0.0.1:9002/topic/send1/topic
控制台信息:

可以看到三个队列均接收到了信息
2.调用接口send2,发送到路由键topic.message.kafka
http://127.0.0.1:9002/topic/send2/topic
只有队列2和队列3接收到数据
3.调用接口send3,发送到路由键topic
http://127.0.0.1:9002/topic/send3/topic
代码地址
RabbitDemo代码
参考
初识RabbitMQ——AMQP 0-9-1
RabbitMQ——RabbitMQ搭建及问题
SpringBoot整合RabbitMQ——Direct交换机
SpringBoot整合RabbitMQ——Fanout交换机
SpringBoot整合RabbitMQ——Headers交换机


