使用tensorflow实现深度卷积生成对抗网络,并使用DCGAN 生成手写数字(超详细)
本文继上一篇文章继续研究深度卷积生成对抗网络(DCGAN) ,本文主要讲解实现细节,使用 DCGAN 实现手写数字生成任务,通过这一个例子,读者可以进一步巩固上一篇博客所讲内容,同时对生成对抗网络会有更加详细的认识。
完整项目代码在本人github上面已经开源,具体用法可以参见本人github
完整参考代码可查看 这里
效果展示
使用如下超参数训练 1000次:
batch_size=128     训练时候的批次大小,默认是128
learning_rate=0.002     默认是0.002
img_sizet=32    生成图片的大小(和训练图片的大小保持一致)
z_dim=100       输入生成器的随机向量的大小,默认是100
g_channels=[128,64,32,1]     生成器的通道数目变化列表,用于构建生成器结构
d_channels=[32,64,128,256]      判别器的通道树木变化列表,用来构建判别器
init_conv_size=4        随机向量z经过全连接之后进行reshape 生成三维矩阵的初始边长,默认是 4
beta1=0.5       AdamOptimizer 指数衰减率估计,默认是0.5
中间结果展示:
训练200次:
生成图片:

真实图片:
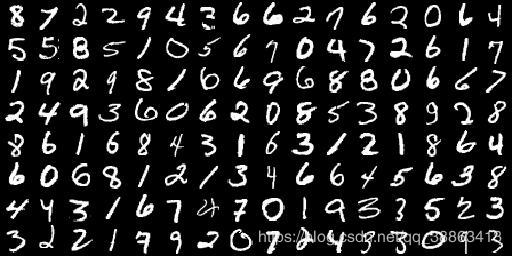
训练500次:
生成图片:
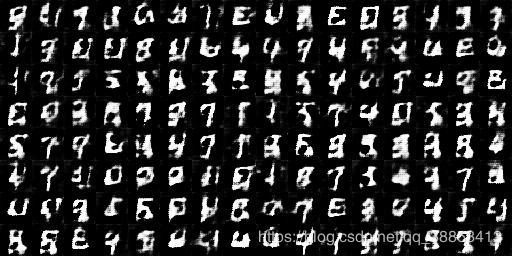
真实图片:
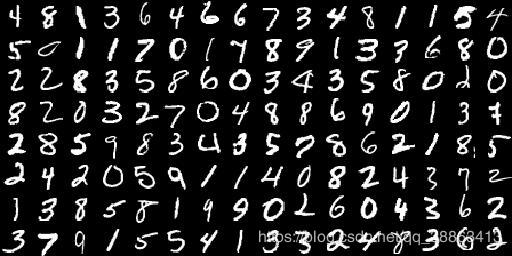
训练1000次:
生成图片:
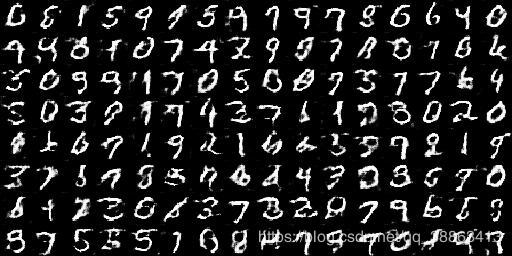
真实图片:
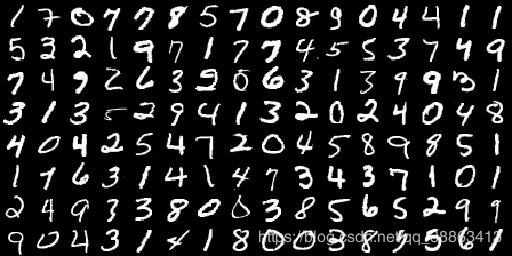
训练3500次:
生成图片:
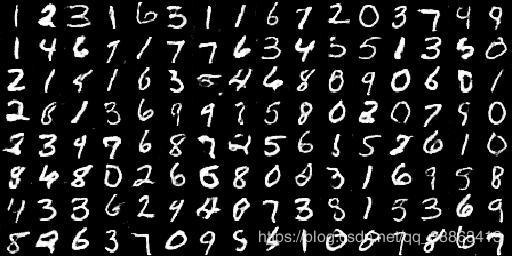
真实图片:
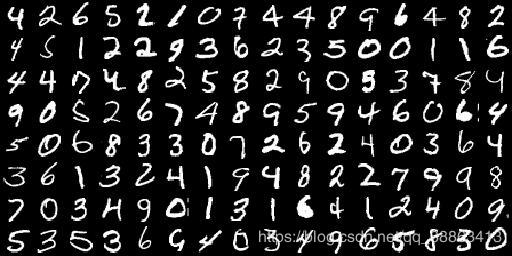
训练5000次:
生成图片:

真实图片:
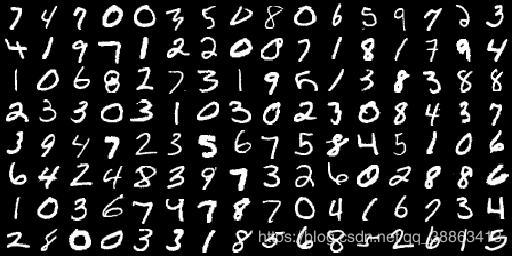
可以看到的是训练 5000 次之后生成的图片和真实的图片已经非常像。
加载训练用的数据集
因为要生成手写数字,则首先需要一个手写数字的数据集来训练GAN,这里使用常见的快被用烂了的MNIST数据集,下面是加载数据集的工具文件:
dataset_loader.py
"""
create by qianqianjun
2019.12.19
"""
import os
import struct
import numpy as np

def load_mnist(path,train=True):
    """
    加载mnist 数据集的函数
    :param path:  数据集的位置
    :param train:  是否加载训练数据,是返回train 用的image和lable,否则返回test用的images和label
    :return: 返回训练或者测试用的images 和 labels
    """
    def get_urls(files,type='train'):
        """
        获取训练数据或者测试数据的二进制文件地址
        :param files:  读取的数据集目录文件列表
        :param type:  训练或者测试标识
        :return:  返回二进制文件的完整地址
        """
        images_path = None
        labels_path = None
        for file in files:
            if file.find(type) != -1:
                if file.find("images") != -1:
                    images_path = os.path.join(path, file)
                else:
                    labels_path = os.path.join(path, file)

        if images_path == None or labels_path == None:
            raise Exception("请检查数据集!")
        return images_path,labels_path
    def load_data_and_label(data_path,label_path):
        """
        加载训练或者测试数据的lable 和 data
        :param data_path:  训练或者测试图片数据的二进制文件地址
        :param label_path:  训练或者测试label数据的二进制文件地址
        :return:  返回读取的图片 和 label 的 ndarray 数组
        """
        images = None
        labels = None
        with open(label_path,'rb') as label_file:
            struct.unpack('>II', label_file.read(8))
            labels=np.fromfile(label_file,dtype=np.uint8)
        with open(data_path,'rb') as img_file:
            struct.unpack('>IIII', img_file.read(16))
            images=np.fromfile(img_file,dtype=np.uint8).reshape(len(labels),784)
        return images,labels

    # 查看数据集文件夹中有多少文件。
    files = os.listdir(path)
    if train:
        data_path,label_path=get_urls(files,type='train')
        return load_data_and_label(data_path,label_path)
    else:
        data_path,label_path=get_urls(files,type='t10k')
        return load_data_and_label(data_path, label_path)

# 读取训练用的图片数据和训练用的labels 标签
train_images,train_labels=load_mnist("./MNIST",train=True)
# 读取测试用的图片数据和测试用的labels 标签
test_images,test_labels=load_mnist("./MNIST",train=False)
数据集provider工具
这一个文件主要用来在训练的时候分批次的取数据,对数据集进行打乱,洗牌工作,防止模型学习到数据之间的顺序关联。
data_provider.py
"""
write by qianqianjun
2019.12.20
"""
import numpy as np
from PIL import Image
class MnistData(object):
    def __init__(self,images_data,z_dim,img_size):
        """
        建立一个data provider
        :param images_data:  传进来的图像数据的集合
        :param z_dim:  生成器输入的随机向量的长度
        :param img_size:  传进来的图像的大小
        """
        self._data=images_data
        self.images_num=len(self._data)
        # 生成随机向量的矩阵,为每一张图像都生成一个随机向量。
        self._z_data=np.random.standard_normal((self.images_num,z_dim))
        self._offset=0
        self.init_mnist(img_size)
        self.random_shuffer()

    def random_shuffer(self):
        """
        数据集进行打乱操作,防止模型学习到训练数据之间的顺序性质
        :return:
        """
        p=np.random.permutation(self.images_num)
        self._z_data=self._z_data[p]
        self._data=self._data[p]

    def init_mnist(self,img_size):
        """
        调整数据集到指定的shape
        :param img_size: 指定大小的边长
        :return:
        """
        # 将训练数据进行resize,使其成为图片
        data=np.reshape(self._data,(self.images_num,28,28))
        new_data=[]
        for i in range(self.images_num):
            img=data[i]
            # 使用PIL 进行图像缩放变换
            img=Image.fromarray(img)
            img=img.resize((img_size,img_size))
            img=np.asarray(img)
            # 将图片转换为有通道的形式方便训练(3维矩阵,只有一个通道)
            img=img.reshape((img_size,img_size,1))
            new_data.append(img)
        # 将列表转换为 ndarray
        new_data=np.asarray(new_data,dtype=np.float32)
        # 对图像数据进行归一化,方便训练
        new_data=new_data / 127.5 -1
        # 更新数据
        self._data=new_data
    def next_batch(self,batch_size):
        """
        用来分批次的取数据
        :param batch_size:  每一批取数据的个数
        :return:  返回一批数据和一批随机向量
        """
        if batch_size> self.images_num:
            raise Exception("batch size is more than train images amount!")
        end_offset=self._offset+batch_size
        if end_offset >self.images_num:
            self.random_shuffer()
            self._offset=0
            end_offset=self._offset+batch_size

        # 取出一批数据和一批随机向量。
        batch_data=self._data[self._offset:end_offset]
        batch_z=self._z_data[self._offset:end_offset]
        self._offset=end_offset
        return batch_data,batch_z
定义生成器结构
generator.py
"""
write by qianqianjun
2019.12.19
生成器模型实现
"""
import tensorflow as tf
def conv2d_transpose(inputs,out_channel,name,training,with_bn_relu=True):
    """
    反卷积的封装
    :param inputs:
    :param output_channel: 输出通道数目
    :param name: 名字
    :param training: bool类型 ,指示是否在训练
    :param with_bn_relu: 是否需要使用 batch_normalization
    :return: 反卷积之后的矩阵
    """
    with tf.variable_scope(name):
        conv2d_trans = tf.layers.conv2d_transpose(
            inputs, out_channel, [5, 5],
            strides=(2, 2),
            padding='SAME'
        )
        if with_bn_relu:
            bn = tf.layers.batch_normalization(conv2d_trans, training=training)
            return tf.nn.relu(bn)
        else:
            return conv2d_trans

class Generator(object):
    def __init__(self,channels,init_conv_size):
        """
        创建生成器模型
        :param channels: 生成器反卷积过程中使用的通道数 数组
        :param init_conv_size:  使用的卷积核大小
        """
        self._channels = channels
        self._init_conv_size = init_conv_size
        self._reuse = False
    def __call__(self, inputs,training):
        """
        一个魔法函数,用来将对象当函数使用
        :param inputs: 输入的随机向量矩阵,shape 为 【batch_size ,z_dim]
        :param training:  是否是训练过程
        :return: 返回生成的图像
        """
        inputs=tf.convert_to_tensor(inputs)
        with tf.variable_scope('generator',reuse=self._reuse):
            """
            下面代码实现的转换是: random vector-> fc全连接层->
            self.channels[0] * self._init_conv_size **2 ->
            reshpe -> [init_conv_size,init_conv_size,self.channels[0] ]
            """
            with tf.variable_scope("input_conv"):
                fc=tf.layers.dense(
                    inputs,
                    self._channels[0] * (self._init_conv_size **2 )
                )
                conv0=tf.reshape(fc,[-1,self._init_conv_size,
                                     self._init_conv_size,self._channels[0]])

                bn0=tf.layers.batch_normalization(conv0,training=training)
                relu0=tf.nn.relu(bn0)

            # 经过全连接和BN归一化和 relu 激活,可以看做是某一个卷积层的输出
            # 下面就可以进行反卷积操作了。
            deconv_inputs=relu0
            # 构建 decoder 网络层
            for i in range(1,len(self._channels)):
                with_bn_relu=(i!=len(self._channels)-1)
                deconv_inputs=conv2d_transpose(
                    deconv_inputs,
                    self._channels[i],
                    "deconv-%d" % i,
                    training,
                    with_bn_relu=with_bn_relu)
            img_inputs=deconv_inputs
            with tf.variable_scope('generate_imgs'):
                imgs=tf.tanh(img_inputs,name='imgs')

        self.reuse=True
        self.variables=tf.get_collection(tf.GraphKeys.TRAINABLE_VARIABLES,
                                         scope='generator')
        return imgs
判别器实现
discriminator.py
"""
write by qianqianjun
2019.12.20
判别器简单实现
"""
import tensorflow as tf
def conv2d(inputs,output_channel,name,training):
    """
    卷积操作的封装
    :param inputs: 输入的图像或者feature map
    :param output_channel:  输出feature map 的channel 数目
    :param name:  varibale_scope 名称
    :param training:  是否是训练过程。
    :return:  返回经过卷积层之后的结果
    """
    def leaky_relu(x,leak=0.2,name=''):
        return tf.maximum(x,x*leak,name=name)

    with tf.variable_scope(name):
        conv2d_output=tf.layers.conv2d(
            inputs,output_channel,
            [5,5],strides=(2,2),
            padding='SAME'
        )
        bn=tf.layers.batch_normalization(conv2d_output,training=training)
        return leaky_relu(bn,name='outputs')

class Discriminator(object):
    def __init__(self,channels):
        """
        创建判别器模型结构
        :param channels:  输出通道数目
        """
        self._channels=channels
        self._reuse=False
    def __call__(self,inputs,training):
        """
        使用判别器输出判别的结果,
        :param inputs:  输入的batch_images data
        :param training:  是否在训练。
        :return:
        """
        inputs=tf.convert_to_tensor(inputs,dtype=tf.float32)
        conv_inputs=inputs
        with tf.variable_scope('discriminator',reuse=self._reuse):
            # 根据卷积通道数组来建立卷积神经网络结构:
            for i in range(len(self._channels)):
                conv_inputs=conv2d(conv_inputs,self._channels[i],
                                   'conv-%d'%i,
                                   training=training)
            fc_inputs=conv_inputs
            # 将卷积神经网络输出的 feature map 展平并进行全连接。
            with tf.variable_scope('fc'):
                flatten=tf.layers.flatten(fc_inputs)
                # 全连接输出大小为 2
                # 其实可以理解为一个分类的问题,真图片还是假图片,一共两类。
                logits=tf.layers.dense(flatten,2,name='logits')
        self._reuse=True
        self.variables=tf.get_collection(tf.GraphKeys.TRAINABLE_VARIABLES,
                                         scope='discriminator')
        return logits
定义DCGAN网络架构
DCGAN.py
"""
write by qianqianjun
2019.12.20
DCGAN 网络架构实现
"""
from generator import Generator
from discriminater import Discriminator
import tensorflow as tf
class DCGAN(object):
    def __init__(self,hps):
        """
        建立一个DCGAN的网络架构
        :param hps:  网络的所有超参数的集合
        """
        g_channels=hps.g_channels
        d_channels=hps.d_channels
        self._batch_size=hps.batch_size
        self._init_conv_size=hps.init_conv_size
        self._z_dim=hps.z_dim
        self._img_size=hps.img_size
        self._generator=Generator(g_channels,self._init_conv_size)
        self._discriminator=Discriminator(d_channels)

    def build(self):
        """
        构建整个计算图
        :return:
        """
        # 创建随机向量和图片的占位符
        self._z_placeholder=tf.placeholder(tf.float32,
                                           (self._batch_size,self._z_dim))
        self._img_placeholder=tf.placeholder(tf.float32,
                                             (self._batch_size,
                                              self._img_size,
                                              self._img_size,1))
        # 将随机向量输入生成器生成图片
        generated_imgs=self._generator(self._z_placeholder,training=True)

        # 将来生成的图片经过判别器来得到 生成图像的logits
        fake_img_logits=self._discriminator(
            generated_imgs,training=True
        )
        # 将真实的图片经过判别器得到真实图像的 logits
        real_img_logits=self._discriminator(
            self._img_placeholder,training=True
        )

        """
        定义损失函数
        包括生成器的损失函数和判别器的损失函数。
        生成器的目的是使得生成图像经过判别器之后尽量被判断为真的
        判别器的目的是使得生成器生成的图像被判断为假的,同时真实图像经过判别器要被判断为真的
        """

        ## 生层器的损失函数,只需要使得假的图片被判断为真即可
        fake_is_real_loss=tf.reduce_mean(
            tf.nn.sparse_softmax_cross_entropy_with_logits(
                labels=tf.ones([self._batch_size],dtype=tf.int64),
                logits=fake_img_logits
            )
        )

        ## 判别器的损失函数,只需要使得生成的图像被判断为假的,真实的图像被判断为真的即可
        # 真的被判断为真的:
        real_is_real_loss=tf.reduce_mean(
            tf.nn.sparse_softmax_cross_entropy_with_logits(
                labels=tf.ones([self._batch_size],dtype=tf.int64),
                logits=real_img_logits
            )
        )
        # 假的被判断为假的:
        fake_is_fake_loss=tf.reduce_mean(
            tf.nn.sparse_softmax_cross_entropy_with_logits(
                labels=tf.zeros([self._batch_size],dtype=tf.int64),
                logits=fake_img_logits
            )
        )

        # 将损失函数集中管理:
        tf.add_to_collection('g_losses',fake_is_real_loss)
        tf.add_to_collection('d_losses',real_is_real_loss)
        tf.add_to_collection('d_losses',fake_is_fake_loss)

        loss={
            'g':tf.add_n(tf.get_collection('g_losses'),name='total_g_loss'),
            'd':tf.add_n(tf.get_collection('d_losses'),name='total_d_loss')
        }
        return (self._z_placeholder,self._img_placeholder,generated_imgs,loss)
    def build_train_op(self,losses,learning_rate,beta1):
        """
        定义训练过程
        :param losses:  损失函数集合
        :param learning_rate:  学习率
        :param beta1:  指数衰减率估计
        :return:
        """
        g_opt=tf.train.AdamOptimizer(learning_rate=learning_rate,beta1=beta1)
        d_opt=tf.train.AdamOptimizer(learning_rate=learning_rate,beta1=beta1)

        g_opt_op=g_opt.minimize(
            losses['g'],
            var_list=self._generator.variables
        )

        d_opt_op=d_opt.minimize(
            losses['d'],
            var_list=self._discriminator.variables
        )

        with tf.control_dependencies([g_opt_op,d_opt_op]):
            return tf.no_op(name='train')
定义超参数集合
train_argparse.py
"""
write by qianqianjun
2019.12.20
命令行参数解释程序
如果不清楚可以参考博客:
https://blog.csdn.net/qq_38863413/article/details/103305449
"""
import argparse
parser=argparse.ArgumentParser()
parser.description="指定DCGAN网络在训练时候的超参数,使用help命令获取详细的帮助"
parser.add_argument("--batch_size",type=int,default=128,help="训练时候的批次大小,默认是128")
parser.add_argument("--learning_rate",type=float,default=0.002,help="训练时候的学习率,默认是0.002")
parser.add_argument("--img_size",type=int,default=32,help="生成图片的大小(和训练图片的大小保持一致)")
parser.add_argument("--z_dim",type=int,default=100,help="输入生成器的随机向量的大小,默认是100")
parser.add_argument("--g_channels",type=list,default=[128,64,32,1],help="生成器的通道数目变化列表,用于构建生成器结构")
parser.add_argument("--d_channels",type=list,default=[32,64,128,256],help="判别器的通道树木变化列表,用来构建判别器")
parser.add_argument("--init_conv_size",type=int,default=4,help="随机向量z经过全连接之后进行reshape 生成三维矩阵的初始边长,默认是 4 ")
parser.add_argument("--beta1",type=float,default=0.5,help="AdamOptimizer 指数衰减率估计,默认是0.5")

hps=parser.parse_args()
编写程序入门文件
mian.py
import os
import tensorflow as tf
from train_argparse import hps
from dataset_loader import train_images
from data_provider import MnistData
from DCGAN import DCGAN
from utils import combine_imgs

output_dir='./out'
if not os.path.exists(output_dir):
    os.mkdir(output_dir)
dcgan=DCGAN(hps)
z_placeholder,img_placeholder,generated_imgs,losses=dcgan.build()
train_op=dcgan.build_train_op(losses,hps.learning_rate,hps.beta1)
init_op=tf.global_variables_initializer()
train_steps=200
mnist_data=MnistData(train_images,hps.z_dim,hps.img_size)
with tf.Session() as sess:
    sess.run(init_op)
    for step in range(train_steps):
        batch_imgs,batch_z=mnist_data.next_batch(hps.batch_size)
        fetches=[train_op,losses['g'],losses['d']]
        should_sample=(step+1) %100 ==0
        if should_sample:
            fetches+= [generated_imgs]
        output_values=sess.run(
            fetches,feed_dict={
                z_placeholder:batch_z,
                img_placeholder:batch_imgs,
            }
        )
        _,g_loss_val,d_loss_val=output_values[0:3]
        if (step+1) %200==0:
            print('step: %4d , g_loss: %4.3f , d_loss: %4.3f' % (step, g_loss_val, d_loss_val))
        if should_sample:
            gen_imgs_val=output_values[3]
            gen_img_path=os.path.join(output_dir,'%05d-gen.jpg' % (step+1))
            gt_img_path=os.path.join(output_dir,'%05d-gt.jpg' % (step+1))
            gen_img=combine_imgs(gen_imgs_val,hps.img_size)
            gt_img=combine_imgs(batch_imgs,hps.img_size)
            gen_img.save(gen_img_path)
            gt_img.save(gt_img_path)
其它工具类
utils.py
"""
write by qianqianjun
2019,12,20

工具文件
这里使用了 numpy 的一些维度变换,如果不清楚可以参考博客:
https://blog.csdn.net/qq_38863413/article/details/103526645
"""
import numpy as np
from PIL import Image
def combine_imgs(batch_images,img_size,rows=8,cols=16):
    """
    用于在训练过程中展示一批数据(将一批图像拼接成一张大图)
    :param batch_images:  批次图像数据
    :param img_size:  图像大小
    :param rows:  一共有多行。
    :param cols:  一行放置多少图片
    :return:  返回拼接之后的大图
    """
    #batch_img: [batch_size,img_size,img_size,1]
    result_big_img=[]
    for i in range(rows):
        row_imgs=[]
        for j in range(cols):
            img=batch_images[cols*i+j]
            img=img.reshape((img_size,img_size))
            # 反归一化
            img=(img+1) * 127.5
            row_imgs.append(img)
        row_imgs=np.hstack(row_imgs)
        result_big_img.append(row_imgs)
    result_big_img=np.vstack(result_big_img)
    result_big_img=np.asarray(result_big_img,np.uint8)
    result_big_img=Image.fromarray(result_big_img)
    return result_big_img