Kibana配置登录密码
Kibana默认安装后没有密码,因公司安全需求,需配置Kibana web页面登录密码
思路:使用nginx使用代理方式进行转发
1、需要安装nginx(参考无网安装ngin分享,带安装包)
2、需要安装php(因需要使用htpasswd)
方法:
一、修改nginx配置,使用nginx发布kibana
修改配置文件/etc/nginx/conf.d/default.conf
将/etc/nginx/conf.d/default.conf原有的
location / {
     root   /usr/share/nginx/html;
     index  index.html index.htm;
 }
改成:
location / {
    proxy_pass http://ip:5601$request_uri;
}
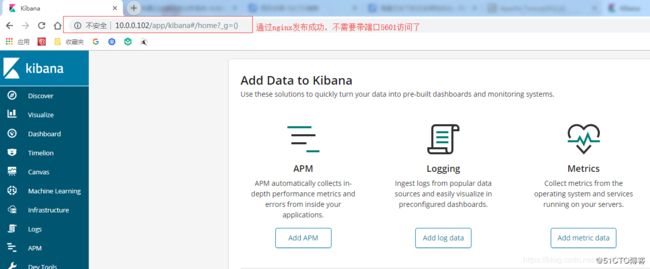
然后启动nginx,访问http://10.0.0.102 就是kibana的界面了(用nginx发布,就不需要带5601端口访问了):

二、然后使用htpasswd命令生成密码文件:
1、htpasswd -cm /usr/local/nginx/htpasswd crystal (/usr/local/nginx/htpasswd就是配置文件里面配置的密码文件,crystal就是用户名)
New password: #输入密码
Re-type new password: #再次输入密码,回车
Adding password for user crystal
2、生成后,查看密码文件/etc/nginx/htpasswd,已经OK:
cat /etc/nginx/htpasswd
crystal: a p r 1 apr1 apr1Xxm/x/fn$PVzP6RL2aQr1H89gf9wK.1
三、修改nginx配置,增加登录验证
1、修改配置文件/etc/nginx/conf.d/default.conf,增加两行登录验证配置:
location / {
    proxy_pass http://10.0.0.102:5601$request_uri;

    #加上下面两行内容:
    auth_basic "登陆验证";
    auth_basic_user_file /usr/local/nginx/htpasswd;
}
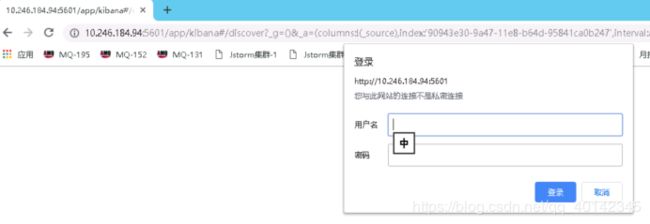
2、重启nginx,再访问http://10.0.0.102 ,就提示输入用户名和密码登录了;

大功告成!!!
注意:
因线环境不行更改kibana访问连接,依旧想使用 http://IP:5601 访问
1、更改nginx端口号
把80端口改为5601
server {
listen 80;更改为5601
server_name localhost;
#charset koi8-r;
#access_log logs/host.access.log main;
location / {
root html;
index index.html index.htm;
}
2、更改kibana.yml 中5601端口改为90
3、更改nginx.conf配置文件
location / {
proxy_pass http://10.0.0.102:90$request_uri;
    #加上下面两行内容:
    auth_basic "登陆验证";
    auth_basic_user_file /usr/local/nginx/htpasswd;
}
