官网:http://greenrobot.org/eventbus
API文档:http://greenrobot.org/eventbus/documentation
GitHub 地址:https://github.com/greenrobot/EventBus
EventBus 3.0的用法详解(一):https://segmentfault.com/a/1190000004279679
EventBus 3.0的用法详解(二):https://segmentfault.com/a/1190000004314315
EventBus简介
EventBus是一个Android端优化的publish/subscribe消息总线。
简化了应用程序内各组件间、组件与后台线程间的通信。
比如请求网络,等网络返回时通过Handler或Broadcast通知UI,
两个Fragment之间需要通过Listener通信,这些需求都可以通过EventBus实现。
EventBus优势
- 简单而强大:EventBus是一个非常容易学习的API的小型库。尽管如此,您的软件架构可能会通过解耦组件获得巨大的收益:使用事件时,订阅者对发件人不了解。

- 战斗测试:EventBus是最常用的Android库之一:数千个应用程序使用EventBus,包括非常受欢迎的应用程序。超过10亿的应用程序安装自己说。

- 高性能:特别是在Android上,性能很重要。EventBus被分析和优化了很多; 可能使其成为同类最快的解决方案。
基于方便的基于注释的API  (不牺牲性能):简单地将@Subscribe注释添加到您的用户方法中。由于注释的构建时间索引,EventBus不需要在应用程序运行时进行注释反射,这在Android上非常慢。

- Android主线程交付:当与UI进行交互时,EventBus可以在主线程中传递事件,而不管事件如何发布。

- 后台线程传递:如果您的用户长时间运行任务,EventBus还可以使用后台线程来避免UI阻塞。

- 事件和订阅者继承:在EventBus中,面向对象的范例适用于事件和订阅者类。假设事件类A是B的超类。类型B的发布的事件也将被发布给对A感兴趣的用户。类似地,考虑订户类的继承。

- 零配置:您可以立即开始使用代码中任何地方提供的默认EventBus实例。

- 可配置:要根据需要调整EventBus,可以使用构建器模式调整其行为。
EvenBus 的项目配置
在项目的Android的build.gradle(Module:app) 文件中的dependencies标签下添加
compile 'de.greenrobot:eventbus:3.0.0-beta1'
具体位置如下:
android {
    compileSdkVersion 26
    defaultConfig {
        applicationId "com.example.administrator.greendao"
        minSdkVersion 15
        targetSdkVersion 26
        versionCode 1
        versionName "1.0"
        testInstrumentationRunner "android.support.test.runner.AndroidJUnitRunner"
    }
    buildTypes {
        release {
            minifyEnabled false
            proguardFiles getDefaultProguardFile('proguard-android.txt'), 'proguard-rules.pro'
        }
    }

dependencies {
    implementation fileTree(dir: 'libs', include: ['*.jar'])
    implementation 'com.android.support:appcompat-v7:26.1.0'
    implementation 'com.android.support.constraint:constraint-layout:1.0.2'
    testImplementation 'junit:junit:4.12'
    androidTestImplementation 'com.android.support.test:runner:1.0.1'
    androidTestImplementation
   'com.android.support.test.espresso:espresso-core:3.0.1'

    //EventBus
 compile 'de.greenrobot:eventbus:3.0.0-beta1'
}
EvenBus使用
自定义一个事件类
public class MessageEvent {
    public final String message;

    public MessageEvent(String message) {
        this.message = message;
    }
}
订阅者
//此方法将在消息发布时调用
    @Subscribe
    public void onMessageEvent(MessageEvent event){
        Toast.makeText(getActivity(), event.message, Toast.LENGTH_SHORT).show();
    }

    //当发布另一个事件时,将调用此方法
    @Subscribe
    public void handleSomethingElse(SomeOtherEvent event){
        doSomethingWith(event);
    }
在需要订阅事件的地方注册事件
    @Override
    public void onStart() {
        super.onStart();
        EventBus.getDefault().register(this);
}
发送事件
EventBus.getDefault().post((new MessageEvent("Hello everyone!");
处理事件
@Subscribe(threadMode = ThreadMode.MAIN)
public void XXX(MessageEvent messageEvent) {
    ...
}
取消事件订阅
    @Override
    public void onStop() {
            super.onStop();
            EventBus.getDefault().unregister(this);
    }
具体代码如下:
订阅普通事件
定义消息事件类
public class MessageEvent {

    private String message;

    public MessageEvent(String message) {
        this.message = message;
    }

    public String getMessage() {
        return message;
    }

    public void setMessage(String message) {
        this.message = message;
    }
}
注册和取消订阅事件
public class MainActivity extends AppCompatActivity {
    private TextView tv_message;
    private Button bt_message;
    @Override
    protected void onCreate(Bundle savedInstanceState) {
        super.onCreate(savedInstanceState);
        setContentView(R.layout.activity_main);
        tv_message=(TextView)this.findViewById(R.id.tv_message);
        tv_message.setText("MainActivity");
        bt_message=(Button)this.findViewById(R.id.bt_message);
        bt_message.setText("跳转到SecondActivity");
        bt_message.setOnClickListener(new View.OnClickListener() {
            @Override
            public void onClick(View v) {
              startActivity(new Intent(MainActivity.this,SecondActivity.class));
            }
        });
        //注册事件
        EventBus.getDefault().register(this);
    }
    @Override
    protected void onDestroy() {
        super.onDestroy();
        //取消注册事件
        EventBus.getDefault().unregister(this);
    }
 }
事件订阅者处理事件
注:这里我们的ThreadMode设置为MAIN,事件的处理会在UI线程中执行,用TextView来展示收到的事件消息:
@Subscribe(threadMode = ThreadMode.MAIN)
    public void onMoonEvent(MessageEvent messageEvent){
        tv_message.setText(messageEvent.getMessage());
    }
事件发布者发布事件
public class SecondActivity extends AppCompatActivity {
    private Button bt_message;
    private TextView tv_message;
    @Override
    protected void onCreate(Bundle savedInstanceState) {
        super.onCreate(savedInstanceState);
        setContentView(R.layout.activity_main);
        tv_message=(TextView)this.findViewById(R.id.tv_message);
        tv_message.setText("SecondActivity");
        bt_message=(Button)this.findViewById(R.id.bt_message);
        bt_message.setText("发送事件");
        bt_message.setOnClickListener(new View.OnClickListener() {
            @Override
            public void onClick(View v) {
                EventBus.getDefault().post(new MessageEvent("欢迎关注"));
                finish();
            }
        });

    }
}
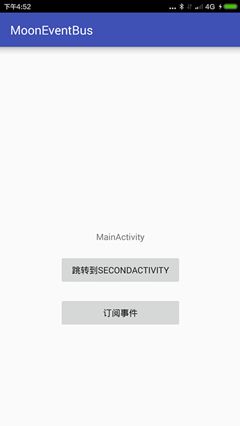
好了运行程序,我们看到MainActivity的TextView显示MainActivity字样:

接下来我们点击按钮进入SecondActivity并点击该界面中的发送事件按钮:

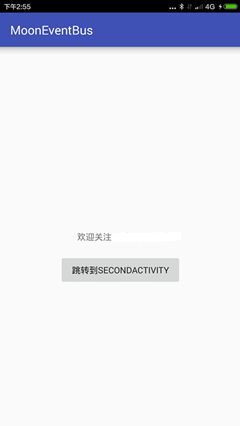
这时SecondActivity被finish掉,MainActivity的TextView显示”欢迎关注”:
除了上面讲的普通事件外,EventBus还支持发送黏性事件,就是在发送事件之后再订阅该事件也能收到该事件,跟黏性广播类似。为了验证粘性事件我们修改以前的代码:
订阅粘性事件
在MainActivity中我们将注册事件添加到button的点击事件中:
bt_subscription.setOnClickListener(new View.OnClickListener() {
            @Override
            public void onClick(View v) {
                //注册事件
                EventBus.getDefault().register(MainActivity.this);
            }
        });
订阅者处理粘性事件
在MainActivity中新写一个方法用来处理粘性事件:
 @Subscribe(threadMode = ThreadMode.POSTING,sticky = true)
    public void ononMoonStickyEvent(MessageEvent messageEvent){
        tv_message.setText(messageEvent.getMessage());
    }
发送黏性事件
在SecondActivity中我们定义一个Button来发送粘性事件:
  bt_subscription.setOnClickListener(new View.OnClickListener() {
            @Override
            public void onClick(View v) {
                EventBus.getDefault().postSticky(new MessageEvent("粘性事件"));
                finish();
            }
        });
好了运行代码再来看看效果,首先我们在MainActivity中并没有订阅事件,而是直接跳到SecondActivity中点击发送粘性事件按钮:

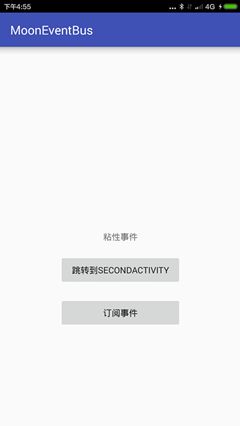
这时界面回到MainActivity,我们看到TextView仍旧显示着MainActivity的字段,这是因为我们现在还没有订阅事件,接下来我们点击订阅事件:
TextView发生改变显示“粘性事件”,大功告成。
ThreadMode线程通信
EventBus可以很简单的实现线程间的切换,包括后台线程、UI线程、异步线程
ThreadMode.POSTING
//默认调用方式,在调用post方法的线程执行,避免了线程切换,性能开销最少
    // Called in the same thread (default)
    @Subscribe(threadMode = ThreadMode.POSTING) // ThreadMode is optional here
    public void onMessage(MessageEvent event) {
        log(event.message);
    }
ThreadMode.MAIN
// 在Android UI的主线程中调用
    @Subscribe(threadMode = ThreadMode.MAIN)
    public void onMessage(MessageEvent event) {
        textField.setText(event.message);
    }
ThreadMode.BACKGROUND
// 如果调用post方法的线程不是主线程,则直接在该线程执行
    // 如果是主线程,则切换到后台单例线程,多个方法公用同个后台线程,按顺序执行,避免耗时操作
    // Called in the background thread
    @Subscribe(threadMode = ThreadMode.BACKGROUND)
    public void onMessage(MessageEvent event){
        saveToDisk(event.message);
    }
ThreadMode.ASYNC
//开辟新独立线程,用来执行耗时操作,例如网络访问
    //EventBus内部使用了线程池,但是要尽量避免大量长时间运行的异步线程,限制并发线程数量
    //可以通过EventBusBuilder修改,默认使用Executors.newCachedThreadPool()
    // Called in a separate thread
    @Subscribe(threadMode = ThreadMode.ASYNC)
    public void onMessage(MessageEvent event){
        backend.send(event.message);
    }
配置EventBusBuilder
EventBus提供了很多配置,一般的情况下我们可以不用配置。
但是,如果你有一些其他要求,比如控制日志在开发的时候输出,发布的时候不输出。在开发的时候错误崩溃,而发布的时候不崩溃...等情况。
EventBus提供了一个默认的实现,但不是单例。
EventBus eventBus = new EventBus();
    //下面这一条的效果是完全一样的
    EventBus eventBus = EventBus.builder().build();
    //修改默认实现的配置,记住,必须在第一次EventBus.getDefault()之前配置,且只能设置一次。建议在application.onCreate()调用
    EventBus.builder().throwSubscriberException(BuildConfig.DEBUG).installDefaultEventBus();
StickyEvent
StickyEvent在内存中保存最新的消息,取消原有消息,执行最新消息,只有在注册后才会执行,如果没有注册,消息会一直保留来内存中
   //在注册之前发送消息
    EventBus.getDefault().postSticky(new MessageEvent("Hello everyone!"));
//限制,新界面启动了
   @Override
    public void onStart() {
        super.onStart();
        EventBus.getDefault().register(this);
    }
    //在onStart调用register后,执行消息
    @Subscribe(sticky = true, threadMode = ThreadMode.MAIN)
    public void onEvent(MessageEvent event) {
        // UI updates must run on MainThread
        textField.setText(event.message);
    }

    @Override
    public void onStop() {
        EventBus.getDefault().unregister(this);
        super.onStop();
    }
你也可以手动管理StickyEvent
MessageEvent stickyEvent = EventBus.getDefault().getStickyEvent(MessageEvent.class);
    // Better check that an event was actually posted before
    if(stickyEvent != null) {
        // "Consume" the sticky event
        EventBus.getDefault().removeStickyEvent(stickyEvent);
        //or
         EventBus.getDefault().removeAllStickyEvents();
        // Now do something with it
    }
priority事件优先级
    //priority越大,级别越高
    @Subscribe(priority = 1);
    public void onEvent(MessageEvent event) {
    …
    }
//优先级实现方式,遍历当前列表,把当前
    int size = subscriptions.size();
    for (int i = 0; i <= size; i++) {
        if (i == size || subscriberMethod.priority > subscriptions.get(i).subscriberMethod.priority) {
            subscriptions.add(i, newSubscription);
            break;
        }
    }
中止事件传递
// 中止事件传递,后续事件不在调用,注意,只能在传递事件的时候调用
    @Subscribe
    public void onEvent(MessageEvent event){
        …
        EventBus.getDefault().cancelEventDelivery(event) ;
    }
index索引加速
EventBus使用了annotation,默认在编译时生成代码,生成索引。
添加index后会在编译时运行,自动生成相应代码。
ps:由于apt的限制,匿名内部类中的annotation不会被识别,会自动降级在运行时反射,此时,效率会降低
buildscript {
    dependencies {
        classpath 'com.neenbedankt.gradle.plugins:android-apt:1.8'
    }
}
apply plugin: 'com.neenbedankt.android-apt'
dependencies {
    compile 'org.greenrobot:eventbus:3.0.0'
    apt 'org.greenrobot:eventbus-annotation-processor:3.0.1'
}
apt {
    arguments {
        eventBusIndex "com.example.myapp.MyEventBusIndex"
    }
}
EventBus eventBus = EventBus.builder().addIndex(new MyEventBusIndex()).build();
EventBus.builder().addIndex(new MyEventBusIndex()).installDefaultEventBus();
// 现在默认实例使用给定的索引。使用它是这样的:
EventBus eventBus = EventBus.getDefault();
NoSubscriberEvent
如果没找到订阅者事件,可以通过EventBusBuilder设置是否默认发送NoSubscriberEvent,默认是打开的
private void postSingleEvent(Object event, PostingThreadState postingState) throws Error {
        ....
        if (!subscriptionFound) {
            if (logNoSubscriberMessages) {
                Log.d(TAG, "No subscribers registered for event " + eventClass);
            }
            if (sendNoSubscriberEvent && eventClass != NoSubscriberEvent.class &&
                    eventClass != SubscriberExceptionEvent.class) {
                post(new NoSubscriberEvent(this, event));
            }
        }
    }
使用建议
EventBus管理
EventBus运行创建多个,那么,明确事件的生命周期,根据不同生命周期使用不同的EventBus?
方法1
/**
 * 用annotation配合使用工厂
 * EventBusFactory.getBus(EventBusFactory.START);
 * EventBusFactory.getBus();
 */
public class EventBusFactory {
    private static SparseArray mBusSparseArray = new SparseArray<>(2);

    @IntDef({CREATE, START})
    @Retention(RetentionPolicy.SOURCE)
    public @interface BusType {
    }

    public static final int CREATE = 0;
    public static final int START = 1;

    static {
        mBusSparseArray.put(CREATE, EventBus.builder().build());
        mBusSparseArray.put(START, EventBus.getDefault());
    }

    public static EventBus getBus() {
        return getBus(START);
    }

    public static EventBus getBus(@BusType int type) {
        return mBusSparseArray.get(type);
    }

}
方法2
/**
 * 用枚举工厂
 * EventBusFactory.START.getBus();
 */
public enum EventBusFactory {
    CREATE(0),
    START(1);

    private int mType;

    EventBusFactory(int type) {
        mType = type;
    }

    public EventBus getBus() {
        return mBusSparseArray.get(mType);
    }

    private static SparseArray mBusSparseArray = new SparseArray<>(2);

    static {
        mBusSparseArray.put(CREATE.mType, EventBus.builder().build());
        mBusSparseArray.put(START.mType, EventBus.getDefault());
    }
}
以事件为对象
将数据封装到一个事件类。所有事件放到一个包下。如果事件太多,同个模块的事件可以考虑使用静态内部类,或者再分包。
/**
 * This Event is posted by EventBus when no subscriber is found for a posted event.
 *
 * @author Markus
 */
public final class NoSubscriberEvent {
    /** The {@link EventBus} instance to with the original event was posted to. */
    public final EventBus eventBus;

    /** The original event that could not be delivered to any subscriber. */
    public final Object originalEvent;

    public NoSubscriberEvent(EventBus eventBus, Object originalEvent) {
        this.eventBus = eventBus;
        this.originalEvent = originalEvent;
    }

}
public class Event {
public static class UserListEvent {
public List users ;
}
public static class ItemListEvent {
public List- items;
}
}
注意,不是相同类型就一定要作为一个事件封装,具体需要考虑业务情景跟代码情况,比如事件行为不同、事件生命周期不同,如果有必要,写封装成两个Event可能是更好的选择。
public class Event  {
    public static class UserListUpdateEventOnCreate {
        public List users;
    }
    public static class UserListUpdateEventOnStart {
        public List users ;
    }
    public static class UserListRemoveEventOnStart {
        public List users;
    }
}
EvenBus混淆
-keepattributes *Annotation*
-keepclassmembers class ** {
    @org.greenrobot.eventbus.Subscribe ;
}
-keep enum org.greenrobot.eventbus.ThreadMode { *; }

# Only required if you use AsyncExecutor
-keepclassmembers class * extends org.greenrobot.eventbus.util.ThrowableFailureEvent {
    (java.lang.Throwable);
}