ELK(7.6.1)下载安装与springboot整合ELK
一、ELK简介
1.Elasticsearch是个开源分布式搜索引擎,它的特点有:分布式,零配置,自动发现,索引自动分片,索引副本机制,restful风格接口,多数据源,自动搜索负载等,可以用于全文检索、结构化检索和分析,并能将这三者结合起来。
2.Logstash是一个完全开源的工具,他可以对你的日志进行收集、过滤,并将其存储供以后使用。Logstash 简单来说就是一根具备实时数据传输能力的管道,负责将数据信息从管道的输入端传输到管道的输出端,与此同时这根管道还可以让你根据自己的需求在中间加上滤网。
3.Kibana 也是一个开源和免费的工具,它Kibana可以为 Logstash 和 ElasticSearch 提供的日志分析友好的 Web 界面(可视化),可以帮助用户汇总、分析和搜索重要数据日志。

二、下载安装
1.elasticsearch(7.6.1)
(1)下载地址https://artifacts.elastic.co/downloads/elasticsearch/elasticsearch-7.6.1-windows-x86_64.zip
(2)下载完成解压即可
(3)启动
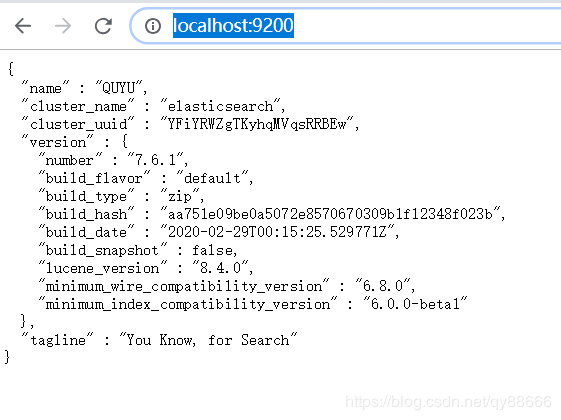
双击bin文件下的elasticsearch.bat,等待命令框执行完毕,然后在浏览器中输入 http://localhost:9200 ,出现如下界面即可

2.kibana(7.6.1)
(1)下载地址
https://artifacts.elastic.co/downloads/kibana/kibana-7.6.1-windows-x86_64.zip
(2)下载完成解压即可
(3)启动
双击bin文件下的 kibana.bat,等待命令框执行完毕,然后在浏览器中输入 http://localhost:5601 ,出现如下界面即可
3.logstash(7.6.1)
(1)下载地址
https://artifacts.elastic.co/downloads/logstash/logstash-7.6.1.zip
(2)下载完成后解压,然后在bin目录下新建 logstash.conf 文件(以下是示例配置,验证是否安装成功,与springboot整合配置请继续往下看),配置如下:
 input {
 file {
    path => ["E:/ELK/localhost_access_log.*.txt"]    #这是日志存储地址,可以自己配置
    start_position => "beginning"
 }
}

filter {
  date {
     match => [ "timestamp" , "YYYY-MM-dd HH:mm:ss" ]
  }
}

 output {
   elasticsearch {
      hosts => ["127.0.0.1:9200"]
   }
   stdout {
      codec => rubydebug
   }
}
(3)启动
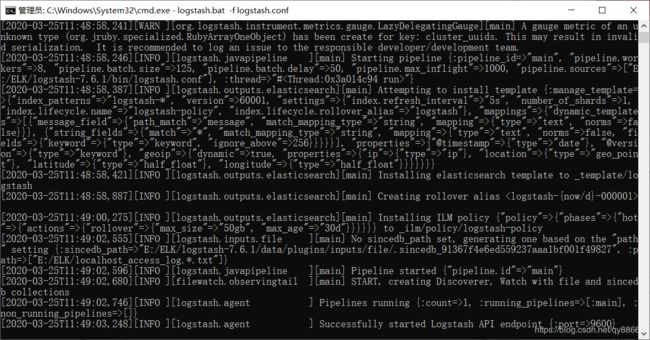
进入bin文件目录命令框,输入 logstash -f logstash.conf ,等待命令框执行完毕,出现 Successfully started Logstash API endpoint {:port=>9600} 字样代表安装成功

三、springboot整合 ELK
1.修改 logstash.conf 为:
input {
tcp {
host => "localhost"
port => 9601 #和 logback.xml中localhost:9601 保持一致
mode => "server" #模式选择为server
tags => ["tags"]
##格式json
codec => json_lines
}
}
output {
elasticsearch {
hosts => "127.0.0.1:9200"
index => "applog" #applog是一个名字,随便取
}
stdout { codec => rubydebug}
}
2.在springboot项目中resources文件下新建 logback.xml 文件,配置如下:
    localhost:9601


        {"appname":"zhaopin"}


        %d{yyyy-MM-dd HH:mm:ss.SSS} ----> [%thread] ---> %-5level %logger{50} - %msg%n
3.在pom.xml中添加依赖
        org.springframework.boot
        spring-boot-starter


                org.springframework.boot
                spring-boot-starter-logging


        ch.qos.logback
        logback-classic


        net.logstash.logback
        logstash-logback-encoder
        4.10


        org.springframework.boot
        spring-boot-starter-test
        test
4.测试
(1)新建controller文件
import org.slf4j.Logger;
import org.slf4j.LoggerFactory;
import org.springframework.web.bind.annotation.GetMapping;
import org.springframework.web.bind.annotation.RequestMapping;
import org.springframework.web.bind.annotation.RestController;

@RestController
@RequestMapping(value = "/test")
public class LogTestController {

Logger logger = LoggerFactory.getLogger(LogTestController.class);

@GetMapping("/test")
public String test(){
    logger.info("你好啊e");
    return "server被调用了!:" ;
}
}
(2)新建启动文件
import org.springframework.boot.SpringApplication;
import org.springframework.boot.autoconfigure.SpringBootApplication;

@SpringBootApplication
public class ElkApplication  {

public static void main(String[] args) {
    SpringApplication.run(ElkApplication.class, args);
}

}
(3)依次启动 elasticsearch、logstash、kibana
(4)运行启动文件
(5)浏览器输入 localhost:5601
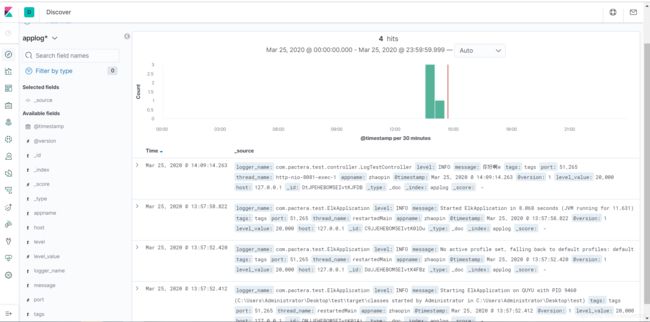
1.运行测试用例后回到kibana界面,Management --> Index Patterns,填入Logstash配置中index的值,此处为applog ,记得要加*哦

2.第二步 此处选择"@timestamp"

