COCOS2D-X示例项目解读
本文来自http://blog.csdn.net/runaying ,引用必须注明出处!
cocos2d-X 示例项目解读
温馨提醒:为了大家能更好学习,强烈推荐大家看看本人的这篇博客 COcos2d-X 中文API
前言
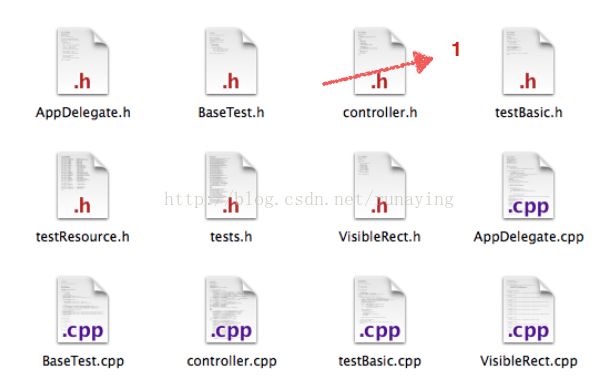
看到官方的 TestCpp 例子,我相信很多人和我一样一头雾水,不知道因该从哪里开始看起先上一个截图吧(图1)!接下来我就为大家一一介绍一下这几个类
1.概述
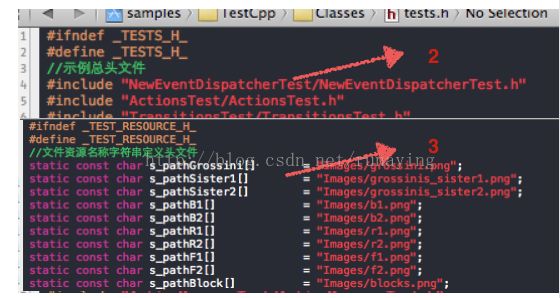
很显然(图1)的 .h 文件就是头文件,通过头文件大家肯定会说,我是不是少了两个 .cpp 文件 tests.cpp 、 VisibleRect.cpp 呢其实不然,tests.h 里面存放了所有例子的头文件,如上图(图2),VisibleRect.h 里面存放的又是什么呢?如上图(图3)它存放的是一些共用的资源文件,这样就不用担心修改了其中一个图片其它的图片没有修改的情况了是不是很实用呢?
2.小节
接下来我就大概概括一下啦
VisibleRect 通过这个类我们可以很方便的定位到屏幕的指定区域,如: 屏幕的左上角、屏幕的右下角
tests 示例头文件汇总
testResource 公共的资源文件
testBasic 自定义的 Scene 的基类,所有的示例 Scene 都是它的子类。
BaseTest 自定义的 Layer 的基类,所有的示例 Layer 都是它的子类。
AppDelegate 在熟悉不过了代理吗?程序的加载配置
controller 程序的入口,示例启东时,大家看到的示例列表啦
.仅仅看到这些大家肯定还是不知道是怎么回事吧!接下来我就带领大家看一个示例项目,通过这个示例项目大家肯定对 TestCpp 例子会有更深入的理解
3.概述
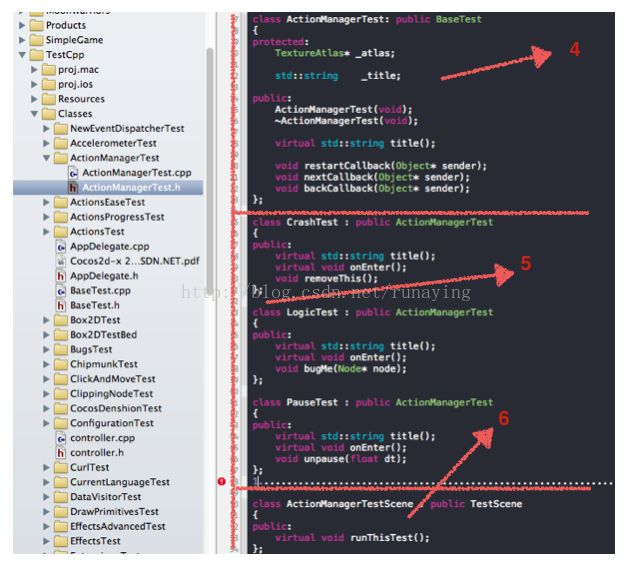
先上一张截图吧!如下图,下图被分成了 4 个区域(图4、图5、图6)
打开ActionManagerTest.h 大家可以看到类似下面的画面,中间的小数点(图6)是省略了一些ActionManagerTest的子类,因为屏幕放不下了。所以就暂时把他们删除掉了,不过不影响阅读效果
4.基础1
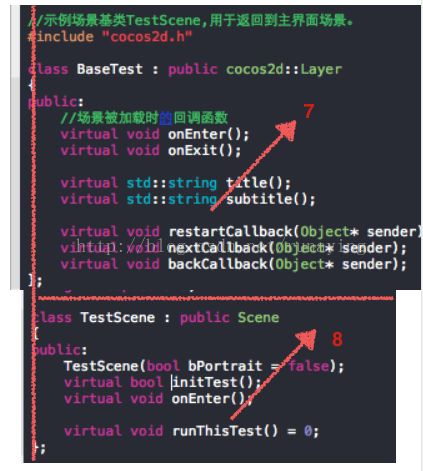
通过图4我们可以看出ActionManagerTest是BaseTest的子类BaseTest又是什么呢,打开BaseTest你可以看到 BaseTest继承自Layer 如图7所以 ActionManagerTest以及 ActionManagerTest的子类 CrashTest、LogicTest、PauseTest….实际上他们都是Layer的子类。
5.基础2
通过图6我们可以看出ActionManagerTestScene继承自 TestScene 。可TestScene是谁呢?打开testBasic我们可以看到TestScene继承了Scene如图8 现在大家是不是对 TestCpp有了大概的了解呢?
6.梳理
现在我们对上面的文章进行一下梳理
6.1ActionManagerTest管理所有的子类(控制显示那一个子类)ActionManagerTestScene是
6.2 ActionManagerTestScene拥有ActionManagerTest,使用时你只需要创建一个ActionManagerTestScene 就可以展示ActionManagerTest子类的所有效果了
接下来我就为大家详细介绍一下 ActionManagerTest吧!希望大家可以认真看一下接下来的介绍,因为以后就不会那么详细了。
写在前面
再开始介绍执之前我先说一下我的实现思路!
1.官方示例梳理
1.1官方的代码 BaseTest 继承了 Layer ,TestScene继承了 Scene
1.2.ActionManagerTest的继承了BaseTest,他的子类负责展示指定效果。ActionManagerTestScene继承了TestScene使用,使用ActionManagerTest时只要创建一个ActionManagerTest就可以展示ActionManagerTest子类的所有效果了
2.官方示例修改版梳理
我觉得官方的代码有些不是特别适合我,所以我就自己简单的修改了一下
2.1具体修改是 BaseTest 继承了 CCNode ,ActionManagerTest继承BaseTest然后使用另外一个 layer 来管理ActionManagerTest的子类
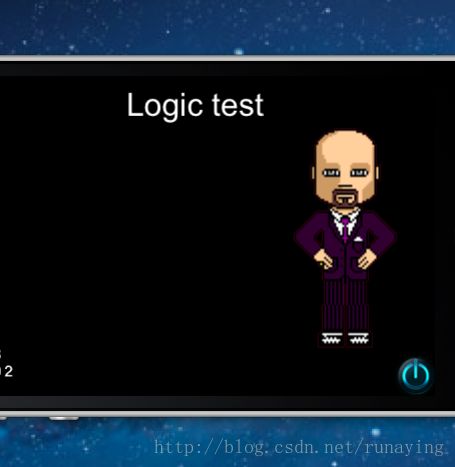
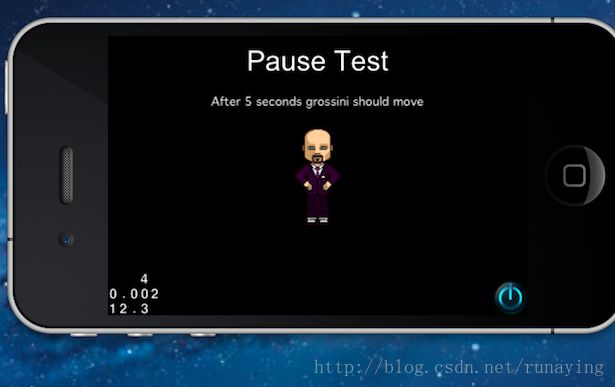
2.2下面是运行效果图
3.代码编写
3.1 把 Resources 目录下面的所有资源都复制到你项目文件的Resources 目录下
3.2 把TestCppclass 目录下面的 BaseTest.cpp、BaseTest.h、testResource.h、VisibleRect.cpp、VisibleRect.h 以及TestCpp Classes/ActionManagerTest 目录下ActionManagerTest.cpp、ActionManagerTest.h 复制到你 项目文件的class 目录下接下来就是对他们进行修改
3.3 打开BaseTest.h 把
class BaseTest : public cocos2d::Layer 修改为
class BaseTest : public cocos2d::Node删除下面的方法以及它的实现文件,因为 ActionManagerTest不需要管理他的子类显示了
virtual void restartCallback(Object* sender);
virtual void nextCallback(Object* sender);
virtual void backCallback(Object* sender);
4.1打开 ActionManagerTest.h 文件删除下面两段代码,以及他们的实现代码
void restartCallback(Object* sender);
void nextCallback(Object* sender);
void backCallback(Object* sender);
class ActionManagerTestScene : public TestScene
{
public:
    virtual void runThisTest();
};
4.2打开 ActionManagerTest.cpp 找到 CrashTest 类的
void removeThis();的实现文件。找到下面的代码
nextCallback(this);把它修改为
HelloWorld::getInstance()->setNextParticleType();
    HelloWorld::getInstance()->runEffect();
好了到现在我们的改造基本完成了接下来就看看如何使用他们吧!
5.1打开 HelloWorldScene.h 添加如下代码
  ~HelloWorld();
 virtual void onTouchesBegan(const std::vector& touches, Event *event);
    virtual void onTouchesMoved(const std::vector& touches, Event *event);
    virtual void onTouchesEnded(const std::vector& touches, Event *event);
public:
    static HelloWorld* getInstance();
     int particleIndex;
    void runEffect();
    void setNextParticleType();
5.2打开 HelloWorldScene.cpp 文件
添加如下代码
void HelloWorld::onTouchesBegan(const std::vector& pTouches, Event *pEvent)
{

}

void HelloWorld::onTouchesMoved(const std::vector& pTouches, Event *pEvent)
{

}

void HelloWorld::onTouchesEnded(const std::vector& pTouches, Event *pEvent)
{
    this->setNextParticleType();
    this->runEffect();
}

void HelloWorld::runEffect(){

    ActionManagerTest* system;
    //    CCLOG("will play %d",particleIndex);//用来输出是那种粒子效果
	switch (particleIndex)
	{
		case 0:

            system =new CrashTest();
            this->removeChildByTag(4, true);
            addChild(system,1,0);

			break;
		case 1:
			system = new LogicTest();
            this->removeChildByTag(0, true);
            addChild(system,1,1);
			break;
		case 2:
			system =  new PauseTest();
            this->removeChildByTag(1, true);
            addChild(system,1,2);
            break;
		case 3:
			system =  new RemoveTest();
            this->removeChildByTag(2, true);
            addChild(system,1,3);
			break;
		case 4:
			system =  new ResumeTest();
            this->removeChildByTag(3, true);
            addChild(system,1,4);
            break;


		default:
			// do nothing
			break;
	}

}
void HelloWorld::setNextParticleType(){
    particleIndex++;
    if (particleIndex >= 5)
	{
		particleIndex = 0;
	}
}
5.3在 HelloWorldScene.cpp 的初始化方法里面添加下面代码
 helloWorld=this;
    this->setTouchEnabled(true);
    this->runEffect();
5.4好了现在运行项目,每次触摸结束后 ActionManagerTest的显示效果,现在你就可以看到类似官方代码的实现效果了
