k8s部署fabric-kafka
k8s部署fabric-kafka
在k8s上部署fabric witch kafka consensus,相比之前部署fabric with solo consensus的区别就在于多了一个zk/kfk集群,在我们部署好zk/kfk后,对fabric.solo简单修改即可应用。
回顾一下,fabric.solo上解决了哪些问题:
- docker dns,即在宿主机上启动链码容器,并保持链码容器和k8s pod的内通信问题;另外还有个改进,就是用k8s启动链码容器,这个可以参考IBM官方部署方案。
- kubeadm构建k8s集群,这里遇到了,集群重启(kubeadm reset->kubeadm init)造成cni网络插件异常的情况。
- 在单节点集群(只有master)上,k8s为master安全考虑,禁止在master node上调度节点,这只需要取消master taint即可。
在单节点k8s集群上,成功部署了fabric.solo;紧接着了,在k8s上又部署成功了zk/kfk集群。此时,部署fabric with kafka consensus的条件我们都具备了,那是否可部署成功了呢。
事实上,流程已经打通了,但没想到fabrci with kfk,需要太多的pod,这就导致,我那台2c4g的机器,cpu满载了,以至于无法操作终端。
所以,还有个工作要做,单节点集群无法满足fabric with kfk的性能要求,我们需要对k8s扩容,这里我又开了一台主机,打算搭建两节点的集群。这样后续,通过调度手段,将pod分布到两台机器上,就可以满足fabric with kfk的性能要求了。
在部署两节点的k8s集群上,又遇到了一些问题,我用官方的kubeadm教程方式搭建,在新机器上,安装的kube都是1.14.2的,索性为了统一,也将旧机器上的kube更换成了1.14.2。看似没问题,但是在启动集群时发现,拉取不到k8s.gcr.io下的镜像,配置代理后,仍是无法获取到k8s.gcr.io下镜像,奇怪的是,我那台旧机器上,居然有1.14.2的镜像,我也没使用过其他手段(比如大tag的方式)获取最新镜像呀。之前的版本都可以通过获取别人存的镜像,再打个tag就好,但是1.14.2可能太新,愣是没找到私人存储的镜像,所以当天工作大多是用来找镜像了。还好,最后找到aws为国内提供k8s.gcr.io的镜像站点gcr.azk8s.cn,通过该站点可以获取到最新的1.14.2镜像,之后再打tag就好。获取到镜像好,很快就部署好了双节点集群。
同样要注意的是,取消掉master node的taints(node-role.kubernetes.io/master),以及kubeadm reset之后的cni插件无法工作的处理。
这样,我们的集群有了两个可以部署pod节点,我们就可以通过affinity或者taints进行一个高级调度,将pod分散到两个node上,我这里采用了较为简单的方式,对node搭上标签,然后通过NodeSelector将pod调度到指定node上。我的安排是,zk/kfk在一个节点上,fabric那一套在一个节点上。
或者通过手动调度,直接填写nodeName字段!
具体过程不在叙述,看一下搭建的集群状况。
root@hw2:~# kubectl version --short
Client Version: v1.14.2
Server Version: v1.14.2
root@hw2:~#
root@hw2:~# kubectl get pods -nkube-system -owide
NAME                          READY   STATUS    RESTARTS   AGE     IP              NODE   NOMINATED NODE   READINESS GATES
coredns-fb8b8dccf-lgr8p       1/1     Running   0          4h22m   10.244.1.3      hw2    <none>           <none>
coredns-fb8b8dccf-vx8lv       1/1     Running   0          4h22m   10.244.1.2      hw2    <none>           <none>
etcd-hw1                      1/1     Running   0          4h21m   192.168.0.109   hw1    <none>           <none>
kube-apiserver-hw1            1/1     Running   0          4h21m   192.168.0.109   hw1    <none>           <none>
kube-controller-manager-hw1   1/1     Running   0          4h21m   192.168.0.109   hw1    <none>           <none>
kube-flannel-ds-amd64-r57jp   1/1     Running   0          4h20m   192.168.0.109   hw1    <none>           <none>
kube-flannel-ds-amd64-vfxks   1/1     Running   0          4h20m   192.168.0.105   hw2    <none>           <none>
kube-proxy-4t268              1/1     Running   0          4h22m   192.168.0.109   hw1    <none>           <none>
kube-proxy-x4xhs              1/1     Running   0          4h22m   192.168.0.105   hw2    <none>           <none>
kube-scheduler-hw1            1/1     Running   0          4h21m   192.168.0.109   hw1    <none>           <none>
root@hw2:~#
上述为部署fabric with kfk的前提,这里进行部署操作。
部署zk/kfk
按照之前部署zk/kfk的方式,部署zk/kfk集群,但是在zk/kfk的StatefulSet上指定了NodeSelector,将zk/kfk部署到一个节点上。
    spec:
      nodeSelector:
        type: hw1
部署fabric部分
我们使用部署solo的fabric代码,需要修改configtx.yaml文件:
- 将orderer算法改为kafka,
- 修改kafka的Brokers地址。并重新生成通道文件、初始化块、密钥等。
这里配置的是kafka-pod的dns解析地址,这是一个典型的statefulSet控制下pod的地址,其地址构成为podName-n.StatefulSetHeadlessService.namespaces。
Orderer: &OrdererDefaults

    # Orderer Type: The orderer implementation to start
    # Available types are "solo" and "kafka"
    OrdererType: kafka
    ...

    Kafka:
        # Brokers: A list of Kafka brokers to which the orderer connects. Edit
        # this list to identify the brokers of the ordering service.
        # NOTE: Use IP:port notation.
        Brokers:
            - kafka-0.kafka-headless.default:9092
            - kafka-1.kafka-headless.default:9092
            - kafka-2.kafka-headless.default:9092
生成相关文件。
root@hw2:~/go/src/github.com/hyperledger/fabric/examples/e2e_cli# ./generateArtifacts.sh
mychannel

Using cryptogen -> /root/go/src/github.com/hyperledger/fabric/examples/e2e_cli/../../release/linux-amd64/bin/cryptogen

##########################################################
##### Generate certificates using cryptogen tool #########
##########################################################
org1

Using idemixgen -> /root/go/src/github.com/hyperledger/fabric/examples/e2e_cli/../../release/linux-amd64/bin/idemixgen

####################################################################
##### Generate idemix crypto material using idemixgen tool #########
####################################################################
Using configtxgen -> /root/go/src/github.com/hyperledger/fabric/examples/e2e_cli/../../release/linux-amd64/bin/configtxgen
##########################################################
#########  Generating Orderer Genesis block ##############
##########################################################
2019-05-18 17:15:07.548 CST [common/tools/configtxgen] main -> INFO 001 Loading configuration
2019-05-18 17:15:07.567 CST [msp] getMspConfig -> INFO 002 Loading NodeOUs
2019-05-18 17:15:07.567 CST [common/tools/configtxgen] doOutputBlock -> INFO 003 Generating genesis block
2019-05-18 17:15:07.568 CST [common/tools/configtxgen] doOutputBlock -> INFO 004 Writing genesis block

#################################################################
### Generating channel configuration transaction 'channel.tx' ###
#################################################################
2019-05-18 17:15:07.598 CST [common/tools/configtxgen] main -> INFO 001 Loading configuration
2019-05-18 17:15:07.616 CST [common/tools/configtxgen] doOutputChannelCreateTx -> INFO 002 Generating new channel configtx
2019-05-18 17:15:07.617 CST [msp] getMspConfig -> INFO 003 Loading NodeOUs
2019-05-18 17:15:07.617 CST [common/tools/configtxgen] doOutputChannelCreateTx -> INFO 004 Writing new channel tx

#################################################################
#######    Generating anchor peer update for Org1MSP   ##########
#################################################################
2019-05-18 17:15:07.669 CST [common/tools/configtxgen] main -> INFO 001 Loading configuration
2019-05-18 17:15:07.687 CST [common/tools/configtxgen] doOutputAnchorPeersUpdate -> INFO 002 Generating anchor peer update
2019-05-18 17:15:07.687 CST [common/tools/configtxgen] doOutputAnchorPeersUpdate -> INFO 003 Writing anchor peer update

#################################################################
#######    Generating anchor peer update for Org2MSP   ##########
#################################################################
接着,为了将fabric相关组件orderer、peer、cli的pod调度到指定node上,需要对fabric k8s部署文件适当修改,在orderer、org1、cli deployment上添加NodeSelector。
orderer
---
kind: Deployment
apiVersion: extensions/v1beta1
metadata:
  name: orderer/peer1/peer2/cli
  namespace: ord/org1/org1/org1
spec:
  replicas: 1
  template:
    metadata:
      labels:
        app: orderer
    spec:
      nodeSelector:
        type: hw2
      containers:
      hostname: orderer
    ...
至此,我们可以启动fabric部分,并进入测试
首先看下集群上zk/kfk和fabric的pod情况,可以看到zk/kfk在hw1上,fabric部分在hw2上。
节点分布
root@hw2:~# kubectl get pods -owide
NAME                READY   STATUS    RESTARTS   AGE    IP            NODE   NOMINATED NODE   READINESS GATES
busybox             1/1     Running   2          157m   10.244.1.18   hw2    <none>           <none>
kafka-0             1/1     Running   0          44m    10.244.0.21   hw1    <none>           <none>
kafka-1             1/1     Running   0          44m    10.244.0.23   hw1    <none>           <none>
kafka-2             1/1     Running   0          43m    10.244.0.24   hw1    <none>           <none>
kafka-test-client   1/1     Running   0          44m    10.244.0.22   hw1    <none>           <none>
zk-0                1/1     Running   0          45m    10.244.0.18   hw1    <none>           <none>
zk-1                1/1     Running   0          45m    10.244.0.19   hw1    <none>           <none>
zk-2                1/1     Running   0          45m    10.244.0.20   hw1    <none>           <none>
root@hw2:~# kubectl get pods -nord -owide
NAME                       READY   STATUS    RESTARTS   AGE   IP            NODE   NOMINATED NODE   READINESS GATES
orderer-7787cc9d7d-d855h   1/1     Running   0          14m   10.244.1.23   hw2    <none>           <none>
root@hw2:~# kubectl get pods -norg1 -owide
NAME                     READY   STATUS    RESTARTS   AGE   IP            NODE   NOMINATED NODE   READINESS GATES
cli-7b57bbffcf-dnhpd     1/1     Running   0          12m   10.244.1.26   hw2    <none>           <none>
peer0-777dd85f9b-4kv9b   1/1     Running   0          13m   10.244.1.24   hw2    <none>           <none>
peer1-864697ffd5-8vvrm   1/1     Running   0          13m   10.244.1.25   hw2    <none>           <none>
root@hw2:~#
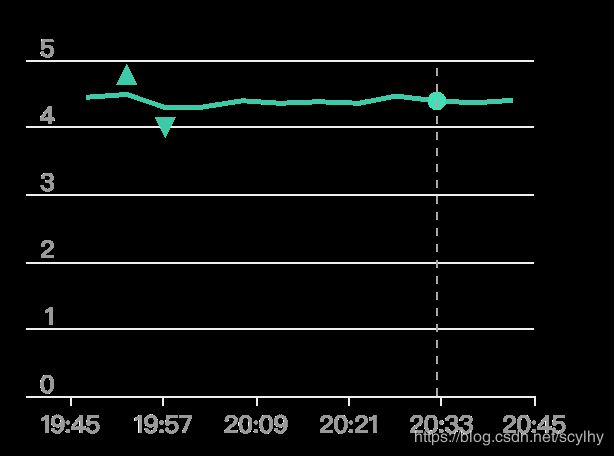
并看一下两台机器的负载情况。
(node1 cpu负载情况,node1上部署这zk/kfk)
(node2 cpu负载情况,node2上部署着fabric部分)
现在,我们进入fabric cli pod执行测试脚本,依次是osn服务发现、创建通道、加入通道、安装链码、实例化链码和查询操作。如下日志,已经清理一些无用消息,最终我们可以查询到a的值100。
root@cli-7b57bbffcf-dnhpd:/opt/gopath/src/github.com/hyperledger/fabric/peer# ./scripts/script.sh

 ____    _____      _      ____    _____           _____   ____    _____
/ ___|  |_   _|    / \    |  _ \  |_   _|         | ____| |___ \  | ____|
\___ \    | |     / _ \   | |_) |   | |    _____  |  _|     __) | |  _|
 ___) |   | |    / ___ \  |  _ <    | |   |_____| | |___   / __/  | |___
|____/    |_|   /_/   \_\ |_| \_\   |_|           |_____| |_____| |_____|

Channel name : mychannel

2019-05-17 12:50:07.354 UTC [channelCmd] InitCmdFactory -> INFO 003 Endorser and orderer connections initialized
2019-05-17 12:50:07.360 UTC [cli.common] readBlock -> INFO 004 Received block: 0
===================== Ordering Service is up and running =====================

2019-05-17 12:50:36.863 UTC [channelCmd] InitCmdFactory -> INFO 003 Endorser and orderer connections initialized
2019-05-17 12:50:36.901 UTC [cli.common] readBlock -> INFO 004 Got status: &{NOT_FOUND}
2019-05-17 12:50:36.906 UTC [channelCmd] InitCmdFactory -> INFO 005 Endorser and orderer connections initialized
2019-05-17 12:50:37.107 UTC [cli.common] readBlock -> INFO 006 Got status: &{SERVICE_UNAVAILABLE}
2019-05-17 12:50:37.110 UTC [channelCmd] InitCmdFactory -> INFO 007 Endorser and orderer connections initialized
2019-05-17 12:50:37.312 UTC [cli.common] readBlock -> INFO 008 Received block: 0
===================== Channel 'mychannel' created =====================

2019-05-17 12:50:51.718 UTC [channelCmd] InitCmdFactory -> INFO 003 Endorser and orderer connections initialized
2019-05-17 12:50:51.808 UTC [channelCmd] executeJoin -> INFO 004 Successfully submitted proposal to join channel
===================== peer0.org1 joined channel 'mychannel' =====================

2019-05-17 12:50:53.866 UTC [channelCmd] InitCmdFactory -> INFO 003 Endorser and orderer connections initialized
2019-05-17 12:50:53.937 UTC [channelCmd] executeJoin -> INFO 004 Successfully submitted proposal to join channel
===================== peer1.org1 joined channel 'mychannel' =====================

2019-05-17 12:51:08.487 UTC [channelCmd] InitCmdFactory -> INFO 003 Endorser and orderer connections initialized
2019-05-17 12:51:08.605 UTC [channelCmd] update -> INFO 004 Successfully submitted channel update
===================== Anchor peers updated for org 'Org1MSP' on channel 'mychannel' =====================

2019-05-17 12:54:23.884 UTC [chaincodeCmd] install -> INFO 005 Installed remotely response:<status:200 payload:"OK" >
===================== Chaincode is installed on peer0.org1 =====================

===================== Chaincode is instantiated on peer0.org1 on channel 'mychannel' =====================

===================== Querying on peer0.org1 on channel 'mychannel'... =====================
Attempting to Query peer0.org1 ...3 secs

value is 100
===================== Query successful on peer0.org1 on channel 'mychannel' =====================
# exit
END,经过kubeadm集群搭建、k8s部署fabric.solo再到k8s部署zk/kfk、k8s部署fabric.kfk,最终实现了用k8s部署管理fabric的目标。
参考:
- Azure中国提供了gcr.io/k8s.gcr.io镜像代理服务 by 伊布
- azure开源镜像站点
- Fabric-solo on k8s
- 在k8s上搭建kfk-zk集群(2)
- 在k8s上搭建kfk-zk集群(1)
- 在本地集群创建StatefulSet有状态的应用


