我的springboot学习之springboot+Mybatis简单整合例子
前些天,找了朋友教我搭框架,朋友教了用最快的方法,搭了一个springboot+Mybatis的简单整合,
虽然现在还不能完全理解,但是这个入门例子,看起来挺好弄,想发出来给网友作参考~
依照惯例,小可爱还是用了idea
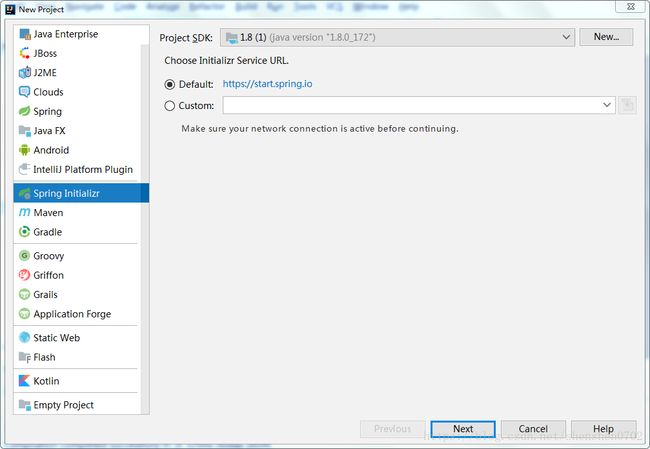
第一步:新建工程
选择Spring Initializr
第二步:填写项目相关信息
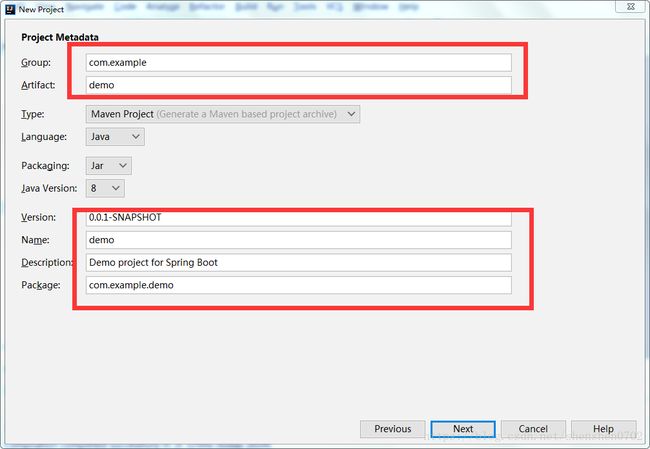
小可爱,
如果是初学者,可以不改这些信息,先默认;
如果有一定了解了,可以根据自己的喜好改信息,哈哈哈。。。
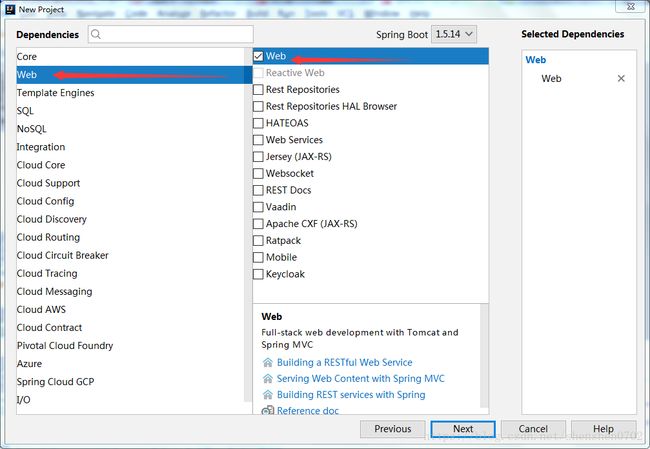
第三步:选择相关依赖

小可爱为什么要指出这里呢,是因为springboot新建工程的时候,idea2018.1默认是2.0.3版本
为什么小可爱要用1.5.14呢,你猜猜看。。。
好了,到这步之后,我们的小可爱不要心急地点next哦,因为我们还没加完依赖呢~
还要加什么依赖呢,且听我分解。。。
(一)Web——————Web
(二)SQL——————MySQL、JDBC、MyBatis

选择sql这边相关的依赖,记得是这三个哦,MySQL、JDBC、MyBatis
小可爱这一步就是教你在spring整合mybatis...hahaha
(三)Template Engines——————Thymeleaf

Thymeleaf 是一个跟 Velocity、FreeMarker 类似的模板引擎,它可以完全替代 JSP
第四步:生成项目

小可爱们,记得确认自己项目的名字,确认自己的工作空间哦。。。
对了,记得这个已经是maven工程,点击:Enable to import

小可爱得解释一番“大道理”给你听哦...
DemoApplication.java是项目主入口,因为我们的项目是springboot集成了tomcat,所以项目只需要启动一次~
不用每次修改代码后重启项目,但是修改代码后需重新编译下,新代码才会生效~
怎么运行呢,通过run/debug configuration进行配置,就可运行
oh!no!又不要我家汤姆猫了,我家汤姆猫这么可爱...
第五步:配置数据库信息
在application.properties中配置信息,包括连接的数据库、用户名以及密码
spring.datasource.url = jdbc:mysql://localhost:3306/demo
spring.datasource.username = root
spring.datasource.password = root
spring.datasource.driverClassName = com.mysql.jdbc.Driver
spring.thymeleaf.cache = false
解释一下,spring.thmeleaf.cache是配置页面热加载~
总而言之,就是是清除缓存,实现热部署。也就是小可爱你修改了html后,不用重启,刷新页面就能看到新的效果~
第六步:编写demo
实体类User
public class User {
    private String id;
    private String userId;
    private String pwd;

    public String getId() {
        return id;
    }

    public void setId(String id) {
        this.id = id;
    }

    public String getUserId() {
        return userId;
    }

    public void setUserId(String userId) {
        this.userId = userId;
    }

    public String getPwd() {
        return pwd;
    }

    public void setPwd(String pwd) {
        this.pwd = pwd;
    }
}
mapper接口类:
import org.apache.ibatis.annotations.Select;
import com.example.demo.entity.User;
import org.apache.ibatis.annotations.Insert;
import org.apache.ibatis.annotations.Param;

public interface UserMapper {
    @Select("select * from users where userId = #{userId}")
    User findUserByUserid(@Param("userId") String userId);
    @Insert("insert into users (userId,pwd) values (#{userId},#{pwd})")
    boolean insertUsers (@Param("userId") String userId,@Param("pwd") String pwd);
}
service接口:
public interface IRegService {
    boolean regUser(String uerId, String pwd);
}
service实现类:
import com.example.demo.mapper.UserMapper;
import org.springframework.beans.factory.annotation.Autowired;
import org.springframework.stereotype.Service;

@Service()
public class RegService implements IRegService {
    @Autowired
    private UserMapper userMapper;
    @Override
    public boolean regUser(String uerId, String pwd) {

        Boolean flag;
        try {
            flag = userMapper.insertUsers(uerId,pwd);
        }catch (Exception e){
            return false;
        }
        return flag;
    }
}
controller类:HelloWorldController
import com.example.demo.service.IRegService;
import org.springframework.beans.factory.annotation.Autowired;
import org.springframework.boot.autoconfigure.EnableAutoConfiguration;
import org.springframework.stereotype.Controller;
import org.springframework.web.bind.annotation.RequestMapping;
import org.springframework.web.bind.annotation.RequestParam;
import org.springframework.web.bind.annotation.ResponseBody;

import java.math.BigInteger;
import java.security.MessageDigest;
import java.security.NoSuchAlgorithmException;


@Controller
@EnableAutoConfiguration
public class HelloWorldController {
    @Autowired
    private IRegService regService;
    @RequestMapping("/")
    String home() {
        return "index";
    }
    @RequestMapping("/reg")
    @ResponseBody
    Boolean reg(@RequestParam("loginPwd") String loginNum, @RequestParam("userId") String userId ){
        String pwd = creatMD5(loginNum);
        System.out.println(userId+":"+loginNum);
        regService.regUser(userId,pwd);
        return true;
    }
    private String creatMD5(String loginNum){
        // 生成一个MD5加密计算
        MessageDigest md = null;
        try {
            md = MessageDigest.getInstance("MD5");
            md.update(loginNum.getBytes());

        } catch (NoSuchAlgorithmException e) {
            e.printStackTrace();
        }
        return new BigInteger(1, md.digest()).toString(16);
    }
}
第七步:主类添加mapperscan包扫描
import org.mybatis.spring.annotation.MapperScan;
import org.springframework.boot.SpringApplication;
import org.springframework.boot.autoconfigure.SpringBootApplication;

@SpringBootApplication
@MapperScan("com.empale.demo.mapper")
public class DemoApplication {

    public static void main(String[] args) {
        SpringApplication.run(DemoApplication.class, args);
    }
}
第八步:运行项目
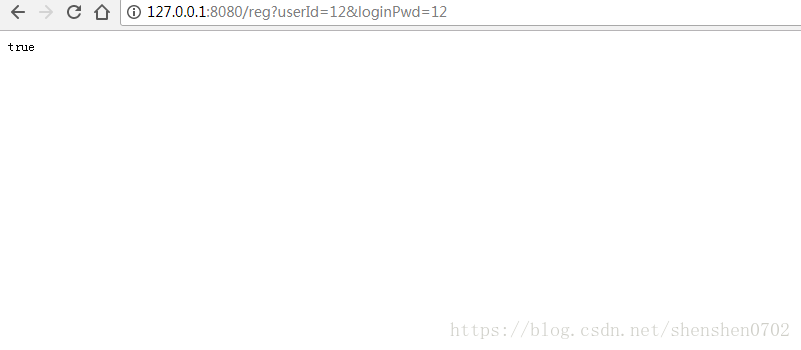
因为小可爱在数据库里填写的是这条数据...

哈哈哈,又完成一个项目了,欢迎各位小可爱的观看