SpringBoot构建Web应用,整合Thymeleaf模板
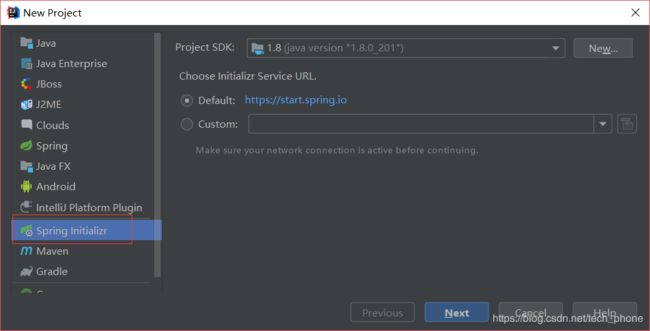
创建springboot web 工程
- 官网https://start.spring.io
点击绿色按钮
浏览器就会下载demo.zip解压在idea中打开就可以,当然要添加相应的依赖 - 创建springboot工程(在idea中创建)
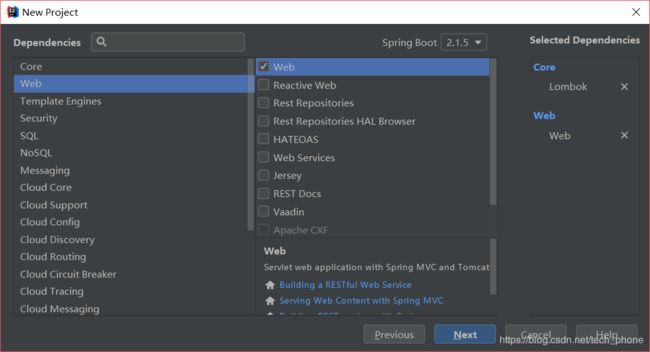
添加Lombok插件可以在javaBean时省去写set、get和构造方法,通过@Setter @Getter 和@NoArgsConstructor 这个注解生成对应的get、set和空的构造方法

因为我们搭建的是web项目,所以我们要添加web依赖
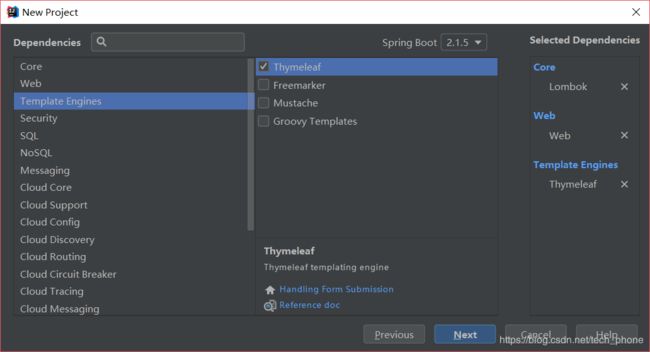
引入模板引擎,Thymeleaf 是一个跟 Velocity、FreeMarker 类似的模板引擎,它可以完全替代 JSP
具体怎么用下文会介绍
添加MyBatis依赖 这里可以不添加先

填写工程名称点击Finish完成

完成以后打开后就这样了 当然这里我删掉了几个对我们demo无影响的文件

接下来看一下我们的依赖
            org.springframework.boot
            spring-boot-starter-thymeleaf


            org.springframework.boot
            spring-boot-starter-web


            org.mybatis.spring.boot
            mybatis-spring-boot-starter
            2.0.1


            org.projectlombok
            lombok
            true


            com.oracle
            ojdbc6
            11.2.0.1.0


            org.springframework.boot
            spring-boot-starter-test
            test
ojdbc6打入本地创库链接https://blog.csdn.net/WYpersist/article/details/80614949
spring-boot-starter-web内置tomcat 默认端口号8080

接下来就是启动这个工程,springboot 启动比较特殊,他是通过main方法启动的,点击下图红色框的绿色小图标就可以run了

你会发现下面这样的报错信息

原因是@SpringBootApplication注解,这是整个Spring Boot的核心注解,它的目的就是开启Spring Boot的自动配置。关于Spring Boot的自动配置那些事大家可以自行去百度,这里不做详解,接下来在把@SpringBootApplication()替换成下面这段,这样就可以启动了
@SpringBootApplication(exclude = DataSourceAutoConfiguration.class)
看到这个表示启动成功了,当然可以用另一种办法不改变注解
![]()
在resource文件加下可以看到application.properties,我用的是Oracle数据库连接,所以如下
spring.datasource.driver-class-name=oracle.jdbc.driver.OracleDriver
spring.datasource.url=jdbc:oracle:thin:@localhost:1521:orcl
spring.datasource.username=scott
spring.datasource.password=tiger
启动就可以了

细心地同学会发现我的spring图标和端口号变了,在application.properties里添加下面这段代码,改变端口号
server.port=9092
定制banner
在resource文件夹下创建banner.txt,然后通过http://patorjk.com/software/taag网站生成需要的字符,将字符复制到banner.txt里就可以了

关闭banner
在启动类的main方法里添加如下代码就可以去掉banner,启动图标就消失了
builder.bannerMode(Banner.Mode.OFF).run(args);
步入web
首先按如下目录创建文件夹(红色框的)
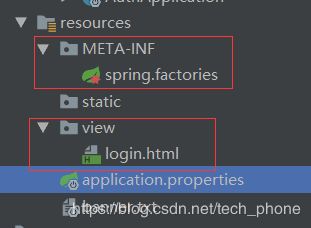
刚创建出来的springboot中resource目录是没有META-INF 和view ,只有static 和templates 这两个都是springboot默认读取的文件,为了保证万无一失的读取到我们想要的文件,在application.properties中添加如下代码
spring.resources.static-locations=classpath:/static/,classpath:/view/,classpath:/META-INF/
创建好login.html,写上一句著名的语句 HELLO WORLD

按下图创建文件夹和类用于配置路径转发

WebConfiguration里的内容如下
@Configuration
    public class WebMVCConfig extends WebMvcConfigurerAdapter {
        @Override
        public void addViewControllers(ViewControllerRegistry registry) {
            registry.addViewController("/view").setViewName("/login");
            super.addViewControllers(registry);
        }

    }

继承WebMvcConfigureAdapter重写addViewControllers 跳转指定页面,这样我们就无须写Control就可以访问页面了,此时我们需要将WebConfiguration类添加到resource/META-INF/spring.factories如图

Spring Boot中的SPI机制
在Spring中也有一种类似与Java SPI的加载机制。它在META-INF/spring.factories文件中配置接口的实现类名称,然后在程序中读取这些配置文件并实例化。这种自定义的SPI机制是Spring Boot Starter实现的基础。
搞好这些后我们就需要配置引擎模板,在application.properties中
spring.thymeleaf.mode=LEGACYHTML5
spring.thymeleaf.encoding=UTF-8
spring.thymeleaf.servlet.content-type=text/html
#开发时关闭缓存,不然没法看到实时页面
spring.thymeleaf.cache=false
# 在构建URL时预先查看名称的前缀
spring.thymeleaf.prefix=classpath:/view/
# 构建URL时附加查看名称的后缀.
spring.thymeleaf.suffix=.html
#thymeleaf end
spring.thymeleaf.mode=LEGACYHTML5 需要添加如下依赖
            net.sourceforge.nekohtml
            nekohtml
            1.9.22
为了防止因为在html中少了结束标签,而让你找半天错误,比如
![]()
这个结束结束标签可有可无,如果把它spring.thymeleaf.mode=HTML5 设置这样就会错,报的是路径错,你会为此得不偿失,哈哈,吃一堑长一智
以下这是我application.properties的配置信息
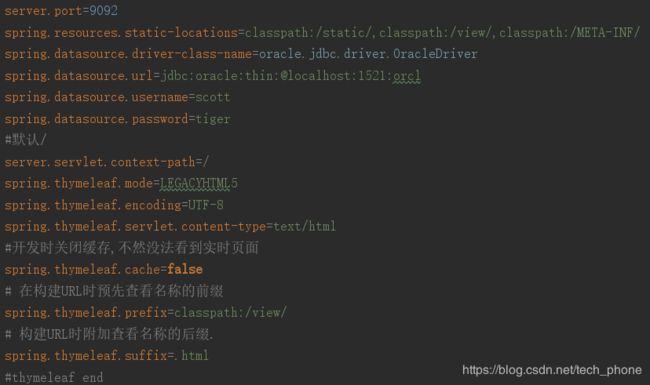
现在就可以启动demo了,在地址栏上输入 http://localhost:9092/view,如下
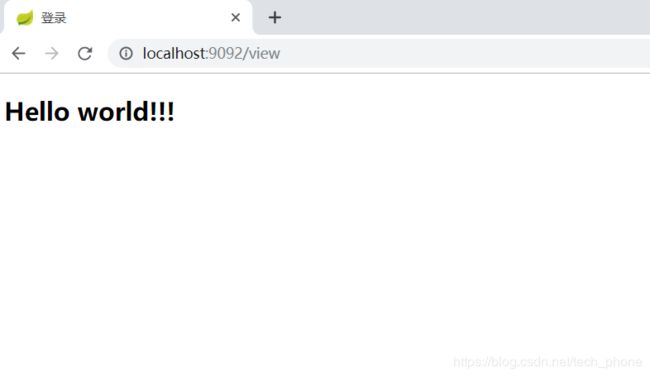
看到Hello World Spring+thymeleaf就算搭建成功了,谢谢你们的阅读,希望能帮到大家,后面介绍springboot+mybatis配置教程