1. 使用packstack部署openstack
redhat开源项目 RDO, 利用puppet 管理openstack
使用RDO项目中的工具packstack 安装openstack:
一种是 allinone 方式 :
把openstack的各个组件全部安装到一台机器上去,安装的时候很多都是不可以定制,allinone只适合做测试环境,体验一下openstack
同时,会预下载一个镜像cirros及配置模拟环境,从互联网上下载,其下载地址是国外网址,所以最好禁止这部分,后文有说这一点provision_demo
一种是应答文件的方式:
生成一个应答文件,然后根据需要对这个应答文件进行修改. 下文是通过应答文件来部署的。
首先建立RHEL 7.2的环境,然后在RHEL7.2上安装openstack:
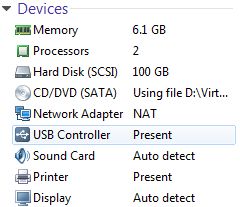
新建的RHEL 7.2环境,配置如下:
内存:需要大于5G
处理器:给2个即可
硬盘:100G
网络:NAT----具体IP地址段,查看下面
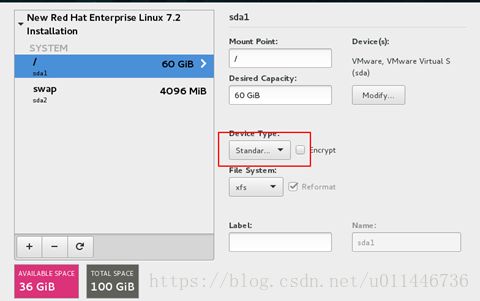
RHEL7.2的分区管理如下:
挂载sda1 挂到 根目录 / 采用标准分区
挂载sda2 挂到 swap 采用标准分区
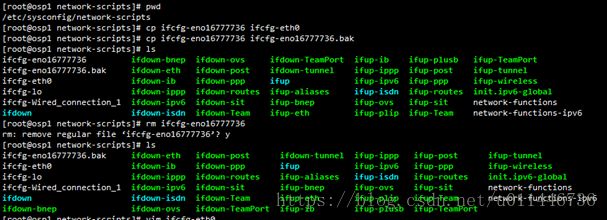
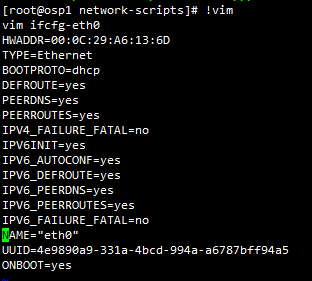
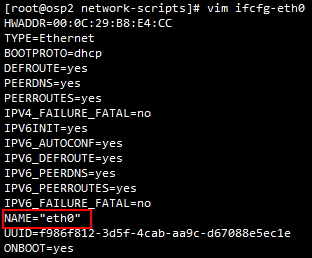
· RHEL7.2启动配置完毕后,由于系统默认的interface是 enoXXXXX格式,此处我们改成eth0的格式,修改方式如下:
vim /etc/default/grub
修改如下内容:
GRUB_CMDLINE_LINUX="rhgbquiet net.ifnames=0 biosdevname=0"
grub2-mkconfig-o /boot/grub2/grub.cfg
reboot
· 重启之后,系统起来后即变成了eth0
关闭selinux:
vim /etc/selinux/config
修改SELINUX=permissive
setenforce 0
getenforce
关闭防火墙,放行所有流量:
firewall-cmd--set-default-zone=trusted
修改本机的hostname如下: 此部分可以在RHEL7.2 创建时候设置,如果未设置可以用hostnamectl --set-hostname 设置。
[root@osp1 ~]# hostname
osp1.example.com
修改本地地址解析hosts:
vim /etc/hosts
上传openstack安装包:
下面创建repos:
第一: RHEL7.2 repos:
mount cdrom 光盘内容到 /iso下面, 如果没有/iso, mkdir /iso
(此处必须保证光盘connected)
![]()
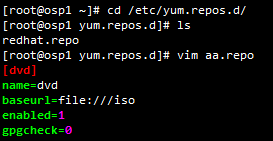
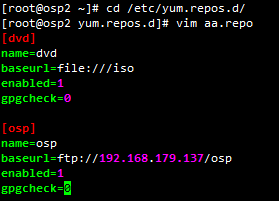
创建新的RHEL7.2 repo:
清除原有的yum信息:
第二:制作openstack repos:
此处安装vsftpd 软件,(原因:我们会将openstack 的repo 创建在/var/ftp下面,让本机启用ftp业务,之后新增加的compute即可不用创建自己的repos,采用ftp 到本机即可下载安装软件包)
启用vsftpd服务并开启下次开机启动:
mount其OPENSTACK 包到 /mnt下:
![]()
cd /var/ftp 目录下,复制所有的包到osp/下,createrepo 定义yum 源:
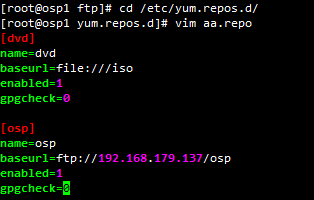
编辑 yum 配置文件如下:
安装packstack 软件包:
P.S.:
allinone 安装命令如下:
![]()
![]()
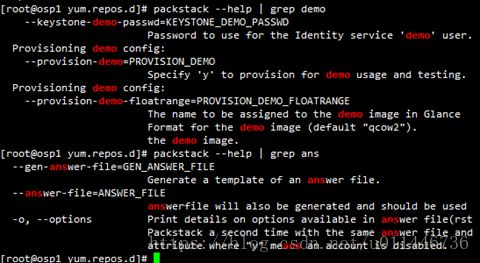
此处采用应答文件的方式安装:
![]()
修改provision_demo为n(no)
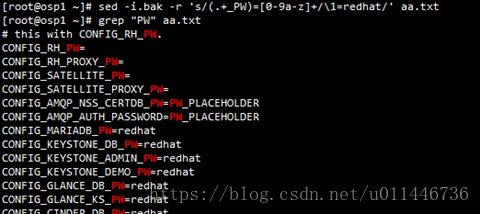
然后使用sed 对所有的相关密码进行修改:
# sed -i.bak -r 's/(.+_PW)=[0-9a-z]+/\1=redhat/'aa.txt
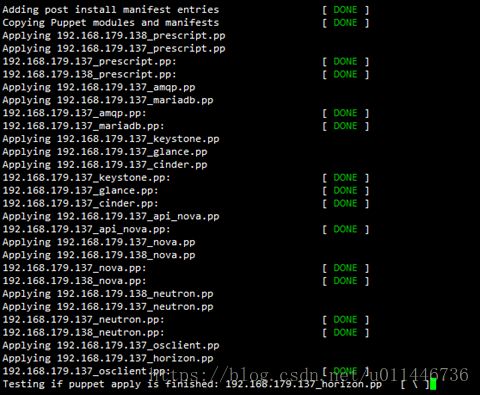
开始安装:
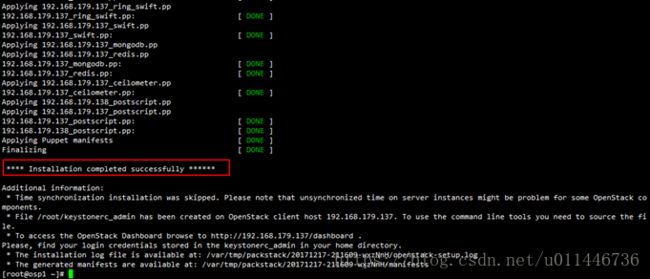
安装完成:
如图所示:
有些服务依赖于NTP,我们此处没有NTP SERVER。
系统启用了NetworkManager, 为防止冲突,关闭它。
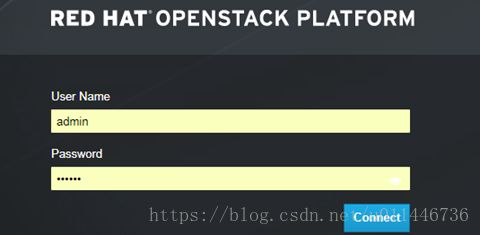
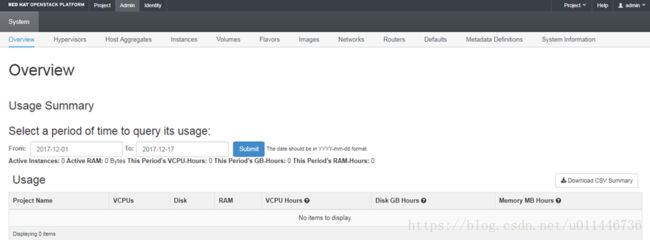
如何介入openstack的dashboard
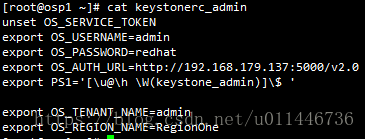
登录dashboard的账户信息在某个文件里。
Additional information:
* Time synchronization installation wasskipped. Please note that unsynchronized time on server instances might beproblem for some OpenStack co
mponents.
* Warning:NetworkManager is active on 192.168.179.137. OpenStack networking currentlydoes not work on systems that have the Network Manager se
rviceenabled.
* File/root/keystonerc_admin has been created on OpenStack client host192.168.179.137. To use the command line tools you need to source the fi
le.
* Toaccess the OpenStack Dashboard browse to http://192.168.179.137/dashboard .
Please,find your login credentials stored in the keystonerc_admin in your homedirectory.
* Theinstallation log file is available at:/var/tmp/packstack/20171217-155854-Z_RpoS/openstack-setup.log
* Thegenerated manifests are available at:/var/tmp/packstack/20171217-155854-Z_RpoS/manifests
关闭NetworkManager:
登录dashboard的账户信息如下: admin/redhat
Verifyinstallation.
Start a session to the newly installed system,source the keystonerc_admin
[root@osp1 ~]# source keystonerc_admin
[root@osp1 ~(keystone_admin)]# openstack-status
== Nova services ==
openstack-nova-api: active
openstack-nova-cert: active
openstack-nova-compute: active
openstack-nova-network: inactive (disabled on boot)
openstack-nova-scheduler: active
openstack-nova-conductor: active
== Glance services ==
openstack-glance-api: active
openstack-glance-registry: active
== Keystone service ==
openstack-keystone: inactive (disabled on boot)
== Horizon service ==
openstack-dashboard: active
== neutron services ==
neutron-server: active
neutron-dhcp-agent: active
neutron-l3-agent: active
neutron-metadata-agent: active
neutron-openvswitch-agent: active
== Swift services ==
openstack-swift-proxy: active
openstack-swift-account: active
openstack-swift-container: active
openstack-swift-object: active
== Cinder services ==
openstack-cinder-api: active
openstack-cinder-scheduler: active
openstack-cinder-volume: active
openstack-cinder-backup: active
== Ceilometer services ==
openstack-ceilometer-api: active
openstack-ceilometer-central: active
openstack-ceilometer-compute: active
openstack-ceilometer-collector: active
openstack-ceilometer-alarm-notifier: active
openstack-ceilometer-alarm-evaluator: active
openstack-ceilometer-notification: active
== Support services ==
mysqld: inactive (disabled on boot)
libvirtd: active
openvswitch: active
dbus: active
target: active
rabbitmq-server: active
memcached: active
== Keystone users ==
/usr/lib/python2.7/site-packages/keystoneclient/shell.py:64:DeprecationWarning: The keystone CLI is deprecated in favor ofpython-openstackclien
t. For a Python library, continue usingpython-keystoneclient. 'python-keystoneclient.', DeprecationWarning)
/usr/lib/python2.7/site-packages/keystoneclient/v2_0/client.py:145:DeprecationWarning: Constructing an instance of the keystoneclient.v2_0.clien
t.Client class without a session is deprecatedas of the 1.7.0 release and may be removed in the 2.0.0 release. 'the 2.0.0 release.', DeprecationWarning)
/usr/lib/python2.7/site-packages/keystoneclient/v2_0/client.py:147:DeprecationWarning: Using the 'tenant_name' argument is deprecated in version
'1.7.0'and will be removed in version '2.0.0', please use the 'project_name' argumentinstead super(Client,self).__init__(**kwargs)
/usr/lib/python2.7/site-packages/debtcollector/renames.py:43:DeprecationWarning: Using the 'tenant_id' argument is deprecated in version'1.7.0'
and willbe removed in version '2.0.0', please use the 'project_id' argument instead return f(*args, **kwargs)
/usr/lib/python2.7/site-packages/keystoneclient/httpclient.py:376:DeprecationWarning: Constructing an HTTPClient instance without using a sessio
n is deprecated as of the 1.7.0 release and maybe removed in the 2.0.0 release. 'the2.0.0 release.', DeprecationWarning)
+----------------------------------+------------+---------+----------------------+
| id | name | enabled | email |
+----------------------------------+------------+---------+----------------------+
| dd6489d6833c4078933866a14baa2e10 | admin | True | root@localhost |
| bce32841a7c7421993690e64ab78e7af | ceilometer| True | ceilometer@localhost |
| a12e3efde83f4321a16f1b1dc21237b4 | cinder | True | cinder@localhost |
| de3d82f02d5044f8a7bfd4ef8fe5bb29 | glance | True | glance@localhost |
| 6745d9a890eb4bd79ff28671b72d47ae | neutron | True | neutron@localhost |
| b9ae58c26fd1445f8e45bf25559a5bb8 | nova | True | nova@localhost |
| c354aab7dffc4ccaad252d8789357092 | swift | True | swift@localhost |
+----------------------------------+------------+---------+----------------------+
== Glance images ==
+----+------+
| ID | Name |
+----+------+
+----+------+
== Nova managed services ==
+----+------------------+------------------+----------+---------+-------+----------------------------+-----------------+
| Id | Binary | Host | Zone | Status | State | Updated_at | Disabled Reason |
+----+------------------+------------------+----------+---------+-------+----------------------------+-----------------+
| 1 |nova-consoleauth | osp1.example.com | internal | enabled | up | 2017-12-17T11:46:54.000000 | - |
| 2 |nova-scheduler | osp1.example.com |internal | enabled | up |2017-12-17T11:46:48.000000 | - |
| 3 |nova-conductor | osp1.example.com |internal | enabled | up |2017-12-17T11:46:57.000000 | - |
| 5 |nova-compute | osp1.example.com |nova | enabled | up | 2017-12-17T11:46:53.000000 | - |
| 6 |nova-cert | osp1.example.com |internal | enabled | up |2017-12-17T11:46:54.000000 | - |
+----+------------------+------------------+----------+---------+-------+----------------------------+-----------------+
== Nova networks ==
+----+-------+------+
| ID | Label | Cidr |
+----+-------+------+
+----+-------+------+
== Nova instance flavors ==
+----+-----------+-----------+------+-----------+------+-------+-------------+-----------+
| ID | Name | Memory_MB | Disk | Ephemeral | Swap | VCPUs | RXTX_Factor | Is_Public|
+----+-----------+-----------+------+-----------+------+-------+-------------+-----------+
| 1 |m1.tiny | 512 | 1 | 0 | | 1 | 1.0 | True |
| 2 |m1.small | 2048 | 20 | 0 | | 1 | 1.0 | True |
| 3 |m1.medium | 4096 | 40 | 0 | | 2 | 1.0 | True |
| 4 |m1.large | 8192 | 80 | 0 | | 4 | 1.0 | True |
| 5 |m1.xlarge | 16384 | 160 | 0 | | 8 | 1.0 | True |
+----+-----------+-----------+------+-----------+------+-------+-------------+-----------+
== Nova instances ==
+----+------+--------+------------+-------------+----------+
| ID | Name | Status | Task State | Power State| Networks |
+----+------+--------+------------+-------------+----------+
+----+------+--------+------------+-------------+----------+
[root@osp1 ~(keystone_admin)]#
如何新增加一个计算节点:
[首先重新安装一个新的RHEL7.2虚拟机,按照上面的步骤新建一个计算节点]
之后做如下配置:osp2 修改selinux,firewall,hostname ,hosts, 同时修改osp1的hosts内容
osp2 hosts配置:
osp1 hosts 增加新加的osp2 计算节点:
创建yum源:
修改enoXXXX 为eth0:
mv ifcfg-enoXXXXX ifcfg-eth0
安装packstack 软件包:
disable NetworkManager服务:
在osp1 的应答文件中增加新的计算节点ip即可:
重新运行一次packstack 应答文件:
直到最终显示如下的结果:
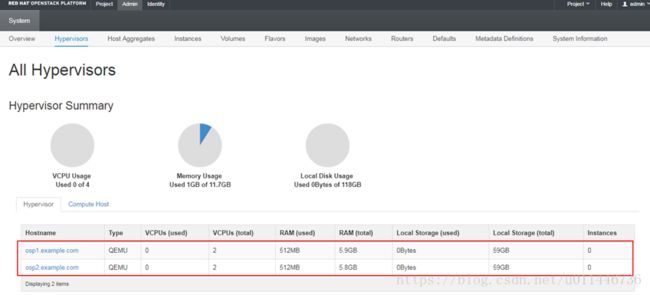
最终会在dashboard中看到这个新增加的计算节点:如图所示

