- 浅谈VB.NET为何还没有被时代淘汰
练习AI两年半
.net
最近在做一个旧项目的更新和维护,比较头疼的是这个项目是08年写的,当时编写编写语言为c++、环境为vc6.0+MFC(嘶~,这玩意儿年纪比我还大),需要将环境改为VS2022、.NET框架,为配合项目组其他同事,新语言改用VB.NET。我之前一直在用C++和QT写项目,一时间让我换一种语言和框架,还要在c++和vb.net之间反复横跳确实让我很崩溃。但打工人再难的项目也要硬着头皮上呀,好在VB.N
- 索骥馆-编程语言之《网络编程实用教程(第2版)》扫描版[PDF]
cinnarnia
面壁区windows编程程序设计TCPIP网络
内容介绍:本书主要介绍基于tcp/ip协议栈的套接字网络编程技术。全书分为10章,第1章介绍网络编程基础,第2章介绍套接字网络编程接口,第3章介绍windows环境的网络编程,第4章介绍mfc编程,第5章介绍mfcwinsock类的编程,第6章介绍wininet编程,第7章介绍winsock的多线程编程,第8章介绍winsock的输入/输出模型,第9章介绍http及高级编程,第10章介绍电子邮件协
- 计算机基础:编码02,有符号数编码,原码
水饺编程
MFC学习笔记Win32学习笔记c++windowsmfcc语言
专栏导航本节文章分别属于《Win32学习笔记》和《MFC学习笔记》两个专栏,故划分为两个专栏导航。读者可以自行选择前往哪个专栏。(一)WIn32专栏导航上一篇:计算机基础:编码01,无符号数编码回到目录下一篇:计算机基础:编码03,根据十进制数,求其原码(二)MFC专栏导航上一篇:计算机基础:编码01,无符号数编码回到目录下一篇:计算机基础:编码03,根据十进制数,求其原码本节前言上一节,我是讲解
- 给空间加载图标
weixin_30859423
//MFCday003Dlg.h:头文件//#pragmaonce#include"MylistCtrl.h"#include"afxcmn.h"//CMFCday003Dlg对话框classCMFCday003Dlg:publicCDialogEx{//构造public:CMFCday003Dlg(CWnd*pParent=NULL);//标准构造函数//对话框数据enum{IDD=IDD_MF
- 控件综合2
weixin_30881367
下拉框//MFCDay002Dlg.cpp:实现文件//#include"stdafx.h"#include"MFCDay002.h"#include"MFCDay002Dlg.h"#include"afxdialogex.h"#include"CmyDialog.h"#ifdef_DEBUG#definenewDEBUG_NEW#endif//用于应用程序“关于”菜单项的CAboutDlg对话框
- **ResNet-SE + MFCC** 训练框架,包括 **数据加载、训练流程**,以及 **混淆矩阵** 可视化示例
大霸王龙
系统分析业务矩阵python线性代数人工智能机器学习深度学习
1.依赖库安装如果你还没安装相关库,请先执行:pipinstalltorchtorchaudiotorchvisionscikit-learnmatplotlibtqdm2.数据加载这里假设你有一个音频分类数据集,其文件结构如下:dataset/│──train/│├──class_0/││├──audio_0.wav││├──audio_1.wav│├──class_1/││├──audio_0
- Electron+Python软件系统开发记录(一):基础环境搭建
多宝鱼1998
环境配置遇到的坑pythonnodejsthrift
Electron+Python软件系统开发记录(一):基础环境搭建1.问题说明最近开始做本科毕设,其中有一部分内容是搭建一个完整的软件系统。系统要求就是常见的客户端,服务器,数据库的整体架构。因为本科不是计算机系的,所以学习的相关技能少,以前写课程设计一般用QT或者MFC,还有Mac的OC语言。本着多学习的态度,这次选用了Electron框架,可以迫使自己学学html,css,js这些东西。后端因
- 【owt】构建m79的owt-client-native:使用vs2017
等风来不如迎风去
WebRTC入门与实战windows
家里电脑换成了台式机,拷贝代码发现了三年前的owt客户端mfc工程。不用下载第三方库,试着构建下:owt-client-native我这里有3年前的代码,思索了下还是用vs2017构建吧:重新构建一下选用x86的vs2017vs的命令行控制台cls可以清理屏幕之前构建过vs2022的webrtc原版所以这里构建都在控制塔设置环境变量。遇到了一些问题,记录下来:可以看到默认使用了我电脑安装的最新的s
- MFC: DeviceIoControl 通过API访问设备驱动程序
kkkmmmjjjj
MFC串口通信MFC串口通信
转载:http://m.blog.csdn.net/article/details?id=21602051DeviceIoControl的其实和ReadFile和WriteFile是一样的,不过这个功能更强,一次交互能够输入数据,也可以输出数据.DeviceIoControl内部创建的IRP是IRP_MJ_DEVICE_CONTROL类型的IRP,然后操作系统会将这个IRP转发给驱动程序的分发函数
- MFC—加法器
nqqcat~
MFCmfcc++
1.需要为编辑框添加变量2.在cpp文件中的按钮中添加代码voidCMFCAddtionDlg::OnBnClickedButton1(){//TODO:在此添加控件通知处理程序代码UpdateData(true);//把控件里的值更新给变量m_add=m_add1+m_add2;//加法UpdateData(false);//把控件相加的值赋值给控件}
- 一个游戏程序员的学习资料【转载】
Snail -Bernoulli
游戏程序员游戏程序员成长路线
想起写这篇文章是在看侯杰先生的《深入浅出MFC》时,突然觉得自己在大学这几年关于游戏编程方面还算是有些心得,因此写出这篇小文,介绍我眼中的游戏程序员的书单与源代码参考。一则是作为自己今后两年学习目标的备忘录,二来没准对别人也有点参考价值。我的原则是只写自己研究过或准备研究的资料,所以内容无疑会带上强烈的个人喜好色彩,比如对网络,数据库等重要方面完全没有涉及。因为自己主要对三维图形引擎,人工智能算法
- 多线程之三:MFC多线程及实例(转)
Stef若木
MFC线程
MFC中有两类线程,分别称之为工作者线程和用户界面线程。二者的主要区别在于工作者线程没有消息循环,而用户界面线程有自己的消息队列和消息循环。工作者线程没有消息机制,通常用来执行后台计算和维护任务,如冗长的计算过程,打印机的后台打印等。用户界面线程一般用于处理独立于其他线程执行之外的用户输入,响应用户及系统所产生的事件和消息等。但对于Win32的API编程而言,这两种线程是没有区别的,它们都只需线程
- MFC线程
rainbow_lucky0106
C\C++\QT\MFCmfc线程
创建线程HANDLEm_hThread;m_hThread=CreateThread(NULL,0,save_snapshot,(LPVOID)this,0,&iThreadId);开启线程循环等待DWORDWINAPIsave_snapshot(LPVOIDpVoid){while(true){//持续循环等待事件到达。接收到事件信号后才进入if。if(::WaitForSingleObject
- 坚持学习100天:MFC多线程开发
smile- sunshine
编程语言C++笔记mfc学习c++
前言Hello,我是修齊。学习C++的第一百零二十六天,5.18的今天,520快到了,要去花店买两朵玫瑰,用心学习。在这里记录一些学习的东西和学习的心情,内容主要是一些自己学习整理的小笔记。一、类CWinThread1.MFC,用类CWinThread的对象来表示一个线程,每个MFC程序的主线程都有一个继承自CWinApp的应用程序类,而CWinApp继承自CWinThread。2.类CWinTh
- MFC的用户界面线程
CodingLife99
javaandroidc++多线程spring
一.简单认识MFC中将线程分为用户界面线程和工作线程,两者最大的区别是前者是和界面相关联的,而后者是进行后台的一些操作.二.如何创建MFC中的线程大多继承自CWinThread,而相关联的界面可以继承自CFrameWnd,也可以继承自对话框之类的(感觉只要是界面类,就可以吧).它的创建过程大概是这样的:1.在主线程中建立用户界面线程,比如这里是CMyThread类型的.2.在CMyThread::
- 多线程3:MFC中用户界面线程的相关操作
智能与优化
多线程mfcuic++开发语言windows
文章目录前言一、工作线程与界面线程的区别1.在子线程中创建模态对话框2.在子线程中创建非模态对话框二、界面线程1.界面线程的创建总结前言多线程3:MFC中用户界面线程的相关操作。一、工作线程与界面线程的区别工作线程与界面线程主要是针对MFC中的线程来说的。默认情况下,通过CreateThread函数创建出来的线程都为工作线程。MFC中的函数AfxBeginThread有两种重载方式,一是创建工作线
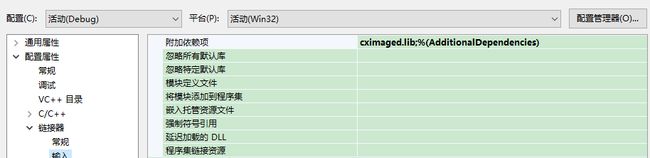
- MFC联合Halcon之窗口图片显示
逆风路途
MFC视觉
MFC联合Halcon之窗口图片显示具体的方案是:使用一个PictureControl控件,调用Halcon中的OpenWindow函数,将其参数中的父窗口设为PictureControl的句柄,就可以在控件内显示我们的照片了,同时要注意缩放一下图片以适应控件大小。MFC程序还是新建一个对话框程序,然后添加一个按钮和一个PictureControl控件,控件的ID默认为IDC_STATIC。正如上
- MFC案例:利用双缓冲技术绘制顶点可移动三角形
LaoWaiHang
MFC小程序mfc
案例目标:在屏幕上出现一个三角形,同时显示各顶点坐标,当用鼠标选择某顶点并拖动时,三角形随鼠标移动而变形。具体步骤为:一、在VS2022上建立一个基于对话框的MFC应用,项目名称:DrawMovableTriangle,其它步骤使用缺省。进入对话框界面,选择对话框,将其适当拉大一些。然后,删除其自带的控件。二、打开解决方案资源管理器,找到DrawMovableTriangleDlg.h文件1、先以
- MFC文件和注册表的操作
Chasing追~
mfc操作系统mfcc++windows
MFC文件和注册表的操作日志、操作配置文件、ini、注册表、音视频的文件存储Linux下一切皆文件C/C++操作文件constchar*与char*constconstchar*常量指针,表示指向的内容为常量。指针可以指向其他变量,但是内容不能再变了charszName[6]="Bingo";constchar*pName=szName;*pName='b';错误//pName常量指针,表示指向的
- ffplay播放器源码(七)overlay滤镜
指掀涛澜天下惊
msys2ffplayffmpegc++视频编解码ffmpeg音视频c++
本章介绍在mfc-ffplay(源码已删除了所有相关滤镜的代码)播放器增加overlay滤镜在视频里面加logo水印图片,效果图:滤镜介绍滤镜(Filters)是FFmpeg库提供的一套强大的工具,滤镜可以应用于视频的每一帧,也可以应用于音频的每一个样本,从而实现各种效果,如缩放、裁剪、旋转视频,调整颜色、对比度、亮度,或者对音频进行混音、延迟、回声等处理。查看FFmpeg滤镜种类命令:ffmpe
- Windows程序设计28:MFC模态与非模态对话框
智能与优化
Windows程序设计windowsmfcc++开发语言
文章目录前言一、创建模态对话框1.创建模态对话框模板2.绑定自定义对话框类3.创建模态对话框DoModal4.销毁模态对话框二、创建非模态对话框1.创建对话框模板2.绑定自定义对话框类3.创建非模态对话框Create、ShowWindow4.销毁非模态对话框5.销毁自身窗口指针总结前言Windows程序设计28:MFC模态与非模态对话框。一、创建模态对话框创建模态对话框主要分为如下四步,这里新建一
- C/C++教程 第十七章 —— MFC开发多人聊天室
余识-
C/C++实战入门到精通mfcc++c语言
注意本系列文章已升级、转移至我的自建站点中,本章原文为:MFC开发多人聊天室目录注意一、前言二、网络编程基础三、网络协议1.TCP2.UDP四、TCP实现聊天1.Tcp服务器2.Tcp客户端4.运行测试五、UDP实现聊天1.UDP服务器2.UDP客户端3.运行测试六、思考问题一、前言前面几个章节我们大致过了一遍MFC的内容,相信现在的你已经是有能力开发一些简单的软件的了!但现在的软件,很少有不需要
- MFC学习笔记-1
nqqcat~
MFCmfcc++
一、编辑框和按钮//.h文件private:CStringstr;//给窗口类加了一个变量(定义一个成员变量),关联到IDC_EDIT1中(要在实现中关联,源文件文件夹中)CStringstr2;//接收button2,和IDC_EDIT2绑定public:afx_msgvoidOnBnClickedButton1();afx_msgvoidOnBnClickedButton2();};//.cp
- C++MFC常用控件
刘欢(C#)
C++c++mfc
_按钮(Button)_编辑框(EditControl)_标签(StaticText)_超级列表框(ListControl)_分组框(GroupBox)_复选框(CheckBox)_树形框(TreeControl)_图片框(PictureControl)_文件选择框(MFCEditBrowseControl)_选择夹(TabControl)_组合框(ComboBox)_avi短动画命令按钮(Com
- c++ mfc调用UpdateData(TRUE)时,发生异常
澄澈天空
mfcc++
1.UpdateData()介绍UpdateData()函数是MFC的窗口函数,是用来刷新数据的。有以下两种调用状态:UpdateData(TRUE):把当前界面上控件中的值更新到绑定的变量中去。UpdateData(FALSE):把绑定变量中的数据更新到控件中去。2.调用时发生如下异常的解决方法DebugAssertionFailed!1)排除控件禁用或不存在、不可用等情况;2)检查调用方式,是
- C++ MFC 获取时间
澄澈天空
c++mfc开发语言
MFC中CTime类的功能非常强大,可以获取年、月、日、小时、分钟、秒、星期等等,最最重要的是可根据需要去格式化。下面是具体的使用方式:①定义一个CTime类对象CTimetime;②得到当前时间time=CTime::GetCurrentTime();③GetYear(),GetMonth(),GetDay(),GetHour(),GetMinute(),GetSecond(),GetDayOf
- MFC中添加Richedit2.0控件导致程序无法运行的解决方法mfc richedit2 Detected memory leaks! 及控件使用
小黄人软件
mfcc++
错误:拖Richedit2.0控件到界面,编译提示mfcrichedit2Detectedmemoryleaks!原因:在MFC中添加Richedit2.0控件,可能会导致程序出错或无法运行。这是由于RichEdit没有初始化导致的。解决:在继承自CWinApp的类中的InitInstance()函数中加入:AfxInitRichEdit();AfxInitRichEdit2();使用要编写一个函
- C++ MFC添加RichEditControl控件后,程序启动失败
澄澈天空
mfcc++
通常,软件界面显示LOG时,需要使用文本控件,然而,在完成添加RichEditControl控件后,启动调试,程序无法启动,不会弹出对话框我当前使用的是控件RichEdit2.0版本,主要是未正确的加载RichEdit控件库解决办法:在InitInstance()函数中添加以下代码来加载RichEdit控件库:在以上函数添加控件初始化后,程序可以正常启动了。
- Qt学习记录--04 Qt的对话框介绍
Barry.Ji
QtC++qtC++
一引言:熟悉win32(MFC)的小伙伴们会知道,对话框分为模态对话框和非模态对话框,他们的明显差异是:模态对话框在弹出后,会阻塞同一应用程序中其它窗体的输入,即无法获取鼠标和键盘等响应。模态对话框很常见,比如记事本的“打开文件”功能。当“打开文件”对话框弹出后,我们无法对此外的窗口进行操作的。而非模态对话框在弹出后,其他窗体依旧可以获取响应。例如记事本的“查找”对话框,我们可以在查找的同时,继续
- MFC调用Python脚本
Laurel_Hou
1环境配置1.Python和MFC的运行环境要一致,要么都是32位,要么都是64位,最好在最开始的时候就统一,不然之后的控件访问可能会出问题2.添加环境变量变量名:PYTHONPATH变量值:Python安装目录/Lib变量名:PYTHONHOME变量值:Python安装目录重启后环境变量生效2MFC配置2.1目录设置项目-》属性-》VC++目录-》包含目录:python安装目录/include项
- 解线性方程组
qiuwanchi
package gaodai.matrix;
import java.util.ArrayList;
import java.util.List;
import java.util.Scanner;
public class Test {
public static void main(String[] args) {
Scanner scanner = new Sc
- 在mysql内部存储代码
annan211
性能mysql存储过程触发器
在mysql内部存储代码
在mysql内部存储代码,既有优点也有缺点,而且有人倡导有人反对。
先看优点:
1 她在服务器内部执行,离数据最近,另外在服务器上执行还可以节省带宽和网络延迟。
2 这是一种代码重用。可以方便的统一业务规则,保证某些行为的一致性,所以也可以提供一定的安全性。
3 可以简化代码的维护和版本更新。
4 可以帮助提升安全,比如提供更细
- Android使用Asynchronous Http Client完成登录保存cookie的问题
hotsunshine
android
Asynchronous Http Client是android中非常好的异步请求工具
除了异步之外还有很多封装比如json的处理,cookie的处理
引用
Persistent Cookie Storage with PersistentCookieStore
This library also includes a PersistentCookieStore whi
- java面试题
Array_06
java面试
java面试题
第一,谈谈final, finally, finalize的区别。
final-修饰符(关键字)如果一个类被声明为final,意味着它不能再派生出新的子类,不能作为父类被继承。因此一个类不能既被声明为 abstract的,又被声明为final的。将变量或方法声明为final,可以保证它们在使用中不被改变。被声明为final的变量必须在声明时给定初值,而在以后的引用中只能
- 网站加速
oloz
网站加速
前序:本人菜鸟,此文研究总结来源于互联网上的资料,大牛请勿喷!本人虚心学习,多指教.
1、减小网页体积的大小,尽量采用div+css模式,尽量避免复杂的页面结构,能简约就简约。
2、采用Gzip对网页进行压缩;
GZIP最早由Jean-loup Gailly和Mark Adler创建,用于UNⅨ系统的文件压缩。我们在Linux中经常会用到后缀为.gz
- 正确书写单例模式
随意而生
java 设计模式 单例
单例模式算是设计模式中最容易理解,也是最容易手写代码的模式了吧。但是其中的坑却不少,所以也常作为面试题来考。本文主要对几种单例写法的整理,并分析其优缺点。很多都是一些老生常谈的问题,但如果你不知道如何创建一个线程安全的单例,不知道什么是双检锁,那这篇文章可能会帮助到你。
懒汉式,线程不安全
当被问到要实现一个单例模式时,很多人的第一反应是写出如下的代码,包括教科书上也是这样
- 单例模式
香水浓
java
懒汉 调用getInstance方法时实例化
public class Singleton {
private static Singleton instance;
private Singleton() {}
public static synchronized Singleton getInstance() {
if(null == ins
- 安装Apache问题:系统找不到指定的文件 No installed service named "Apache2"
AdyZhang
apachehttp server
安装Apache问题:系统找不到指定的文件 No installed service named "Apache2"
每次到这一步都很小心防它的端口冲突问题,结果,特意留出来的80端口就是不能用,烦。
解决方法确保几处:
1、停止IIS启动
2、把端口80改成其它 (譬如90,800,,,什么数字都好)
3、防火墙(关掉试试)
在运行处输入 cmd 回车,转到apa
- 如何在android 文件选择器中选择多个图片或者视频?
aijuans
android
我的android app有这样的需求,在进行照片和视频上传的时候,需要一次性的从照片/视频库选择多条进行上传
但是android原生态的sdk中,只能一个一个的进行选择和上传。
我想知道是否有其他的android上传库可以解决这个问题,提供一个多选的功能,可以使checkbox之类的,一次选择多个 处理方法
官方的图片选择器(但是不支持所有版本的androi,只支持API Level
- mysql中查询生日提醒的日期相关的sql
baalwolf
mysql
SELECT sysid,user_name,birthday,listid,userhead_50,CONCAT(YEAR(CURDATE()),DATE_FORMAT(birthday,'-%m-%d')),CURDATE(), dayofyear( CONCAT(YEAR(CURDATE()),DATE_FORMAT(birthday,'-%m-%d')))-dayofyear(
- MongoDB索引文件破坏后导致查询错误的问题
BigBird2012
mongodb
问题描述:
MongoDB在非正常情况下关闭时,可能会导致索引文件破坏,造成数据在更新时没有反映到索引上。
解决方案:
使用脚本,重建MongoDB所有表的索引。
var names = db.getCollectionNames();
for( var i in names ){
var name = names[i];
print(name);
- Javascript Promise
bijian1013
JavaScriptPromise
Parse JavaScript SDK现在提供了支持大多数异步方法的兼容jquery的Promises模式,那么这意味着什么呢,读完下文你就了解了。
一.认识Promises
“Promises”代表着在javascript程序里下一个伟大的范式,但是理解他们为什么如此伟大不是件简
- [Zookeeper学习笔记九]Zookeeper源代码分析之Zookeeper构造过程
bit1129
zookeeper
Zookeeper重载了几个构造函数,其中构造者可以提供参数最多,可定制性最多的构造函数是
public ZooKeeper(String connectString, int sessionTimeout, Watcher watcher, long sessionId, byte[] sessionPasswd, boolea
- 【Java命令三】jstack
bit1129
jstack
jstack是用于获得当前运行的Java程序所有的线程的运行情况(thread dump),不同于jmap用于获得memory dump
[hadoop@hadoop sbin]$ jstack
Usage:
jstack [-l] <pid>
(to connect to running process)
jstack -F
- jboss 5.1启停脚本 动静分离部署
ronin47
以前启动jboss,往各种xml配置文件,现只要运行一句脚本即可。start nohup sh /**/run.sh -c servicename -b ip -g clustername -u broatcast jboss.messaging.ServerPeerID=int -Djboss.service.binding.set=p
- UI之如何打磨设计能力?
brotherlamp
UIui教程ui自学ui资料ui视频
在越来越拥挤的初创企业世界里,视觉设计的重要性往往可以与杀手级用户体验比肩。在许多情况下,尤其对于 Web 初创企业而言,这两者都是不可或缺的。前不久我们在《右脑革命:别学编程了,学艺术吧》中也曾发出过重视设计的呼吁。如何才能提高初创企业的设计能力呢?以下是 9 位创始人的体会。
1.找到自己的方式
如果你是设计师,要想提高技能可以去设计博客和展示好设计的网站如D-lists或
- 三色旗算法
bylijinnan
java算法
import java.util.Arrays;
/**
问题:
假设有一条绳子,上面有红、白、蓝三种颜色的旗子,起初绳子上的旗子颜色并没有顺序,
您希望将之分类,并排列为蓝、白、红的顺序,要如何移动次数才会最少,注意您只能在绳
子上进行这个动作,而且一次只能调换两个旗子。
网上的解法大多类似:
在一条绳子上移动,在程式中也就意味只能使用一个阵列,而不使用其它的阵列来
- 警告:No configuration found for the specified action: \'s
chiangfai
configuration
1.index.jsp页面form标签未指定namespace属性。
<!--index.jsp代码-->
<%@taglib prefix="s" uri="/struts-tags"%>
...
<s:form action="submit" method="post"&g
- redis -- hash_max_zipmap_entries设置过大有问题
chenchao051
redishash
使用redis时为了使用hash追求更高的内存使用率,我们一般都用hash结构,并且有时候会把hash_max_zipmap_entries这个值设置的很大,很多资料也推荐设置到1000,默认设置为了512,但是这里有个坑
#define ZIPMAP_BIGLEN 254
#define ZIPMAP_END 255
/* Return th
- select into outfile access deny问题
daizj
mysqltxt导出数据到文件
本文转自:http://hatemysql.com/2010/06/29/select-into-outfile-access-deny%E9%97%AE%E9%A2%98/
为应用建立了rnd的帐号,专门为他们查询线上数据库用的,当然,只有他们上了生产网络以后才能连上数据库,安全方面我们还是很注意的,呵呵。
授权的语句如下:
grant select on armory.* to rn
- phpexcel导出excel表简单入门示例
dcj3sjt126com
PHPExcelphpexcel
<?php
error_reporting(E_ALL);
ini_set('display_errors', TRUE);
ini_set('display_startup_errors', TRUE);
if (PHP_SAPI == 'cli')
die('This example should only be run from a Web Brows
- 美国电影超短200句
dcj3sjt126com
电影
1. I see. 我明白了。2. I quit! 我不干了!3. Let go! 放手!4. Me too. 我也是。5. My god! 天哪!6. No way! 不行!7. Come on. 来吧(赶快)8. Hold on. 等一等。9. I agree。 我同意。10. Not bad. 还不错。11. Not yet. 还没。12. See you. 再见。13. Shut up!
- Java访问远程服务
dyy_gusi
httpclientwebservicegetpost
随着webService的崛起,我们开始中会越来越多的使用到访问远程webService服务。当然对于不同的webService框架一般都有自己的client包供使用,但是如果使用webService框架自己的client包,那么必然需要在自己的代码中引入它的包,如果同时调运了多个不同框架的webService,那么就需要同时引入多个不同的clien
- Maven的settings.xml配置
geeksun
settings.xml
settings.xml是Maven的配置文件,下面解释一下其中的配置含义:
settings.xml存在于两个地方:
1.安装的地方:$M2_HOME/conf/settings.xml
2.用户的目录:${user.home}/.m2/settings.xml
前者又被叫做全局配置,后者被称为用户配置。如果两者都存在,它们的内容将被合并,并且用户范围的settings.xml优先。
- ubuntu的init与系统服务设置
hongtoushizi
ubuntu
转载自:
http://iysm.net/?p=178 init
Init是位于/sbin/init的一个程序,它是在linux下,在系统启动过程中,初始化所有的设备驱动程序和数据结构等之后,由内核启动的一个用户级程序,并由此init程序进而完成系统的启动过程。
ubuntu与传统的linux略有不同,使用upstart完成系统的启动,但表面上仍维持init程序的形式。
运行
- 跟我学Nginx+Lua开发目录贴
jinnianshilongnian
nginxlua
使用Nginx+Lua开发近一年的时间,学习和实践了一些Nginx+Lua开发的架构,为了让更多人使用Nginx+Lua架构开发,利用春节期间总结了一份基本的学习教程,希望对大家有用。也欢迎谈探讨学习一些经验。
目录
第一章 安装Nginx+Lua开发环境
第二章 Nginx+Lua开发入门
第三章 Redis/SSDB+Twemproxy安装与使用
第四章 L
- php位运算符注意事项
home198979
位运算PHP&
$a = $b = $c = 0;
$a & $b = 1;
$b | $c = 1
问a,b,c最终为多少?
当看到这题时,我犯了一个低级错误,误 以为位运算符会改变变量的值。所以得出结果是1 1 0
但是位运算符是不会改变变量的值的,例如:
$a=1;$b=2;
$a&$b;
这样a,b的值不会有任何改变
- Linux shell数组建立和使用技巧
pda158
linux
1.数组定义 [chengmo@centos5 ~]$ a=(1 2 3 4 5) [chengmo@centos5 ~]$ echo $a 1 一对括号表示是数组,数组元素用“空格”符号分割开。
2.数组读取与赋值 得到长度: [chengmo@centos5 ~]$ echo ${#a[@]} 5 用${#数组名[@或
- hotspot源码(JDK7)
ol_beta
javaHotSpotjvm
源码结构图,方便理解:
├─agent Serviceab
- Oracle基本事务和ForAll执行批量DML练习
vipbooks
oraclesql
基本事务的使用:
从账户一的余额中转100到账户二的余额中去,如果账户二不存在或账户一中的余额不足100则整笔交易回滚
select * from account;
-- 创建一张账户表
create table account(
-- 账户ID
id number(3) not null,
-- 账户名称
nam