Rancid cvs ViewVC 安装配置
Rancid + ViewVC
###########################
@rancid安装设定
@源码安装,rancid及ViewVC的安装设定
@Wiki推荐安装配置参考文档
####################################
环境:
VMWare(CentOS6.8)
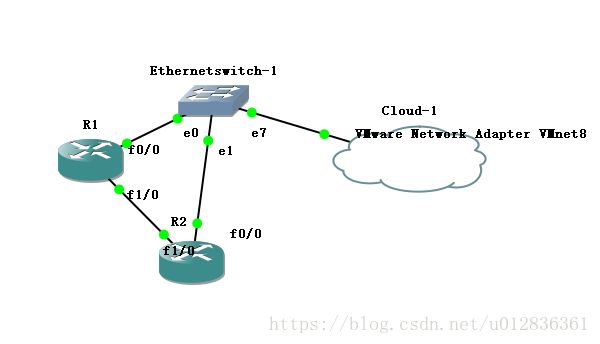
GNS3(Router Cisco-7200) #虚拟有Cisco路由器网络环境
Radius(FreeRadius3.0.15编译安装) #提供给Cisco路由器AAA认证服务
LNMP(LNMP一键安装包最新) #Nginx Mysql PHP环境
Apache(yum安装) #Apache环境
源码安装Rancid 3.7 @Rancid 下载
1.依赖环境
Perl升级到5.20.3(Rancid高版本的要求)@Perl下载
./Configure -des -Dprefix=/usr
perl --version
2.编译安装
useradd -d /home/rancid -p 123456 rancid
./configure --prefix=/usr/local/rancid
rancid --version
3.配置
cp cloginrc.sample /home/rancid/.cloginrc        #Rancid clogin模块登入设备时用到的登入信息文件
chmod 0640 /home/rancid/.cloginrc
vim /home/rancid/.cloginrc						#添加登入Cisco设备的用户数据
	add method 192.168.* ssh
	add user 192.168.* rancid
	add password 192.168.* {123456}
	add autoenable 192.168.* 1
chown -R rancid:rancid /home/rancid/.cloginrc    #给用户/组rancid所有权
chown -R rancid:rancid /usr/local/rancid/
chmod 775 /usr/local/rancid/
vim /usr/local/rancid/etc/rancid.conf #配置文件,添加Routers组
LIST_OF_GROUPS="Routers">su - rancid #切换到rancid登入
/usr/local/rancid/bin/rancid-cvs #生成Routers这个组的CVS数据库文件到 rancid/var/...vim /usr/local/rancid/var/Routers/router.db #配置Routers数据库文件,添加Cisco设备
192.168.159.170;cisco;up #坑+1,这里的格式与老版本Rancid不同了,是“ ;” 不是“ :”
>/usr/local/bin/rancid-run	                  #手动运行rancid-run,去自动登入Cisco设备并log 设备配置
>crontab -e					  #加入定时任务,
1 * * * * /usr/local/rancid/bin/rancid-run	  #定时运行
50 23 * * * /usr/bin/find /usr/local/rancid/var/logs -type f -mtime +2 -exec rm {} \;    #定时清理运行产生的log文件
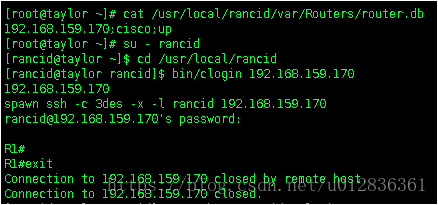
测试Rancid 的Clogin模块是否可以远程登入Cisco路由器
源码安装ViewVC @下载ViewVC
cd viewvc-1.1.24
./viewvc-install
vim /usr/local/viewvc-1.1.26/viewvc.conf
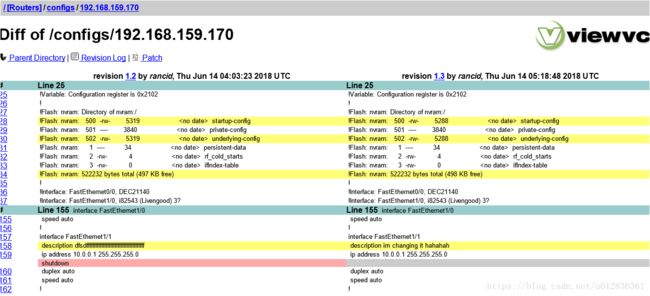
    allowed_views = co, annotate, diff, markup, roots	#co是download的视图,默认是关闭的,再web页面上没有download选项,需要手动打      root_parents = /usr/local/rancid/var/CVS : cvs
    rcs_dir = /usr/local/bin
    use_rcsparse = 1
Yum安装设置Apach
yum -y install httpd
chkconfig on httpd
cp /usr/local/viewvc-1.1.24/bin/cgi/*.cgi /var/www/cgi-bin
chmod +x /var/www/cgi-bin/*.cgi
chown apache:apache /var/www/cgi-bin/*.cgi
vim /etc/httpd/conf/httpd.conf
listen 1000 #设定监听端口为1000,因为之前的Nginx已经在用80
# Custom Rancid Config
DocumentRoot /var/www
ScriptAlias /cgi-bin/ "/var/www/cgi-bin"
ScriptAlias /viewvc /var/www/cgi-bin/viewvc.cgi
ScriptAlias /query /var/www/cgi-bin/query.cgi
AllowOverride None
Options None
Order allow,deny
Allow from all
>service httpd start           #运行Apache
>chkconfig httpd on            #加入开机启动项
导入ViewVC的数据库,设定Mysql数据库
CREATE USER 'rancid'@'localhost' IDENTIFIED BY '123456';
GRANT ALL PRIVILEGES ON *.* TO 'rancid'@'localhost' WITH GRANT OPTION;
CREATE USER 'rancid_ro'@'localhost' IDENTIFIED BY '123456';
grant all on *.* to rancid_ro@localhost identified by "123456";
FLUSH PRIVILEGES;
###如果导入失败就删除下
mysql>Delete FROM user Where User='test' and Host='localhost';
mysql>drop database testDB;
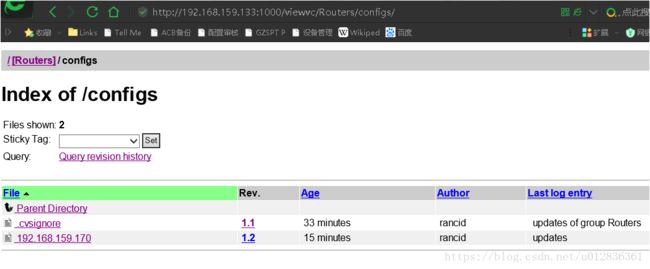
####打开网页:http://192.168.159.133:1000/viewvc
问题:MySQLdb 模块不存在
由于python2 与python3 同时存在, pip是无法安装mysql-python的,只能easy-install2.6 /下载的MySQLdb文件夹 @https://pypi.org/project/MySQL-python/#files
如果easy-install 出错 command 'gcc' failed with exit status 1
那先安装python-devel再安装 MySQL-pyton
问题:建立数据库失败
更改单行的字段大小,255的都改小一点,比如改为128
问题:Su rancid 出现bash4.1$
cp -a /etc/skel/. /home/rancid/ #把环境变量copy到用户目录即可


