一步一步教你centos7搭建最新版本的WordPress
我走了许多坑了,所以还是有信心跟你们担保,你们按照我的步骤,可以搭建成功。不懂的可以微我patrickstar12358。
参考链接
https://codex.wordpress.org/Installing_WordPress
装mysql、apache参考:
https://blog.csdn.net/qq_35723367/article/details/79544001
装php7参考:
https://blog.csdn.net/li_lening/article/details/80950014
修改默认80端口:
https://blog.csdn.net/qq_33258515/article/details/75384236
apache网站文件默认路径:
https://blog.csdn.net/lee18254290736/article/details/51901725
云主机开放的安全组端口有:9527(Apache)、9000(php)、
环境:centos7.4 minimal
申请好域名,做个域名解析,去阿里云申请即可
根据WordPress的官方文档指示,要先装好以下的组件
- 按照上面链接先装:apache
#yum -y install httpd
systemctl start httpd.service
由于国内80端口要备案,所以我改成9527.
service httpd restart
默认网站路径,我等phpmyadmin的时候再做修改,默认路径:/var/www/html
测试需要,我就把防火墙都关了
- 再装mysql
期间设置开机自启动mysql时候报了个软连接的错,所以我直接修改/etc/rc.local文件,变相实现就好。
- 安装php7
我安装的时候,索性选择了:yum install -y php72w* --skip-broken
service php-fpm start
测试apache网页下打开php文件,出现空白,说明环境配置有问题
参考:http://ask.apelearn.com/question/6965
查看http配置文件:
的确没有php的解析,于是做个添加,发现问题依旧
于是继续找,找到这个网址,解决了这个问题:
https://blog.csdn.net/wkh___/article/details/83540713
apache无法解析php文件,显示php源码或直接下载文件
2018年10月30日 13:52:21 954L 阅读数:313
我百度了一下午,根本原因是漏了一个php扩展:mod_php
安装完重启apache就好了。
yum install mod_php
链接下面的内容有差异的,我就没做改变了,能执行php文件就好
下面这步也是我做了的,标注一下:
1.找到:
AddType application/x-gzip .gz .tgz
在其下面添加:
AddType application/x-httpd-php .php //添加支持对php脚本解析
期间还根据下面的网站加了目录的权限,以防万一也做个标注:
https://bbs.csdn.net/topics/330147768
恩 用了 chmod 775 * -R /var/www/html 后可以了.
这个很不好,目录可以用755,文件加上可执行权限就太危险了。
- 获取WordPress
wget https://wordpress.org/latest.tar.gz
tar -xzvf latest.tar.gz
这里选用phpMyAdmin来对数据库操作,最主要plesk跟cpanel要钱,就不考虑了。
5,安装phpmyadmin
参考:http://www.cnblogs.com/sunshine-H/p/9592668.html
按照链接,我们也修改个网站路径
我这里修改为:/home/taylorswfit13
在这个链接找到centos7的压缩包:https://www.phpmyadmin.net/downloads/phpMyAdmin-4.8.3-all-languages.tar.gz
应该是被墙了,所以自己下载好文件,并通过sftp软件传过去即可。
测试可以访问phpmyadmin,回到我们安装WordPress的过程
6.Using phpMyAdmin
If your web server has phpMyAdmin installed, you may follow these instructions to create your WordPress username and database. If you work on your own computer, on most Linux distributions you can install PhpMyAdmin automatically.
我们已经安装了phpmyadmin,接下来创建WordPress的用户名跟数据库。
Note: These instructions are written for phpMyAdmin 4.4; the phpMyAdmin user interface can vary slightly between versions. 版本差异,设置界面可能有差异
- If a database relating to WordPress does not already exist in the Database dropdown on the left, create one:
如果关于WordPress的数据库不存在,那么我们要创建一个
-
- Choose a name for your WordPress database: 'wordpress' or 'blog' are good, but most hosting services (especially shared hosting) will require a name beginning with your username and an underscore, so, even if you work on your own computer, we advise that you check your hosting service requirements so that you can follow them on your own server and be able to transfer your database without modification. Enter the chosen database name in the Create database field and choose the best collation for your language and encoding. In most cases it's better to choose in the "utf8_" series and, if you don't find your language, to choose "utf8mb4_general_ci" (Reference: [1]).
数据库名字我设为wordpress,编码格式为推荐的utf8mb4_general_ci
- Click the phpMyAdmin icon in the upper left to return to the main page, then click the Users tab. If a user relating to WordPress does not already exist in the list of users, create one:
点击左上角的phpmyadmin图标进入主界面,接着点击用户标签,关联WordPress数据库的用户我们没有创建,那么要创建一个:
-
- Click Add user.
- Choose a username for WordPress ('wordpress' is good) and enter it in the User name field. (Be sure Use text field: is selected from the dropdown.)
名字跟随建议值:wordpress
-
- Choose a secure password (ideally containing a combination of upper- and lower-case letters, numbers, and symbols), and enter it in the Password field. (Be sure Use text field: is selected from the dropdown.) Re-enter the password in the Re-type field.
- Write down the username and password you chose.
- Leave all options under Global privileges at their defaults.
这句好难理解,保留默认Global privileges的配置即可,我是这么理解的
没提及到的,我选择了任意主机
-
- Click Go.
- Return to the Users screen and click the Edit privileges icon on the user you've just created for WordPress.
- In the Database-specific privileges section, select the database you've just created for WordPress under the Add privileges to the following database dropdown, and click Go.
在数据库那里选择WordPress这个数据库
-
- The page will refresh with privileges for that database. Click Check All to select all privileges, and click Go.
-
- On the resulting page, make note of the host name listed after Server: at the top of the page. (This will usually be localhost.)
7.我选择跳过这一步配置wp-config.php
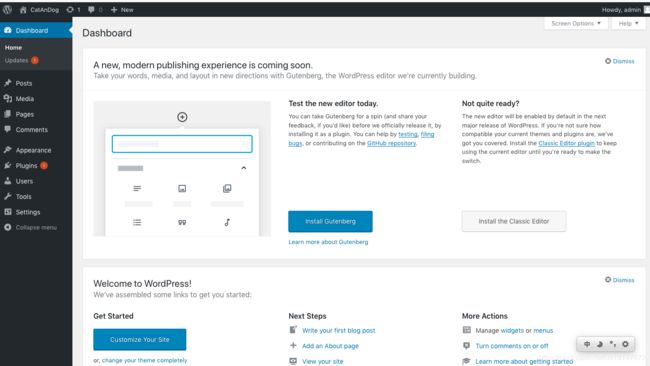
8.Run the Install Script
安装操作,进入下图
继续下一步,
然后你会遇到报错,经过排查,是权限问题,参考链接:
http://www.mamicode.com/info-detail-1176428.html
这时候,首先考虑wordpress文件夹的所属用户和组,根据httpd.conf中User和Group的配置,更新wordpress目录及其子目录的所有归属:
chown -R apache:apache wordpress/
然后重新执行,进入下图:
我填入了admin,作为网站管理员,官方说不推荐使用这个名称,没关系吧
那么下一步,就根据这个网站:
https://codex.wordpress.org/Administration_Screens
来规划你的网站,终于搭建完成了


