Spring Boot2.0深入理解SpringApplication第二章
这一章主要写创建并准备Enviroment,依然是进入到SpringApplication类下面的run方法中。咱们看一下代码
//args参数不用解释了
ApplicationArguments applicationArguments = new DefaultApplicationArguments(args);
//准备系统参数,主要看prepareEnviroment干了些啥。
ConfigurableEnvironment environment = prepareEnvironment(listeners,applicationArguments);
进入到prepareEnvironment方法中,代码如下
private ConfigurableEnvironment prepareEnvironment(
			SpringApplicationRunListeners listeners,
			ApplicationArguments applicationArguments) {
		// Create and configure the environment
                //获取或者创建环境参数,主要看的重点之一。
		ConfigurableEnvironment environment = getOrCreateEnvironment();
		configureEnvironment(environment, applicationArguments.getSourceArgs());
                //通知咱们spring.factories里添加的listener加载application配置文件。
                //主要干活的listener是ConfigFileApplicationListener。
                //虽然其余几个也会运行,不过都是掩护大哥的小弟。
		listeners.environmentPrepared(environment);
                //将获取到的environment中的spring.main配置绑定到SpringApplication的source中。
		bindToSpringApplication(environment);
		if (this.webApplicationType == WebApplicationType.NONE) {
			environment = new EnvironmentConverter(getClassLoader())
					.convertToStandardEnvironmentIfNecessary(environment);
		}
		ConfigurationPropertySources.attach(environment);
		return environment;
	}
在getOrCreateEnviroment方法中仅仅只是加载了System.getProperties()以及System.getenv()。代码清单如下
private ConfigurableEnvironment getOrCreateEnvironment() {
                //不为空直接返回
		if (this.environment != null) {
			return this.environment;
		}
                //servlet 新建StandardServletEnvironment
		if (this.webApplicationType == WebApplicationType.SERVLET) {
			return new StandardServletEnvironment();
		}
                //其余清空直接返回StandardEnvironment,至于reactive为啥用这个我也不清楚。没用过
		return new StandardEnvironment();
	}
上述咱们走的servlet的情况具体实现挺简单的就是不断的新建PropertySource并添加到MutablePropertySources。主要干事情的还是AbstractEnvironment这个类,具体情况跟进代码里面一看究竟就明白了。加载完毕后的environment情况如下图
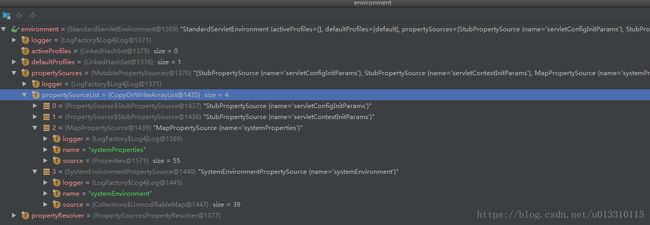
接下来就是将args的参数也放进去,这里不细说了。咱们接着看将准备好的enviroment通知listener去加载application配置文件。
这里咱们一般写一个application.properties或者application.yml文件。其实是可以两个都放到项目里面的,但是如果两个都存在,则application.properties配置生效。接着说触发listener会新建一个ApplicationEnvironmentPreparedEvent事件去触发listener,同样的和原先start事件一样先从缓存获取没拿到则去defaultRetriever中拿。这里主要执行逻辑的代码在AbstractApplicationEventMulticaster类的getApplicationListeners方法中。之后则是执行ConfigFileApplicationListener中的onApplicationEnvironmentPreparedEvent方法代码如下。
private void onApplicationEnvironmentPreparedEvent(ApplicationEnvironmentPreparedEvent event) {
		List postProcessors = loadPostProcessors();
                //将自己添加进去,
                //获取application.yml或者properties的逻辑在本类的postProcessEnvironment方法。
		postProcessors.add(this);
		AnnotationAwareOrderComparator.sort(postProcessors);
		for (EnvironmentPostProcessor postProcessor : postProcessors) {
			postProcessor.postProcessEnvironment(event.getEnvironment(),
					event.getSpringApplication());
		}
	}
在postProcessEnvironment方法中会调用addPropertySources(environment, application.getResourceLoader());添加方法的具体代码如下
	protected void addPropertySources(ConfigurableEnvironment environment,
			ResourceLoader resourceLoader) {
		RandomValuePropertySource.addToEnvironment(environment);
		new Loader(environment, resourceLoader).load();
	}
在该方法中调用内部类Loader的load方法
	public void load() {
			this.profiles = new LinkedList<>();
			this.processedProfiles = new LinkedList<>();
			this.activatedProfiles = false;
			this.loaded = new LinkedHashMap<>();
			initializeProfiles();
			while (!this.profiles.isEmpty()) {
				Profile profile = this.profiles.poll();
				if (profile != null && !profile.isDefaultProfile()) {
					addProfileToEnvironment(profile.getName());
				}
				load(profile, this::getPositiveProfileFilter,
						addToLoaded(MutablePropertySources::addLast, false));
				this.processedProfiles.add(profile);
			}
			load(null, this::getNegativeProfileFilter,
					addToLoaded(MutablePropertySources::addFirst, true));
			addLoadedPropertySources();
		}
在该方法中主要是通过扫描下面四个路径
private static final String DEFAULT_SEARCH_LOCATIONS = "classpath:/,classpath:/config/,file:./,file:./config/";去获取application的配置文件,并初始化一个OriginTrackedMapPropertySource里面存放的则是咱们的配置文件信息。加载配置信息会根据spring.profiles.active里设置的环境参数加载相对应的配置信息。这时候如果有以及application.yml会新建两个OriginTrackedMapPropertySource。但是只有application.properties内容生效。加载完成后environment如下图
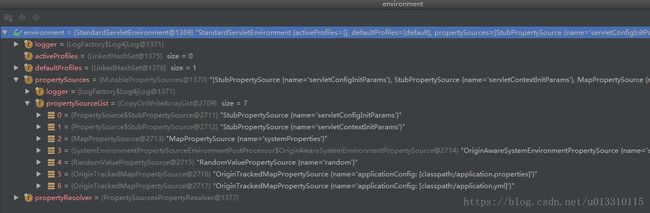
可以看到在propertySourceList中多了两个PropertySource。接下来则会将environment里的spring.main配置信息绑定到SpringApplication的source中去。首先看一张bind前的SpringApplication的对象信息
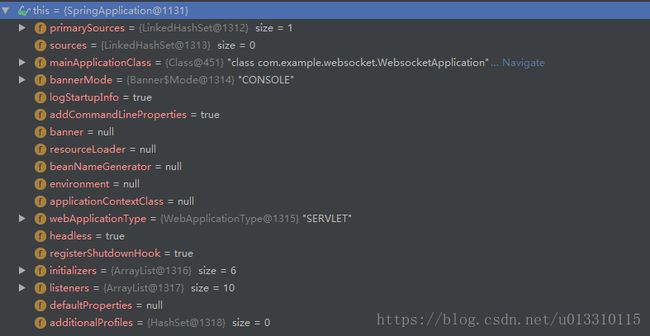
里面的source为空,下图是执行以下代码之后的截图以及配置文件信息的截图
protected void bindToSpringApplication(ConfigurableEnvironment environment) {
		try {
                        //Spring boot2.0新增绑定方式
			Binder.get(environment).bind("spring.main", Bindable.ofInstance(this));
		}
		catch (Exception ex) {
			throw new IllegalStateException("Cannot bind to SpringApplication", ex);
		}
	}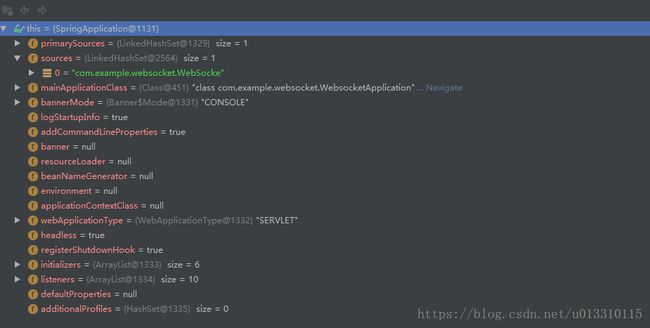
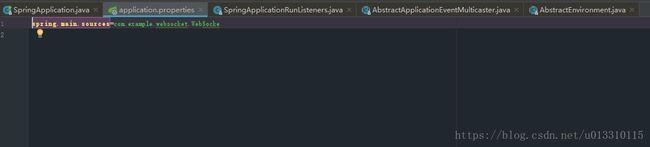
可以看到source中加入了spring.main.source信息,其实通过这里我们可以想。为什么boot要这样做,其实咱们启动一个boot的时候并不是一定要使用如下代码的方式
public static void main(String[] args) {
		SpringApplication.run(WebsocketApplication.class, args);
	}
我们可以自己new一个SpringApplication,并设置source等信息启动。通过上面的代码source可以配置到配置文件中,同样另外也可以设置到代码当中去。代码如下有兴趣可以自己尝试下
public static void main(String[] args) {
		//SpringApplication.run(WebsocketApplication.class, args);
		//Set sources = new HashSet();
		//sources.add(WebsocketApplication.class.getName());
		SpringApplication springApplication = new SpringApplication();
		//springApplication.setSources(sources);
		springApplication.run(args);
	}
至此environment的初始化就结束了,下一章会详细些写上下文源码