OAI搭建之ENB
说明:由于OAI搭建系列的贴是在2017年时写的,由于在实验室换方向了,所以后来就没有继续搞OAI了,手上也没有USRP这些玩意儿了。很多网友按照17年的教程可能会搭建失败,由于OAI迭代很快,且本人没有USRP和白卡去验证这些问题,所以恕不能一一解答疑惑,抱歉!以前的贴仅做参考。
上个写轮眼防水
1 软硬件准备
ENB对硬件要求比较高,所以请准备英特尔三代以上的i5/i7处理器。
其次我在ubuntu 17单独搭过ENB,但是不知道是什么原因,运行起来非常不稳定。所以我又换回ubuntu 14了,目前这个ENB在ubuntu14上已经连续运行六个小时,没任何问题。
5-(2)中的修改clone地址方法来自CSDN博主xrh003(http://blog.csdn.net/xrh003/)
最重要的是网要好,特别是访问外网速度。
2 内核设置
(1) 更换低时延内核:
sudo apt-get update(这一步最好能成功,不然后面就麻烦了)
sudo apt-get install linux-image-3.19.0-61-lowlatency linux-headers-3.19.0-61-lowlatency
然后 shutdown –r now重启
(2) 重启后uname –a,会显示系统内核信息,可以看到:
Linux … 3.19.0-61-lowlatency……..
3 电源管理
为了节能,一般电脑CPU并非全速运行,为了更好的性能,所以需要进行相关设置。
(1) 编辑/etc/default/grub 在里面添加两行:
GRUB_CMDLINE_LINUX_DEFAULT="quiet intel_pstate=disable"
GRUB_CMDLINE_LINUX_DEFAULT="processor.max_cstate=1 intel_idle.max_cstate=0 idle=poll”
我是添加到GRUB_CMDLINE_LINUX_DEFAULT="quiet splash”这行的下面两行
(2) 编辑文件/etc/modprobe.d/blacklist.conf 在最后添加这句 blacklist intel_powerclam
(3) 重启,进入bios关闭与节能或者影响CPU次能性能的设置,如超线程,C-state(这一步非必须,只要电脑性能够强,有的电脑bios里面没有这些设置,不必担心)
(4) sudo apt-get install i7z安装i7z 同时运行i7z查看CPU运行信息。
(5) sudo apt-get install cpufrequtils安装cpufrequtils,然后编辑/etc/default/cpufrequtils文件(有可能为空文件),在里面加上一句:GOVERNOR="performance"
(6) sudo update-rc.d ondemand disable
(7) 重启
4 下载源码
(1) 安装git: sudo apt-get install git
(2) 克隆源码git clone https://gitlab.eurecom.fr/oai/openairinterface5g.git
5编译准备(如果前面sudo apt-get update能成功 则先不用换源)
(1) 更换源:sudo gedit /etc/apt/source.list 将里面所有内容替换为
deb http://mirrors.aliyun.com/ubuntu/ trusty main restricted universe multiverse
deb http://mirrors.aliyun.com/ubuntu/ trusty-security main restricted universe multiverse
deb http://mirrors.aliyun.com/ubuntu/ trusty-updates main restricted universe multiverse
deb http://mirrors.aliyun.com/ubuntu/ trusty-proposed main restricted universe multiverse
deb http://mirrors.aliyun.com/ubuntu/ trusty-backports main restricted universe multiverse
deb-src http://mirrors.aliyun.com/ubuntu/ trusty main restricted universe multiverse
deb-src http://mirrors.aliyun.com/ubuntu/ trusty-security main restricted universe multiverse
deb-src http://mirrors.aliyun.com/ubuntu/ trusty-updates main restricted universe multiverse
deb-src http://mirrors.aliyun.com/ubuntu/ trusty-proposed main restricted universe multiverse
deb-src http://mirrors.aliyun.com/ubuntu/ trusty-backports main restricted universe multiverse
或者换成网易的163源(我感觉这个效果更好)
也可以 点击桌面最左边第一个图标 搜索update-->打开software updater-->等待-->点击setting-->ubuntu software-->download from(选China->163之类的)-->close->reload
如果apt-get update出错,就:搜索update-->打开software updater-->等待-->点击setting-->other software-->删掉跟出错相关的地方。
保存退出,然后sudo apt-get update
(2)
在进行第二步之前,打开openairinterface5g/cmake_targets/tools/build_helper,用浏览器访问里面的
https://gist.github.com/2190472.git
https://github.com/google/protobuf/releases/download/v2.6.1/protobuf-2.6.1.tar.gz
(若第一个地址能访问,则无需进行下面的替换。若第二个地址不能访问,请查看我另外的一个帖子)
编辑源码包openairinterface5g/cmake_targets/tools/build_helper
注释掉所有的sodo apt-get update那行
找到这两行(我下载的版本中,在411,412行,可以搜索2190472定位)
$SUDO rm -fr /opt/ssh
$SUDO git clone https://gist.github.com/2190472.git /opt/ssh
改为:
$SUDO rm -fr /opt/ssh
$SUDO git clone https://github.com/JackPaul/ssh.git /opt/ssh
6 编译ENB
(1)进入openairinterface ( 也就是进入源码文件夹),依次执行下面操作
source oaienv
cd cmake_targets
./build_oai -I --eNB -x --install-system-files -w USRP
若无红色报错,说明编译成功
若在protobuf-c这地方出错,请看我另外一个帖子
若是显示apt-get update之类的错误 注释掉build_helper里面的apt-get update语句
7 配置ENB
(1)编辑源码包中/targets/PROJECTS/GENERIC-LTE-EPC/CONF/enb.band7.tm1.usrpb210.conf或者编辑:/targets/PROJECTS/GENERIC-LTE- EPC/CONF/enb.band7.tm2.usrpb210.conf(多输入输出)具体如下
(这里我的EPC主机IP地址为10.105.42.14,ENB主机网卡名为eth0,IP地址为10.105.43.187,子网掩码为255.255.252.0—>算出网络前缀为22位)
tracking_area_code = "1";
mobile_country_code = "208";
mobile_network_code = "93";(和mme.conf里面一致)
////////// MME parameters:
mme_ip_address = ( { ipv4 = "10.105.42.14";
ipv6 = "192:168:30::17";
active = "yes";
preference = "ipv4";
}
);
NETWORK_INTERFACES :
{
ENB_INTERFACE_NAME_FOR_S1_MME = "eth0";
ENB_IPV4_ADDRESS_FOR_S1_MME = "10.105.43.187/22";
ENB_INTERFACE_NAME_FOR_S1U = "eth0";
ENB_IPV4_ADDRESS_FOR_S1U = "10.105.43.187/22";
ENB_PORT_FOR_S1U = 2152; # Spec 2152
};
8运行
cd ~/openairinterface5g
source oaienv
./cmake_targets/build_oai -w USRP -x -c --eNB(仅第一次运行时需要,不是必须,这条来自官网教程,但我没执行)
cd cmake_targets/lte_build_oai/build
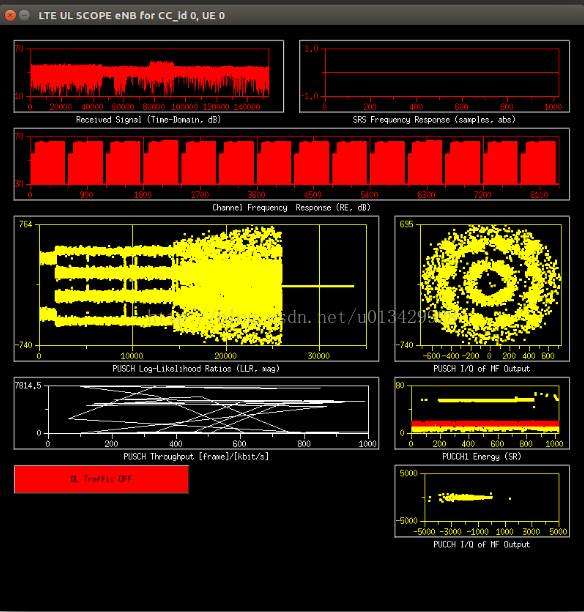
sudo -E ./lte-softmodem -O $OPENAIR_DIR/targets/PROJECTS/GENERIC-LTE-EPC/CONF/enb.band7.tm1.usrpb210.conf -d(注意将$OPENAIR_DIR换成你自己下载的openairinterface5g路径 不要直接复制!!!)
