Python 绘图代码懒人仓
自用。
190805更新
国际通行引用法
import numpy as np
import pandas as pd
import seaborn as sns
import matplotlib.pyplot as plt
频率图
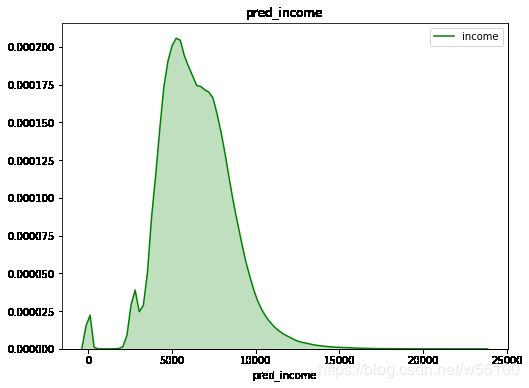
sns.kdeplot
#频率分布图
x = df['income']

fig, ax = plt.subplots( figsize=(8,6))
ax.set(xlabel='pred_income')
sns.kdeplot(x, color='g',shade=True,ax=ax).set_title('pred_income')
plt.show()
直方图
#可以启用kde=True
fig, ax = plt.subplots( figsize=(8,6))
sns.distplot(g['freq'], bins=range(0,20,1),hist=True,kde=False, color="g", kde_kws={"shade": True}, ax=ax)
plt.show()
多子图+频方图
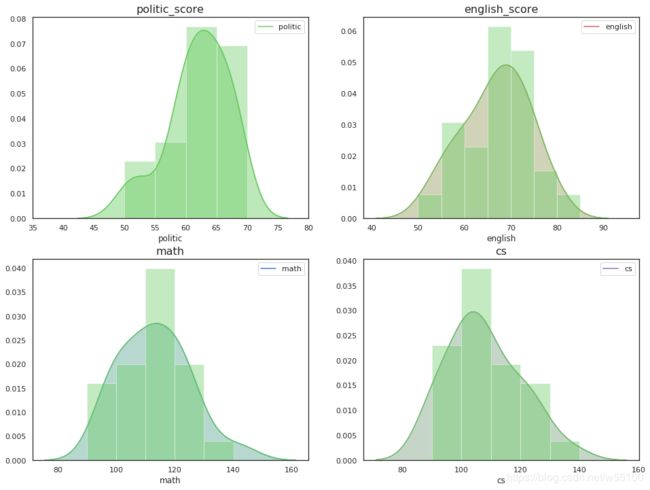
主要是用sns.dostplot实现了hist,sns.kdeplot实现了核密度估计。
fig, ax = plt.subplots( 2 , 2,figsize=(16,12))

#ax[0,0].set(xlabel='politic_score')
sns.distplot(q['politic'], bins=range(40,80,5),hist=True, color="g", kde_kws={"shade": True}, ax=ax[0, 0])
aa = sns.kdeplot(q['politic'],color='g',shade=True, ax=ax[0,0])
aa.set_title('politic_score',fontdict={'fontsize':16})
aa.set_xticks(aa.get_xticks(),minor=True)

#ax[0,1].set(xlabel='english_score')
aa = sns.kdeplot(q['english'],color='r',shade=True, ax=ax[0,1])
aa.set_title('english_score',fontdict={'fontsize':16})
aa.set_xticks(aa.get_xticks(),minor=True)
sns.distplot(q['english'], bins=range(50,100,5),hist=True, color="g", kde_kws={"shade": True}, ax=ax[0, 1])

aa = sns.kdeplot(q['math'],color='b',shade=True, ax=ax[1,0])
aa.set_title('math',fontdict={'fontsize':16})
aa.set_xticks(aa.get_xticks(),minor=True)
sns.distplot(q['math'], bins=range(80,150,10),hist=True, color="g", kde_kws={"shade": True}, ax=ax[1, 0])

aa = sns.kdeplot(q['cs'],color='m',shade=True, ax=ax[1,1])
aa.set_title('cs',fontdict={'fontsize':16})
aa.set_xticks(aa.get_xticks(),minor=True)
sns.distplot(q['cs'], bins=range(80,150,10),hist=True, color="g", kde_kws={"shade": True}, ax=ax[1, 1])

plt.show()
直方图
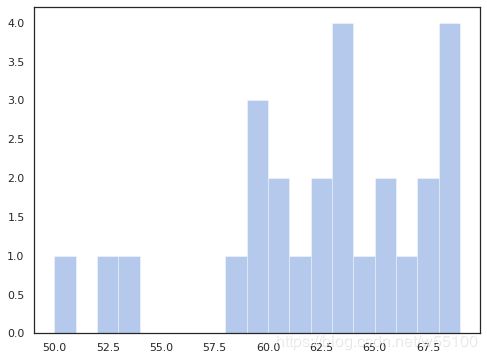
注意自己设计bins分箱,这个的style还没整明白。
fig, ax = plt.subplots( 1 , 1,figsize=(8,6))
sns.set(style="white", palette="muted", color_codes=True)
sns.distplot(list(q['政治']),kde=False,hist=True,bins=range(50,70))
plt.show()
热度图
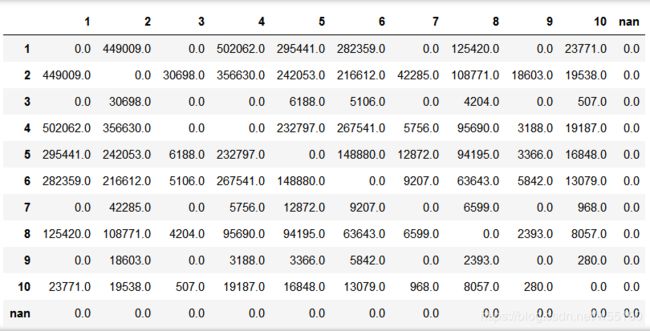
传入df的话,会自动使用index和columns来做xy轴标签。
我这里用了行逆向,希望对角线是左下角到右上角。
plt.figure(figsize=(8,8))

#需要行转置一下,不然不能看出对角线关系
sns.heatmap(myo.values[::-1,:],cmap="YlGnBu", xticklabels=myo.columns, yticklabels = myo.index[::-1] ,annot=False)
plt.show()
调色板控制
1.自定义颜色
flatui = ["#60acfc", "#32d3eb", "#5bc49f", "#feb64d", "#ff7c7c", "#9287e7"]
mypalette = sns.color_palette(flatui)
sns.palplot(mypalette)
print(mypalette)
[(0.3764705882352941, 0.6745098039215687, 0.9882352941176471),
 (0.19607843137254902, 0.8274509803921568, 0.9215686274509803),
 (0.3568627450980392, 0.7686274509803922, 0.6235294117647059),
 (0.996078431372549, 0.7137254901960784, 0.30196078431372547),
 (1.0, 0.48627450980392156, 0.48627450980392156),
 (0.5725490196078431, 0.5294117647058824, 0.9058823529411765)]
2.亮化、暗化
sns.palplot(sns.light_palette("green"))

sns.palplot(sns.dark_palette("red"))
3.渐变色
sns.palplot(sns.color_palette("ch:2.5,-.2,dark=.3"))

#这是什么语法?
sns.palplot(sns.color_palette("Blues_d"))
//调色板文章 https://www.jianshu.com/p/8bb06d3fd21b
//中文文档https://www.cntofu.com/book/172/docs/54.md
柱状图
注意跟直方图的运算逻辑并不相同。
plt.figure(figsize=(12,8))
sns.barplot(x=label,y=value,palette=mypalette)
plt.show()
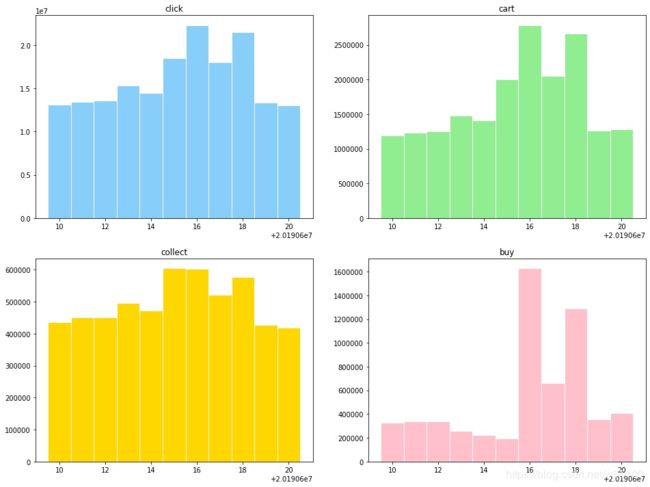
多子图柱状图
fig, ax = plt.subplots( 2 , 2,figsize=(16,12))

ax[0,0].bar(dates,y1,width = 1,facecolor = 'lightskyblue',edgecolor = 'white')
ax[0,0].set_title('click')

ax[0,1].bar(dates,y2,width = 1,facecolor = 'lightgreen',edgecolor = 'white')
ax[0,1].set_title('cart')

ax[1,0].bar(dates,y3,width =1,facecolor = 'gold',edgecolor = 'white')
ax[1,0].set_title('collect')

ax[1,1].bar(dates,y4,width = 1,facecolor = 'pink',edgecolor = 'white',align='center')
ax[1,1].set_title('buy')

plt.show()
散点图
import numpy as np
import matplotlib.pyplot as plt

x = sizes[:,0]
y = sizes[:,1]

#color,可为rgb、"#xxxxxx"等定值
#c ,可使用定值,list of number时可以搭配cmap使用
#s,尺寸单位pix
#marker,编辑
plt.scatter(x, y, marker = '.',c =y,cmap='plasma', s = 20 ,label = 'First',alpha=0.7)
plt.legend(loc = 'best')    # 设置 图例所在的位置 使用推荐位置
plt.xlabel('width')#横轴标签
plt.ylabel('height')
plt.show() 