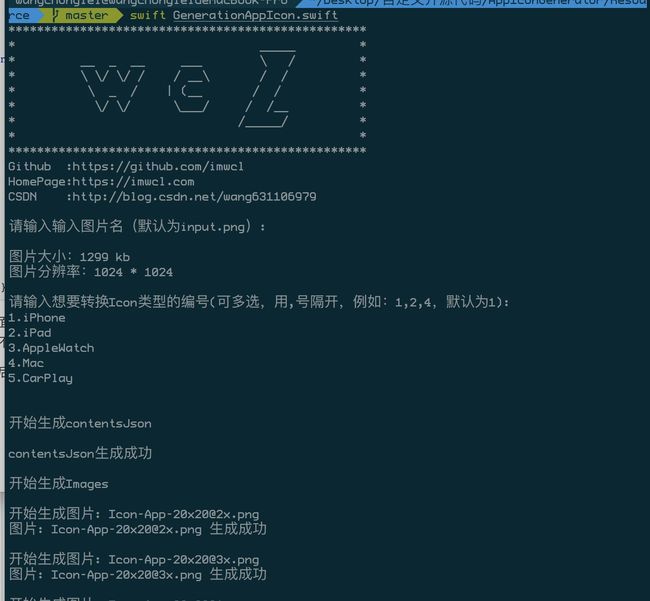
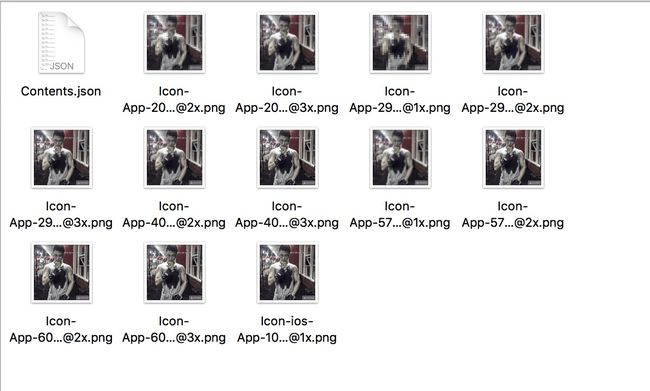
swift脚本编程:一键生成AppIcon
- 事前准备
- 查看swift版本
- swift脚本编程小知识
- 终端输入和输出
- 输出
- 输入
- 在swift脚本中调用其他命令
- 终端输入和输出
- 开始编写脚本
- 读取inputpng
- 生成AppIconappiconset和Contentsjson
- 生成不同尺寸的image
自从Xcode8之后就不支持插件了,没法用Xcode一键生成AppIcon,一直没找到好的解决方案,一怒之下决定自己写一个脚本用来生成AppIcon,下面是正文,小弟抛砖引玉,有写的不好的地方有请大佬们见谅:
源码地址
事前准备
查看swift版本
首先你要确定你的Mac上的swift版本:
swift --version我电脑上的执行结果是这样的:
Apple Swift version 4.0 (swiftlang-900.0.65 clang-900.0.37)
Target: x86_64-apple-macosx10.9
然后就可以用Xcode建一个swift文件来编写swift脚本了,不过单独建一个swift文件,Xcode编辑起来非常不友好,我的方案是建一个在Mac上运行的Command Line Tool工程,这样的话有代码提示,要不然写起来太痛苦,如果大佬们有更好的办法,可以指导一下小弟。
swift脚本编程小知识
终端输入和输出
刚入手脚本我们第一件事前就应该了解在终端如何进行输入和输出,下面是输入和输出的办法:
输出
输入很简单,大家也很熟悉,就是print,下面是代码示例:
print("Hello world!")然后大家可以执行以下试试(test.swift是你的文件名):
swift test.swift执行后就能在终端上看到一行字:Hello world!
这样子我们的第一个swift脚本就完成了。
输入
知道了怎么输出我们还得知道怎么输入,输入也非常简单,下面是代码示例:
print("请输入文字:")
if let input = readLine() {
    print("你输入的文字:\(input)")
}
执行之后显示的结果:
请输入文字:
Hello world!
你输入的文字:Hello world!
这样输入也完成了,我们也算swift脚本编程入门了。
在swift脚本中调用其他命令
我们经常用的命令有很多,比如echo、mkdir、cd等等,我们能不能在swift中直接调用呢,答案是可以的,下面我们用简单的例子来了解一下,大家想深入的话可以去研究一下传送门:
import Foundation

func execute(path: String, arguments: [String]? = nil) -> Int {
    let process = Process()
    process.launchPath = path
    if arguments != nil {
        process.arguments = arguments!
    }
    process.launch()
    process.waitUntilExit()
    return Int(process.terminationStatus)

}

let status = execute(path: "/bin/ls")
print("Status = \(status)")
以上的脚本相当于在终端中执行了ls命令,如果大家不知道命令的路径的话,可以用where查找一下,例如:
where ls这是执行后的结果:
ls: aliased to ls -G
/bin/ls
这里的/bin/ls就是ls命令的路径。
开始编写脚本
读取input.png
首先我们要从将需要转化的图片读取出来,下面是主要代码:
import Foundation

let inputPath = "input.png"
let inoutData = try Data(contentsOf: url)
print("图片大小:\(inoutData.count / 1024) kb")
let dataProvider = CGDataProvider(data: inoutData as CFData)
if let inputImage = CGImage(pngDataProviderSource: dataProvider!, decode: nil, shouldInterpolate: true, intent: .defaultIntent) {
    /// inputImage就是需要转化的图片
}else {
    print("转换失败,图片必须是png格式")
}
生成AppIcon.appiconset和Contents.json
这里就设计到文件操作了,用FileManager就行了,相信大家已经轻车熟路了,我就贴一些主要代码,大家看完整版去我的github源码看就行了:
import Foundation

/// AppIcon的model
struct AppIconImageItem: Codable {
    let size: String
    let idiom: String
    let filename: String
    let scale: String
    let role: String?
    let subtype: String?
}

struct AppIconInfo: Codable {
    let version: Int
    let author: String
}

struct AppIcon: Codable {
    var images: [AppIconImageItem]
    let info: AppIconInfo
}


/// 创建contentsJson
///
/// - Parameter appIcon: 传入的appIcon
func createAppIconContentsJson(appIcon: AppIcon) {
    print("\n开始生成contentsJson\n")
    let encoder = JSONEncoder()
    do {
        encoder.outputFormatting = .prettyPrinted
        let appIconData = try encoder.encode(appIcon)
        if let appIconStr  = String.init(data: appIconData, encoding: .utf8) {
            let contentJsonPath = "AppIcon.appiconset/Contents.json"
            let contentJsonUrl = URL(fileURLWithPath: contentJsonPath)
            try appIconStr.write(to: contentJsonUrl, atomically: true, encoding: .utf8)
            print("contentsJson生成成功\n")
        }else {
            print("contentsJson生成失败")
        }
    }catch {
        print(error.localizedDescription)
    }
}

/// 创建appicon文件
///
/// - Parameter appIcon: appicon
func createFile(appIcon: AppIcon, image: CGImage) {
    let fileManager = FileManager.default
    let filePath = "AppIcon.appiconset"
    do {
        if fileManager.fileExists(atPath: filePath) {
            try fileManager.removeItem(atPath: filePath)
        }
        try fileManager.createDirectory(atPath: filePath, withIntermediateDirectories: true, attributes: nil)
        createAppIconContentsJson(appIcon: appIcon)
        print("~~~~~~~~~~~~~~完成~~~~~~~~~~~~~~")
    }catch {
        print("文件目录\(filePath)创建失败")
        print(error.localizedDescription)
    }
}
生成不同尺寸的image
生成图片我们用的是Foundation框架里面的Core Graphics框架,下面是主要代码:
import Foundation


/// 生成单个image
///
/// - Parameters:
///   - size: 图片的size
///   - scale: 倍数,例如@2x就是2倍
///   - filename: 文件名
func createImage(size: CGSize, scale: CGFloat, image: CGImage, filename: String) {
    print("开始生成图片: \(filename)")
    let width  = Int(size.width * scale)
    let height = Int(size.height * scale)
    let bitsPerComponent = image.bitsPerComponent
    let bytesPerRow = image.bytesPerRow
    let colorSpace  = image.colorSpace

    if let context = CGContext.init(data: nil,
                                    width: width,
                                    height: height,
                                    bitsPerComponent: bitsPerComponent,
                                    bytesPerRow: bytesPerRow,
                                    space: colorSpace!,
                                    bitmapInfo: CGImageAlphaInfo.premultipliedLast.rawValue) {
        context.interpolationQuality = .high
        context.draw(image, in: .init(origin: .zero, size: .init(width: width, height: height)))
        if let inputImage = context.makeImage() {
            let outputImagePath = "AppIcon.appiconset/\(filename)"
            let outputUrl = URL(fileURLWithPath: outputImagePath) as CFURL
            let destination = CGImageDestinationCreateWithURL(outputUrl, kUTTypePNG, 1, nil)
            if let destination = destination {
                CGImageDestinationAddImage(destination, inputImage, nil)
                if CGImageDestinationFinalize(destination) {
                    print("图片: \(filename) 生成成功\n")
                }else {
                    print("图片: \(filename) 生成失败\n")
                }
            }
        }else {
            print("图片: \(filename) 生成失败\n")
        }
    }
}上面只是一部分主要代码,完整的代码太多了,大家可以去我的github地址上去下载执行以下试试,如果有什么做的不好的地方,欢迎大家指教~~

