1.swagger简介
Swagger是一个API接口管理工具,支持在线测试接口数据,根据配置自动生成API文档,结合spring mvc而提供界面化方法文档的一个开源框架。
1.1Swagger主要的项目
Swagger是一组开源项目,主要项目如下:
Swagger-tools:提供各种与Swagger进行集成和交互的工具。例如模式检验、Swagger 1.2文档转换成Swagger 2.0文档等功能。
Swagger-core: 用于Java/Scala的的Swagger实现。与JAX-RS(Jersey、Resteasy、CXF…)、Servlets和Play框架进行集成。
Swagger-js: 用于JavaScript的Swagger实现。
Swagger-node-express: Swagger模块,用于node.js的Express web应用框架。
Swagger-ui:一个无依赖的HTML、JS和CSS集合,可以为Swagger兼容API动态生成优雅文档。
Swagger-codegen:一个模板驱动引擎,通过分析用户Swagger资源声明以各种语言生成客户端代码。
Swagger-editor:可让使用者在浏览器里以YAML格式编辑Swagger API规范并实时预览文档。可以生成有效的Swagger JSON描述,并用于所有Swagger工具(代码生成、文档等等)中。
2.Swagger-Bootstrap-UI简介
Swagger-Bootstrap-UI是springfox-swagger的增强UI实现,为Java开发者在使用Swagger的时候,能拥有一份简洁、强大的接口文档体验。
2.1Swagger-Bootstrap-UI核心功能
官方文档:https://doc.xiaominfo.com/guide/#%E7%AE%80%E4%BB%8B
效果:http://swagger-bootstrap-ui.xiaominfo.com/doc.html
示例:https://gitee.com/xiaoym/swagger-bootstrap-ui-demo
该UI增强包主要包括两大核心功能:文档说明 和 在线调试
文档说明:根据Swagger的规范说明,详细列出接口文档的说明,包括接口地址、类型、请求示例、请求参数、响应示例、响应参数、响应码等信息,使用swagger-bootstrap-ui能根据该文档说明,对该接口的使用情况一目了然。
在线调试:提供在线接口联调的强大功能,自动解析当前接口参数,同时包含表单验证,调用参数可返回接口响应内容、headers、Curl请求命令实例、响应时间、响应状态码等信息,帮助开发者在线调试,而不必通过其他测试工具测试接口是否正确,简介、强大
3.创建spring Boot项目
本案例是基于spring boot+jpa+mysql+swagger,编译器选择IDEA。
3.1创建maven 项目,引入依赖包:spring boot、swagger和swagger-bootstrap-ui依赖包
spring Boot父包和编码格式设置
    <parent>
        <groupId>org.springframework.bootgroupId>
        <artifactId>spring-boot-starter-parentartifactId>
        <version>2.0.1.RELEASEversion>
        <relativePath/>
    parent>

    <properties>
        <project.build.sourceEncoding>UTF-8project.build.sourceEncoding>
        <project.reporting.outputEncoding>UTF-8project.reporting.outputEncoding>
        <java.version>1.8java.version>
    properties>
spring boot常用依赖包
<dependencies>


        <dependency>
            <groupId>org.springframework.bootgroupId>
            <artifactId>spring-boot-starter-webartifactId>
        dependency>

        <dependency>
            <groupId>org.springframework.bootgroupId>
            <artifactId>spring-boot-starter-testartifactId>
            <scope>testscope>
        dependency>


        <dependency>
            <groupId>org.springframework.bootgroupId>
            <artifactId>spring-boot-starter-data-jpaartifactId>
        dependency>


        <dependency>
            <groupId>org.springframework.bootgroupId>
            <artifactId>spring-boot-devtoolsartifactId>
            <optional>trueoptional>
            <scope>truescope>
        dependency>


        <dependency>
            <groupId>org.springframework.bootgroupId>
            <artifactId>spring-boot-starter-thymeleafartifactId>
        dependency>


        <dependency>
            <groupId>mysqlgroupId>
            <artifactId>mysql-connector-javaartifactId>
        dependency>
    dependencies>
其他
<build>
        <plugins>
            <plugin>
                <groupId>org.springframework.bootgroupId>
                <artifactId>spring-boot-maven-pluginartifactId>
                <configuration>

                    <fork>truefork>
                configuration>
            plugin>
        plugins>
    build>
引入swagger和的swagger-bootstrap-ui包
        <dependency>
            <groupId>io.springfoxgroupId>
            <artifactId>springfox-swagger-uiartifactId>
            <version>2.2.2version>
        dependency>


        <dependency>
            <groupId>io.springfoxgroupId>
            <artifactId>springfox-swagger2artifactId>
            <version>2.2.2version>
        dependency>


        <dependency>
            <groupId>com.github.xiaoymingroupId>
            <artifactId>swagger-bootstrap-uiartifactId>
            <version>1.8.3version>
        dependency>
全部:
    <parent>
        <groupId>org.springframework.bootgroupId>
        <artifactId>spring-boot-starter-parentartifactId>
        <version>2.0.1.RELEASEversion>
        <relativePath/>
    parent>

    <properties>
        <project.build.sourceEncoding>UTF-8project.build.sourceEncoding>
        <project.reporting.outputEncoding>UTF-8project.reporting.outputEncoding>
        <java.version>1.8java.version>
    properties>

    <dependencies>


        <dependency>
            <groupId>org.springframework.bootgroupId>
            <artifactId>spring-boot-starter-webartifactId>
        dependency>

        <dependency>
            <groupId>org.springframework.bootgroupId>
            <artifactId>spring-boot-starter-testartifactId>
            <scope>testscope>
        dependency>


        <dependency>
            <groupId>io.springfoxgroupId>
            <artifactId>springfox-swagger-uiartifactId>
            <version>2.2.2version>
        dependency>


        <dependency>
            <groupId>io.springfoxgroupId>
            <artifactId>springfox-swagger2artifactId>
            <version>2.2.2version>
        dependency>


        <dependency>
            <groupId>com.github.xiaoymingroupId>
            <artifactId>swagger-bootstrap-uiartifactId>
            <version>1.8.3version>
        dependency>


        <dependency>
            <groupId>org.springframework.bootgroupId>
            <artifactId>spring-boot-starter-data-jpaartifactId>
        dependency>


        <dependency>
            <groupId>org.springframework.bootgroupId>
            <artifactId>spring-boot-devtoolsartifactId>
            <optional>trueoptional>
            <scope>truescope>
        dependency>


        <dependency>
            <groupId>org.springframework.bootgroupId>
            <artifactId>spring-boot-starter-thymeleafartifactId>
        dependency>


        <dependency>
            <groupId>mysqlgroupId>
            <artifactId>mysql-connector-javaartifactId>
        dependency>
    dependencies>
    <build>
        <plugins>
            <plugin>
                <groupId>org.springframework.bootgroupId>
                <artifactId>spring-boot-maven-pluginartifactId>
                <configuration>

                    <fork>truefork>
                configuration>
            plugin>
        plugins>
    build>
3.2编写数据表
3.3利用JPA编写基本的增删改查
在 resources 目录下新建 application.properties 文件,内容如下
#修改tomcat默认端口号
server.port=8090

#配置数据源信息
spring.datasource.driver-class-name=com.mysql.jdbc.Driver
spring.datasource.url=jdbc:mysql://localhost:3306/jpastudy
spring.datasource.username=root
spring.datasource.password=1234567
#配置jpa
spring.jpa.hibernate.ddl-auto=update
spring.jpa.show-sql=true
spring.jackson.serialization.indent_output=true
##控制台打印sql
entitiy层
/**
 * @Auther: Newbe
 * @Date: 2019/9/24 10:34
 * @Description:
 */
@Entity
public class User {
    @Id
    @GeneratedValue(strategy= GenerationType.AUTO)
    private  Integer id;
    private  String username;
    private  String password;

    public Integer getId() {
        return id;
    }

    public void setId(Integer id) {
        this.id = id;
    }

    public String getUserName() {
        return username;
    }

    public void setUserName(String username) {
        this.username = username;
    }

    public String getPassword() {
        return password;
    }

    public void setPassword(String password) {
        this.password = password;
    }

}
service 接口层
package com.newbe.service; import com.newbe.entity.User; import java.util.List; import java.util.Optional; /** * @Auther: Newbe * @Date: 2019/9/24 23:48 * @Description: */ public interface UserService { //根据id查询用户 OptionalgetUserById(Integer id); //查询所有用户 List getUserAll(); //根据id删除用户 void del(int id); //更新保存 User save(User user); }
service impl
package com.newbe.service; import com.newbe.entity.User; import com.newbe.repository.UserDAO; import org.springframework.beans.factory.annotation.Autowired; import org.springframework.stereotype.Service; import java.util.List; import java.util.Optional; /** * @Auther: Newbe * @Date: 2019/9/24 23:53 * @Description: */ @Service public class UserServiceImpl implements UserService{ @Autowired private UserDAO userDAO; @Override public OptionalgetUserById(Integer id) { return userDAO.findById(id); } @Override public List getUserAll() { return userDAO.findAll(); } @Override public void del(int id) { userDAO.deleteById(id); } @Override public User save(User user) { userDAO.save(user); return user; } }
controller层
package com.newbe.controller; import com.newbe.entity.User; import com.newbe.service.UserService; import org.springframework.beans.factory.annotation.Autowired; import org.springframework.web.bind.annotation.RequestMapping; import org.springframework.web.bind.annotation.RestController; import java.util.List; import java.util.Optional; /** * @Auther: Newbe * @Date: 2019/9/24 23:58 * @Description: */ @RestController public class UserController { @Autowired private UserService userService; @RequestMapping("/findUserById") public OptionalgetUserById(int id){ return userService.getUserById(id); } @RequestMapping("/findAll") public List findUserAll(){ return userService.getUserAll(); } @RequestMapping("/del") public void del(int id){ userService.del(id); } @RequestMapping("/save") public User save(User user){ return userService.save(user); } }
启动类
package com.newbe;

import org.springframework.boot.SpringApplication;
import org.springframework.boot.autoconfigure.SpringBootApplication;
import org.springframework.boot.web.client.RestTemplateBuilder;
import org.springframework.context.annotation.Bean;
import org.springframework.web.client.RestTemplate;

/**
 * @Auther: Newbe
 * @Date: 2019/9/25 00:05
 * @Description:
 */
@SpringBootApplication
public class UserApp {

    public static void main(String[] args) {

        SpringApplication.run(UserApp.class,args);
    }
}
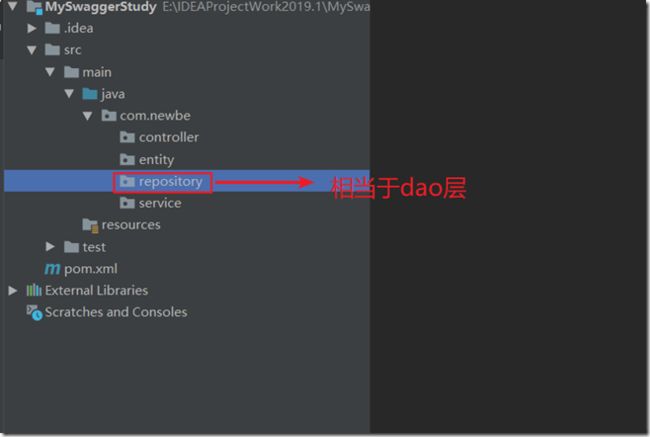
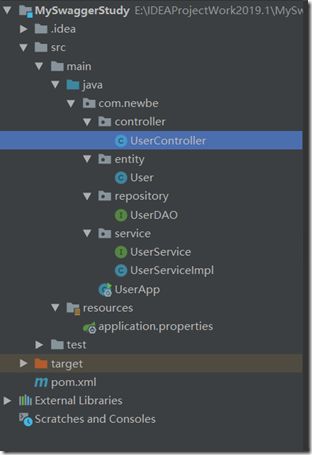
项目结构:
以上代码的项目地址:https://gitee.com/fbyluohua/SwaggerStudy.git 以上是源代码,后面直接对源代码进行使用Swagger生成文档
4.配置Swagger信息
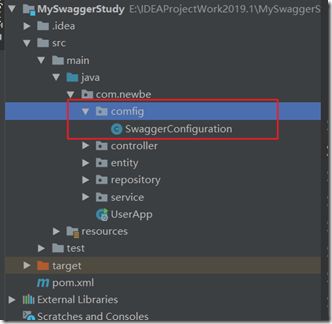
新建config文件夹
SwaggerConfiguration.java
package com.newbe.comfig;
import org.springframework.context.annotation.Bean;
import org.springframework.context.annotation.Configuration;
import springfox.documentation.builders.ApiInfoBuilder;
import springfox.documentation.builders.PathSelectors;
import springfox.documentation.builders.RequestHandlerSelectors;
import springfox.documentation.service.ApiInfo;
import springfox.documentation.spi.DocumentationType;
import springfox.documentation.spring.web.plugins.Docket;
import springfox.documentation.swagger2.annotations.EnableSwagger2;

@Configuration
@EnableSwagger2
public class SwaggerConfiguration {

 @Bean
 public Docket createRestApi() {
     return new Docket(DocumentationType.SWAGGER_2)
     .apiInfo(apiInfo())
     .select()
//扫描端口
     .apis(RequestHandlerSelectors.basePackage("com.newebe"))
     .paths(PathSelectors.any())
     .build();
 }

 private ApiInfo apiInfo() {
     return new ApiInfoBuilder()
     .title("swagger-bootstrap-ui RESTful APIs")
     .description("swagger-bootstrap-ui")
     .termsOfServiceUrl("http://localhost:8999/")
     .contact("[email protected]")
     .version("1.0")
     .build();
 }
}
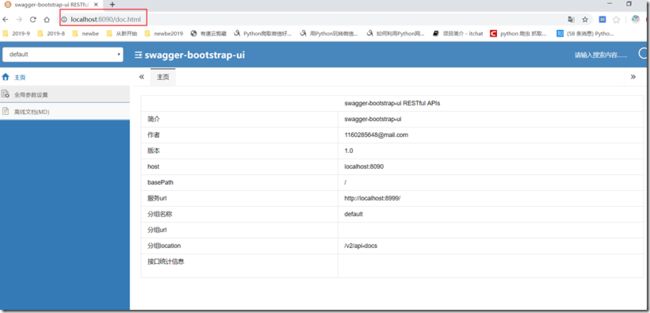
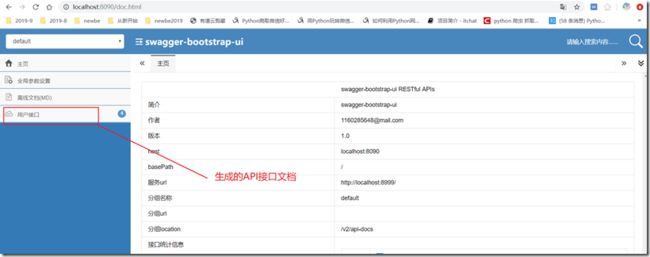
启动项目,在浏览器输入:http://localhost:8090/doc.html
以上表示swagger界面生成成功,接着需要配置注释来生成API文档
5.添加swagger注解
为controller层添加注解
** * @Auther: Newbe * @Date: 2019/9/24 23:58 * @Description: */ @Api(value="用户接口",description = "用户信息接口") @RestController public class UserController { @Autowired private UserService userService; @ApiOperation(value="根据id获取用户信息",notes="方法备注说明") @ApiImplicitParams({ @ApiImplicitParam(paramType = "query", dataType = "Integer", name = "id", value = "编号", required = true) }) @RequestMapping(value = "/findUserById", method=RequestMethod.GET ) public OptionalgetUserById(int id){ return userService.getUserById(id); } @ApiOperation(value="查询所有用户信息",notes="方法备注说明") @RequestMapping(value = "/findAll", method=RequestMethod.GET ) public List findUserAll(){ return userService.getUserAll(); } @ApiOperation(value="根据id删除用户信息",notes="方法备注说明") @RequestMapping(value ="/del", method=RequestMethod.GET) public void del(int id){ userService.del(id); } @ApiOperation(value="保存用户信息",notes="方法备注说明") @RequestMapping(value ="/save",method=RequestMethod.GET) public User save(User user){ return userService.save(user); } }
为实体层添加注解
/**
 * @Auther: Newbe
 * @Date: 2019/9/24 10:34
 * @Description:
 */
@ApiModel(value = "User",description = "用户信息")
@Entity
public class User {
    @Id
    @GeneratedValue(strategy= GenerationType.AUTO)
    @ApiModelProperty(value = "用户ID",name = "id")
    private  Integer id;

    @ApiModelProperty(value = "用户名",name = "userName")
    private  String username;

    @ApiModelProperty(value = "密码",name = "password")
    private  String password;

    public Integer getId() {
        return id;
    }

    public void setId(Integer id) {
        this.id = id;
    }

    public String getUserName() {
        return username;
    }

    public void setUserName(String username) {
        this.username = username;
    }

    public String getPassword() {
        return password;
    }

    public void setPassword(String password) {
        this.password = password;
    }

    @Override
    public String toString() {
        return "User{" +
                "id=" + id +
                ", username='" + username + '\'' +
                ", password='" + password + '\'' +
                '}';
    }
}
6.生成API文档
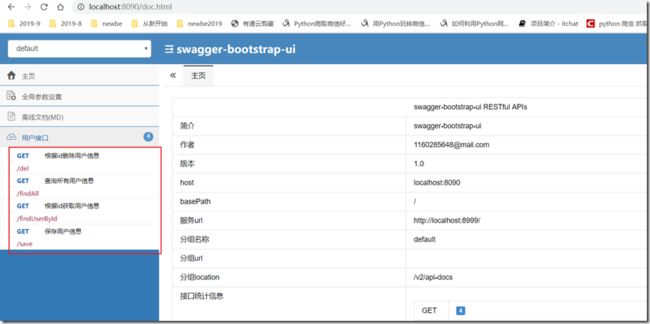
启动项目,在浏览器输入:http://localhost:8090/doc.html
展开用户接口
测试接口
测试成功,其他接口也一样这样测试
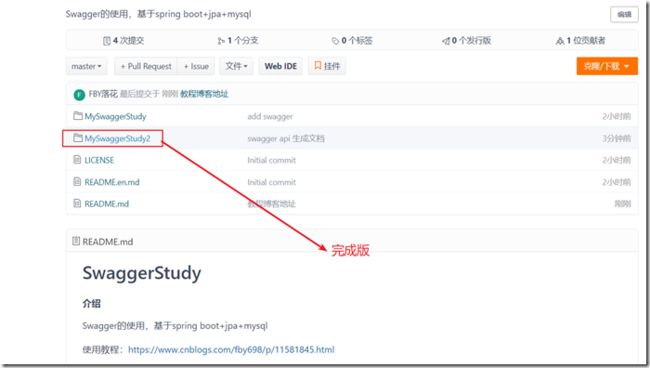
关于项目代码
7.关于API接口详解
请参考:https://blog.csdn.net/xiaojin21cen/article/details/78654652
