访客视图 - 目标
- 如果用户没有登录,显示
访客视图,提示用户注册或者登录
课程重点
- 自定义
TableViewController的基类VisitorViewController - 自定义访客视图,用代码实现苹果原生的自动布局
- 设置全局外观
应用实例
- 在实际应用开发中,有可能会出现:
- 功能框架已经构建完成
- 产品经理提出新的功能需求
- 而新提出的功能需求,会对已有的架构产生影响
- 例如,在新浪微博中,已经搭建好程序架构,但是如何应对用户登录的处理呢?
新的需求 —— 未登录页面
界面截图
- 首页
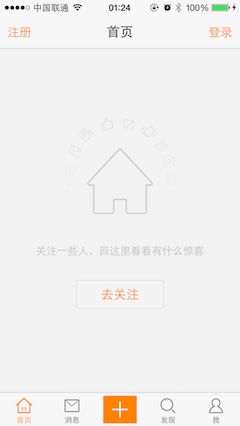
首页.png
- 消息
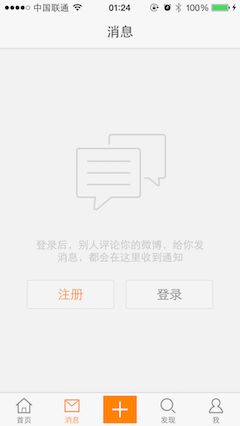
消息.png
- 发现
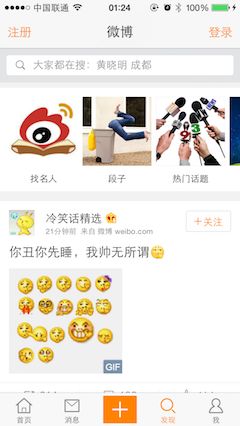
发现.png
- 我
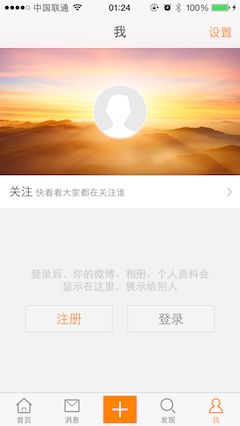
我.png
架构分析及调整
- 现有架构图

现有架构图.png
- 新增
HMVisitorViewController
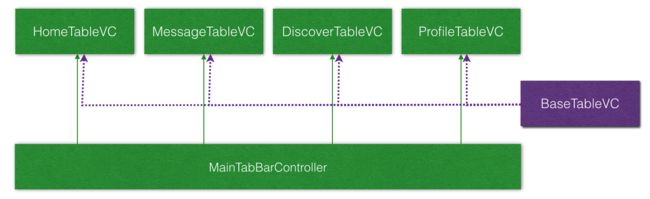
新增BassTableVC.png
表格视图控制器基类
功能需求
- 判断用户是否登录,如果没有登录
- 使用用户登录视图替换表格视图控制器的默认视图
- 在导航栏左侧添加
注册按钮 - 在导航栏右侧添加
登录按钮
代码实现
新建
HMVisitorViewController-
将功能主界面的视图控制器基类设置为
HMVisitorViewController- HMHomeTableViewController
- HMMessageTableViewController
- HMDiscoverTableViewController
- HMProfileTableViewController
增加 用户登录标记,根据用户登录标记判断是否加载默认视图
/// 功能模块控制器的基类控制器
class HMVisitorViewController: UITableViewController {

    /// 用户登录标记
    var userLogon = true

    override func loadView() {
        userLogon ? super.loadView() : setupVisitorView()
    }

    /// 设置访客视图
    private func setupVisitorView() {
        view = UIView()
        view.backgroundColor = UIColor.orangeColor()
    }
}
修改
userLogon的值,运行测试界面效果
添加导航栏按钮
/// 设置访客视图
private func setupVisitorView() {
    view = UIView()
    view.backgroundColor = UIColor.orangeColor()

    // 添加导航栏按钮
    navigationItem.leftBarButtonItem = UIBarButtonItem(title: "注册", target: nil, action: "")
    navigationItem.rightBarButtonItem = UIBarButtonItem(title: "登录", target: nil, action: "")
}
用户登录视图
对于第三方开发者,新浪没有开放未登录访问数据的权限,因此在用户登录之前,无法
加载微博数据以及关注用户
功能需求
- 用户登录操作视图,用于在用户没有登录时替换表格控制器的根视图
- 每个功能模块的登录视图包含以下四个控件
- 模块图标
- 描述文字
- 注册按钮
- 登录按钮
- 特例
- 首页有一个小的转轮图片会不停旋转
功能实现
- 拖拽相关图片素材
- 新建
HMVisitorView.swift继承自UIView
/// 访客登录视图
class HMVisitorView: UIView {

    override init(frame: CGRect) {
        super.init(frame: frame)

        setupUI()
    }

    required init?(coder aDecoder: NSCoder) {
        super.init(coder: aDecoder)

        setupUI()
    }

    /// 设置界面元素
    private func setupUI() {

    }
}
- 修改
setupVisitorView函数
// 替换根视图
view = HMVisitorView()
- 添加界面元素
/// 设置界面元素
private func setupUI() {
    // 1. 添加控件
    addSubview(circleView)
    addSubview(iconView)
    addSubview(messageLabel)
    addSubview(registerButton)
    addSubview(loginButton)
}

// MARK: - 懒加载属性
// 小房子
private lazy var iconView: UIImageView = UIImageView(image: UIImage(named: "visitordiscover_feed_image_house"))

// 转圈的 view
private lazy var circleView: UIImageView = UIImageView(image: UIImage(named: "visitordiscover_feed_image_smallicon"))

// 提示 label
private lazy var messageLabel: UILabel = {
    // 这个地方使用 extension 里面的便利构造函数初始化的
    let label = UILabel(textColor: UIColor.darkGrayColor(), fontSize: 14)
    label.text = "关注一些人,回这里看看有什么惊喜关注一些人,回这里看看有什么惊喜"
    label.numberOfLines = 0
    // 文本对齐方式
    label.textAlignment = .Center
    return label
}()

// 注册按钮
lazy var registerButton: UIButton = {
    let button = UIButton()
    button.setTitle("注册", forState: .Normal)
    button.setBackgroundImage(UIImage(named: "common_button_white_disable"), forState: .Normal)
    button.titleLabel?.font = UIFont.systemFontOfSize(14)
    button.setTitleColor(UIColor.orangeColor(), forState: .Normal)
    return button
}()

// 登录按钮
lazy var loginButton: UIButton = {
    let button = UIButton()
    button.setTitle("登录", forState: .Normal)
    button.setBackgroundImage(UIImage(named: "common_button_white_disable"), forState: .Normal)
    button.titleLabel?.font = UIFont.systemFontOfSize(14)
    button.setTitleColor(UIColor.darkGrayColor(), forState: .Normal)
    return button
}()
设置自动布局
- 设置图标约束 - 参照视图居中对齐
// 1> 图标
// 2.1 图标
iconView.translatesAutoresizingMaskIntoConstraints = false
addConstraint(NSLayoutConstraint(item: iconView, attribute: .CenterX, relatedBy: .Equal, toItem: self, attribute: .CenterX, multiplier: 1, constant: 0))
addConstraint(NSLayoutConstraint(item: iconView, attribute: .CenterY, relatedBy: .Equal, toItem: self, attribute: .CenterY, multiplier: 1, constant: 0))
- 设置首页小房子 - 参照图标居中对齐
// 2> 首页的房子
circleView.translatesAutoresizingMaskIntoConstraints = false
addConstraint(NSLayoutConstraint(item: circleView, attribute: .CenterX, relatedBy: .Equal, toItem: iconView, attribute: .CenterX, multiplier: 1, constant: 0))
addConstraint(NSLayoutConstraint(item: circleView, attribute: .CenterY, relatedBy: .Equal, toItem: iconView, attribute: .CenterY, multiplier: 1, constant: 0))
- 设置文本 - 参照图标,水平居中,下方 16 个点
// 3> 描述文字
messageLabel.translatesAutoresizingMaskIntoConstraints = false
addConstraint(NSLayoutConstraint(item: messageLabel, attribute: .CenterX, relatedBy: .Equal, toItem: circleView, attribute: .CenterX, multiplier: 1, constant: 0))
addConstraint(NSLayoutConstraint(item: messageLabel, attribute: .Top, relatedBy: .Equal, toItem: circleView, attribute: .Bottom, multiplier: 1, constant: 16))
- 增加文本宽度约束 - 224
// 添加最大宽度约束
addConstraint(NSLayoutConstraint(item: messageLabel, attribute: .Width, relatedBy: .Equal, toItem: nil, attribute: .NotAnAttribute, multiplier: 1, constant: 224))
- 注册按钮,文本标签左下(16)对齐,宽度 100,高度 35
// 4> 注册按钮
registerButton.translatesAutoresizingMaskIntoConstraints = false
addConstraint(NSLayoutConstraint(item: registerButton, attribute: .Leading, relatedBy: .Equal, toItem: messageLabel, attribute: .Leading, multiplier: 1, constant: 0))
addConstraint(NSLayoutConstraint(item: registerButton, attribute: .Top, relatedBy: .Equal, toItem: messageLabel, attribute: .Bottom, multiplier: 1, constant: 16))

addConstraint(NSLayoutConstraint(item: registerButton, attribute: .Width, relatedBy: .Equal, toItem: nil, attribute: .NotAnAttribute, multiplier: 1, constant: 100))
addConstraint(NSLayoutConstraint(item: registerButton, attribute: .Height, relatedBy: .Equal, toItem: nil, attribute: .NotAnAttribute, multiplier: 1, constant: 35))
调整按钮背景图片切片
登录按钮,文本标签右下(16)对齐,宽度 100,高度 35
loginButton.translatesAutoresizingMaskIntoConstraints = false
addConstraint(NSLayoutConstraint(item: loginButton, attribute: .Trailing, relatedBy: .Equal, toItem: messageLabel, attribute: .Trailing, multiplier: 1, constant: 0))
addConstraint(NSLayoutConstraint(item: loginButton, attribute: .Top, relatedBy: .Equal, toItem: registerButton, attribute: .Top, multiplier: 1, constant: 0))

addConstraint(NSLayoutConstraint(item: loginButton, attribute: .Width, relatedBy: .Equal, toItem: nil, attribute: .NotAnAttribute, multiplier: 1, constant: 100))
addConstraint(NSLayoutConstraint(item: loginButton, attribute: .Height, relatedBy: .Equal, toItem: nil, attribute: .NotAnAttribute, multiplier: 1, constant: 35))
- 设置登录按钮文字颜色
btn.setTitleColor(UIColor.darkGrayColor(), forState: UIControlState.Normal)
- 调整控件整体垂直位置
addConstraint(NSLayoutConstraint(item: iconView, attribute: NSLayoutAttribute.CenterY, relatedBy: NSLayoutRelation.Equal, toItem: self, attribute: NSLayoutAttribute.CenterY, multiplier: 1.0, constant: -60))
- 添加遮罩图片视图
/// 遮罩视图
private lazy var maskIconView: UIImageView = UIImageView(image: UIImage(named: "visitordiscover_feed_mask_smallicon"))
- 调整控件的层次
// 1. 添加控件
addSubview(circleView)
addSubview(maskIconView)
addSubview(iconView)
...
- 遮罩图片自动布局
// 6> 遮罩视图
maskIconView.translatesAutoresizingMaskIntoConstraints = false
addConstraints(NSLayoutConstraint.constraintsWithVisualFormat("H:|-0-[subview]-0-|", options: [], metrics: nil, views: ["subview": maskIconView]));
addConstraints(NSLayoutConstraint.constraintsWithVisualFormat("V:|-0-[subview]-(-35)-[regButton]", options: [], metrics: nil, views: ["subview": maskIconView, "regButton": registerButton]));
- 视图背景颜色
// 3. 设置视图背景颜色
backgroundColor = UIColor(white: 237.0 / 255.0, alpha: 1.0)
运行测试
设置未登录信息
- 设置访客视图信息
/**
设置各个页签信息

- parameter imageName: 图片名字
- parameter message:   信息内容
*/
func setupInfo(imageName: String?, message: String?) {
    if imageName != nil {
        circleView.hidden = true
        iconView.image = UIImage(named: imageName!)
        messageLabel.text = message
    }
}
- 在
HMVisitorViewController中添加登录视图属性
private lazy var visitorView: HMVisitorView = {
    let visitorView = HMVisitorView()
    return visitorView
}()
- 在
setupVisitorView中记录登录视图
view = visitorView
修改功能视图控制器中的代码
- HMHomeTableViewController
if !userLogon {
    visitorView.setupInfo(nil, message: nil)
    return
}
- HMMessageTableViewController
if !userLogon {
    visitorView.setupInfo("visitordiscover_image_message", message: "登录后,别人评论你的微博,发给你的消息,都会在这里收到通知")
    return
}
- HMDiscoverTableViewController
if !userLogon {
    visitorView.setupInfo("visitordiscover_image_message", message: "登录后,最新、最热微博尽在掌握,不再会与实事潮流擦肩而过")
    return
}
- HMProfileTableViewController
if !userLogon {
    visitorView.setupInfo("visitordiscover_image_profile", message: "登录后,你的微博、相册、个人资料会显示在这里,展示给别人")
    return
}
- 提示信息
- 关注一些人,回这里看看有什么惊喜
- 登录后,别人评论你的微博,发给你的消息,都会在这里收到通知
- 登录后,最新、最热微博尽在掌握,不再会与实事潮流擦肩而过
- 登录后,你的微博、相册、个人资料会显示在这里,展示给别人
首页动画
- 添加动画代码
/// 启动动画
/**
首页的动画
*/
private func startAnim(){
    let anim = CABasicAnimation(keyPath: "transform.rotation")
    // 旋转
    anim.toValue = 2 * M_PI
    // 执行时间
    anim.duration = 20
    // 执行次数
    anim.repeatCount = MAXFLOAT
    // 切换界面的时候动画会被释放,指定为false之后切换界面动画就不会被释放
    anim.removedOnCompletion = false
    // 添加动画
    circleView.layer.addAnimation(anim, forKey: nil)
}
- 调整
setupInfo函数
/// 设置访客视图信息
///
/// - parameter imageName: 图片名称
/// - parameter message:   消息文字
func setupInfo(imageName: String?, message: String?){
    if imageName == nil {
        circleView.hidden = false
        startAnim()
    }else{
        circleView.hidden = true
        iconView.image = UIImage(named: imageName!)
        messageLabel.text = message
    }
}
运行测试,发现切换控制器后动画会被释放,另外在首页退出到桌面再次进入,动画同样会被释放
- 设置动画属性
anim.removedOnCompletion = false
登录&注册代理回调
- 定义协议
/// 访客登录视图协议
protocol HMVisitorViewDelegate: NSObjectProtocol{
    /// 访客视图将要登录
    func visitorLoginViewWillLogin();
    /// 访客视图将要注册
    func visitorLoginViewWillRegister();
}
定义协议时,需要继承自
NSObjectProtocol,否则无法设置代理的属性为weak
- 定义代理
weak var delegate: HMVisitorViewDelegate?
- 按钮回调
// MARK: - 监听按钮点击
@objc private func registerButtonClick(){
    delegate?.visitorLoginViewWillRegister()
}

@objc private func loginButtonClick(){
    delegate?.visitorLoginViewWillLogin()
}
- 遵守协议
class HMVisitorViewController: UITableViewController, VisitorLoginViewDelegate
- 设置代理
visitorView.delegte = self
- 实现方法
// MARK: - VisitorLoginViewDelegate
func visitorLoginViewWillLogin() {
    print("登录")
}

func visitorLoginViewWillRegister() {
    print("注册")
}
- 修改导航条按钮监听方法
navigationItem.leftBarButtonItem = UIBarButtonItem(title: "注册", style: UIBarButtonItemStyle.Plain, target: self, action: "visitorLoginViewWillRegister")
navigationItem.rightBarButtonItem = UIBarButtonItem(title: "登录", style: UIBarButtonItemStyle.Plain, target: self, action: "visitorLoginViewWillLogin")
运行测试
登录&注册按钮监听
- 修改
HMVisitorViewController- 删除遵守协议
- 删除设置代理属性
- 修改
VisitorLoginView- 删除协议
- 删除
delegate属性 - 删除按钮监听方法
- 取消
注册&登录按钮的private修饰符
- 在
setupVisitorView方法中添加按钮监听方法
// 设置按钮监听方法
visitorView.registerButton.addTarget(self, action: "visitorLoginViewWillRegistor", forControlEvents: UIControlEvents.TouchUpInside)
visitorView.loginButton.addTarget(self, action: "visitorLoginViewWillLogin", forControlEvents: UIControlEvents.TouchUpInside)
- 修改按钮监听方法作用域
// MARK: - 按钮监听方法
@objc private func visitorLoginViewWillLogin() {
    print("登录")
}

@objc private func visitorLoginViewWillRegistor() {
    print("注册")
}
阶段性小结
应用程序设计
- 程序开发过程中,如果因为需求变化要对应用程序做大幅度调整,以对现有代码做最小化修改为原则,可以考虑抽取基类的方式实现
- 整理项目目录结构时,不建议将
AppDelegate隐藏
代理的使用
- swift 中代理的使用基本与 OC 相同
- 需要注意的是,定义协议时,需要继承自
NSObjectProtocol - 代理属性需要使用
weak防止出现循环引用
事件传递
- 可以直接在控制器中添加
自定义视图中的按钮监听方法 - 在 Swift 中可以直接将按钮开放
- 在 OC 中可以将按钮的定义放在
.h中 - 在 Storyboard 中,可以直接拖线