今天来整理下springboot,开发工具使用eclipse(后期会再做个idea的).主要实现的功能是
1.通过数据库的查询返回前端数据.
第一步:新建marven工程,在pom文件中引入
    4.0.0
    com.sunjian
    springboot-jsp
    0.0.1-SNAPSHOT
    war

        org.springframework.boot
        spring-boot-starter-parent
        1.3.3.RELEASE


            org.springframework.boot
            spring-boot-starter-web


            org.springframework.boot
            spring-boot-starter-tomcat


            org.apache.tomcat.embed
            tomcat-embed-jasper


            org.mybatis.spring.boot
            mybatis-spring-boot-starter
            1.1.1


            mysql
            mysql-connector-java
第二步:新建entity
package com.sunjian.entity;

public class UserEntity {

    private Long id;
    private String name;
    private Integer age;

    public Long getId() {

        return id;
    }

    public void setId(Long id) {

        this.id = id;
    }

    public String getName() {

        return name;
    }

    public void setName(String name) {

        this.name = name;
    }

    public Integer getAge() {

        return age;
    }

    public void setAge(Integer age) {

        this.age = age;
    }

}
第三步:新建UserMapper(需要在application.properties下面配置mysql数据源,请见3)
package com.sunjian.mapper;

import org.apache.ibatis.annotations.Param;
import org.apache.ibatis.annotations.Select;

import com.sunjian.entity.UserEntity;

public interface UserMapper {

    @Select("select * from users where id=#{id}")
    UserEntity findName(@Param("id") long id);

}
第四部:新建IndexController
package com.sunjian.controller;

import org.springframework.beans.factory.annotation.Autowired;
import org.springframework.boot.SpringApplication;
import org.springframework.boot.autoconfigure.EnableAutoConfiguration;
import org.springframework.stereotype.Controller;
import org.springframework.web.bind.annotation.RequestMapping;
import org.springframework.web.bind.annotation.ResponseBody;

import com.sunjian.entity.UserEntity;
import com.sunjian.mapper.UserMapper;

@Controller
public class IndexController {
    @Autowired
    private UserMapper userMapper;

    @RequestMapping("/index")
    public String index() {
        int i=1/0;
        return "index";
    }

    @ResponseBody
    @RequestMapping("/getUserName")
    public UserEntity getUserName(long id) {
        return userMapper.findName(id);
    }

}
第五步:新建app启动类运行试试(注:sql已经在下面springboot-jsp下载那里提供了)
package com.sunjian.app;

import org.mybatis.spring.annotation.MapperScan;
import org.springframework.boot.SpringApplication;
import org.springframework.boot.autoconfigure.EnableAutoConfiguration;
import org.springframework.context.annotation.ComponentScan;

@ComponentScan(basePackages = "com.sunjian.controller")
@MapperScan(basePackages = "com.sunjian.mapper")
@EnableAutoConfiguration
public class App {

    public static void main(String[] args) {
        SpringApplication.run(App.class, args);
    }

}
效果图:
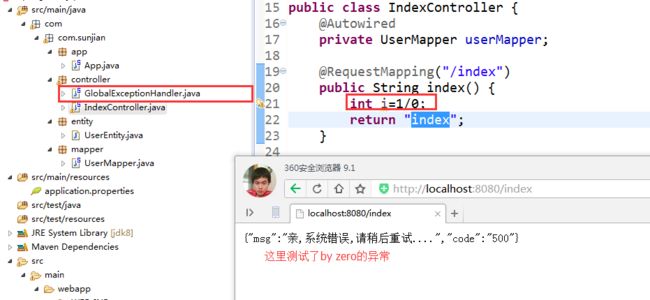
2.全局异常的捕获
在controller中新建GlobalExceptionHandler
package com.sunjian.controller;

import java.util.HashMap;
import java.util.Map;

import org.springframework.web.bind.annotation.ControllerAdvice;
import org.springframework.web.bind.annotation.ExceptionHandler;
import org.springframework.web.bind.annotation.ResponseBody;

/**
 * @classDesc: 功能描述:(拦截异常)
 */
@ControllerAdvice
public class GlobalExceptionHandler {
    @ExceptionHandler(RuntimeException.class)
    @ResponseBody // 拦截返回是 json返回结果
    public Map exceptionHandler() {
        Map result=new HashMap();
        result.put("code","500");
        result.put("msg","亲,系统错误,请稍后重试....");
        return result;
    }

}
效果图
3.springboot如何返回jsp(但是springboot是不推荐使用jsp的,一般会用ftl)
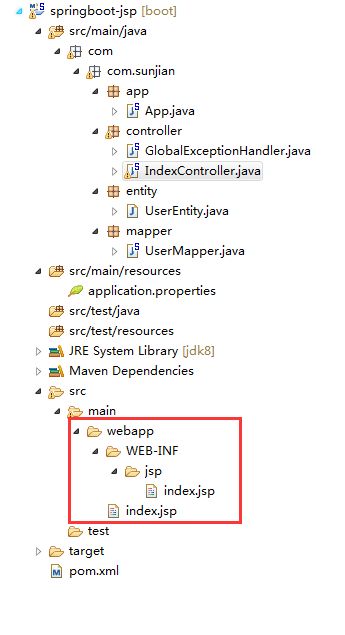
首先在webapp下面新建WEB-INF,然后按照下图新建文件
在application.properties中加入
spring.mvc.view.prefix=/WEB-INF/jsp/
spring.mvc.view.suffix=.jsp


spring.datasource.url=jdbc:mysql://localhost:3306/test
spring.datasource.username=root
spring.datasource.password=root
spring.datasource.driver-class-name=com.mysql.jdbc.Driver
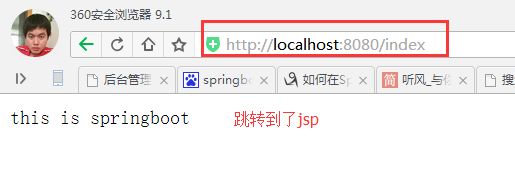
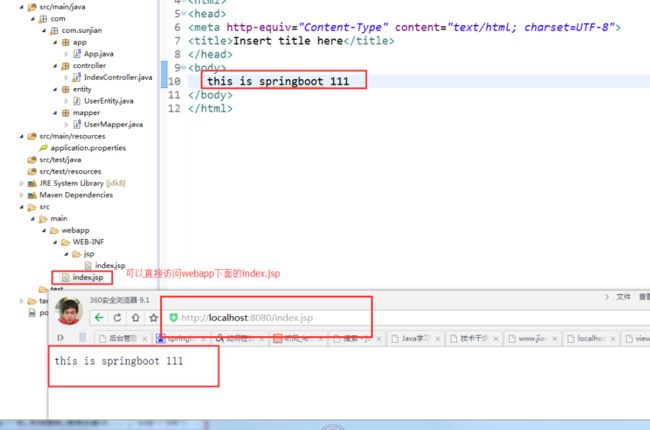
然后测试,见图
springboot-jsp下载地址 密码 f3pw
springboot(二)进阶篇
关注我的公众号,都是满满的干货!

