2019独角兽企业重金招聘Python工程师标准>>> ![]()
运行环境:windows10
Jekyll中文文档,Jekyll英文文档,Jekyll Themes
1.安装Ruby和DevKit
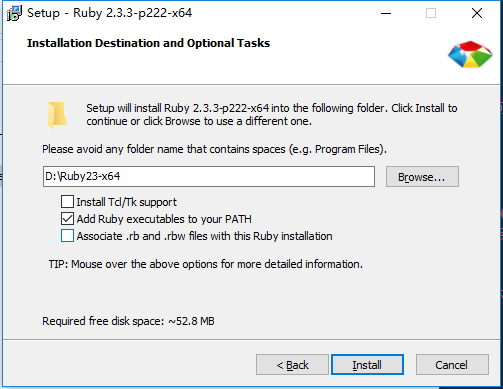
1.1从RubyInstaller for Windows下载Ruby2.3.3(x64)和DevKit-mingw64-64-4.7.2-20130224-1432-sfx.exe,安装的时候注意将ruby的可执行文件加入到环境变量PATH中,如下图
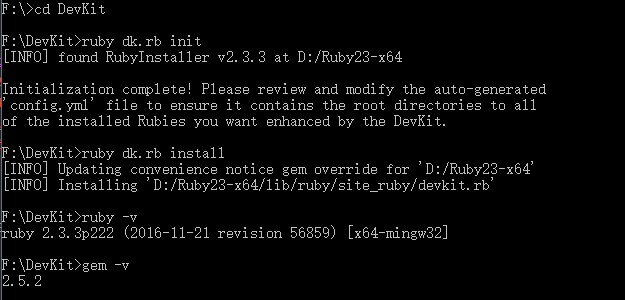
1.2在命令行进入解压后的DevKit文件夹,并执行如下命令:
cd F:\DevKid
ruby dk.rb init
ruby dk.rb install
ruby -v #查看ruby版本,以确认安装成功
gem -v  #查看gem版本,以确认安装成功
2.安装Jekyll
在命令行执行如下命令:
gem install jekyll
jekyll -v  #查看jekyll版本,以确认安装成功
3.下载Jekyll模板
你可以从Jekyll Themes或者其他地方下载你喜欢的模板到本地。
进入模板目录,执行如下命令:
cd E:\Moon
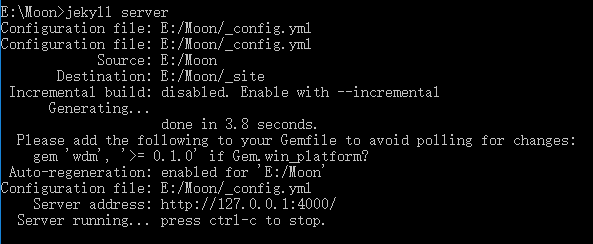
jekyll server
在浏览器输入http://localhost:4000, 即可看到效果
问题:
1.执行jekyll server命令后可能会出现如下错误
D:/Ruby23-x64/lib/ruby/2.3.0/rubygems/core_ext/kernel_require.rb:55:in `require': cannot load such file -- bundler (LoadError)
    from D:/Ruby23-x64/lib/ruby/2.3.0/rubygems/core_ext/kernel_require.rb:55:in `require'
    from D:/Ruby23-x64/lib/ruby/gems/2.3.0/gems/jekyll-3.3.1/lib/jekyll/plugin_manager.rb:34:in `require_from_bundler'
    from D:/Ruby23-x64/lib/ruby/gems/2.3.0/gems/jekyll-3.3.1/exe/jekyll:9:in `'
    from D:/Ruby23-x64/bin/jekyll:22:in `load'
    from D:/Ruby23-x64/bin/jekyll:22:in `'
解决:执行以下命令
gem install bundler
2.执行jekyll server命令后可能会出现如下错误
D:/Ruby23-x64/lib/ruby/gems/2.3.0/gems/bundler-1.14.3/lib/bundler/spec_set.rb:87:in `block in materialize: Could not find i18n-0.7.0 in any of the sources (Bundler::GemNotFound)
...
解决:执行以下命令
bundle install
3.执行jekyll server命令后可能会出现如下错误
D:/Ruby23-x64/lib/ruby/gems/2.3.0/gems/bundler-1.14.0/lib/bundler/resolver.rb:376:in `block in verify_gemfile_dependencies_are_found!': Could not find gem 'jekyll (~> 3.2.1) x64-mingw32' in any of the gem sources listed in your Gemfile. (Bundler::GemNotFound)
    ......
解决:查看Gemfile文件里的jekyll版本是否与安装的版本一致,若不一致,修改为此时安装的版本
4.执行jekyll server命令后可能会出现如下类似错误
D:/Ruby23-x64/lib/ruby/gems/2.3.0/gems/bundler-1.14.0/lib/bundler/resolver.rb:376:in `block in verify_gemfile_dependencies_are_found!': Could not find gem 'jekyll-sitemap x64-mingw32' in any of the gem sources listed in your Gemfile. (Bundler::GemNotFound)
解决:执行以下命令
gem install jekyll-sitemap
多说评论
1.注册多说
2.复制以下代码到post.html的
下
这段代码有四处要改:
·data-thread-key填上{{page.id}}
·data-title填上{{page.title}}
·data-url填上{{page.url}}
·short_name填上注册多说账号时的二级短域名
分享功能
修改meta.html页面
可以根据你的需求将标签里的class替换为自己需要的代码,具体代码可以看FontAwesome图标,并将href的值改为相应代码
友言评论
近日,多说突然发出公告,不再提供服务。好吧,那么我们可以用友言。个人觉得友善的设置操作要比多说简单,所以在此就不再写怎么用了。当然,我也觉得友言的功能在某些方面不如多说。
部署到github
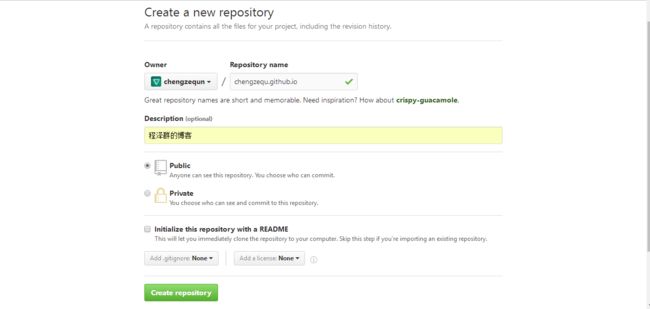
1.申请并建立仓库
2.进入到项目目录,在命令行运行如下命令:
git init #对已有项目进行git初始化
运行命令后会自动创建一个master分支
3.发布
git add .
git commit -a -m "v0.0.1 first blog" #提交所有的修改到本地仓库
3.上传到github
git remote add origin https://github.com/(github用户名)/(jekyll项目名称).git
git push origin master
4.修改后上传
git add .                     #增加所有新增的文件到项目中
git commit -a -m "提交注释"    #提交所有修改
git push origin master        #将修改提交到远程github服务器
绑定自己的域名
1.在项目根目录创建一个CNAME文件,写上自己购买的域名
2.在DNS中增加一条记录,如下图
注意
文件的名字格式应为xxxx-xx-xx-名字.markdown,名字不能是中文,否则将找不到文件!
将github同步到coding
大家可能都知道github把百度的爬虫给屏蔽了,所以很难被百度收录,那么我们可以将博客放一份到coding上。二来为了防止万一仓库某一天不能用了,我们也有个备份,有备无患。好了废话不多说了,开始着手
1.在coding上注册并创建新项目
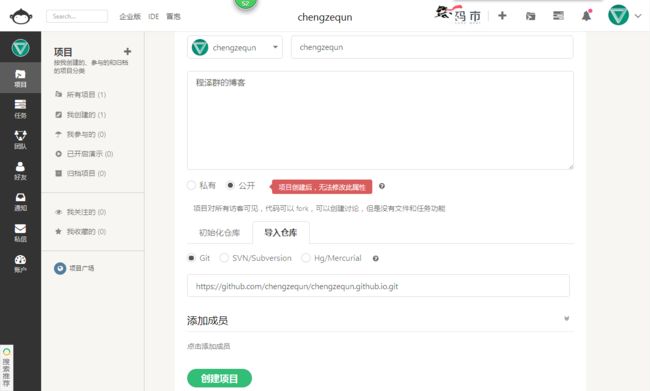
2.填写项目名、项目描述、项目属性、导入仓库的地址、创建项目
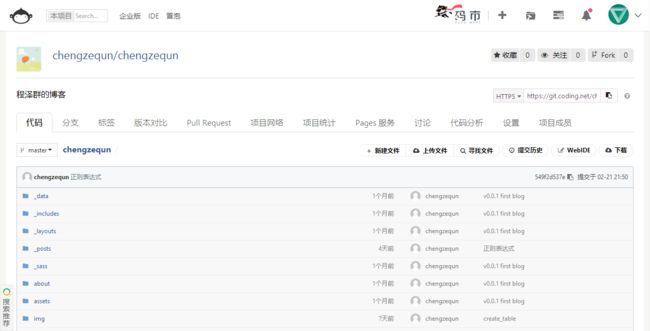
3.过几分钟项目就被复制到coding上了
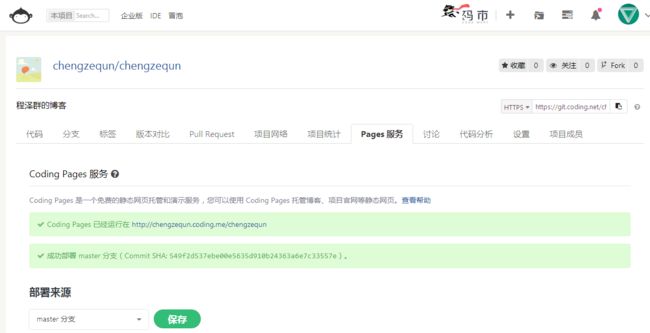
4.设置Pages服务
部署来源填写和github的一致
5.更改git下的config文件
[remote "origin"]
  url = https://github.com/chengzequn/chengzequn.github.io.git
  url = https://git.coding.net/chengzequn/chengzequn.git
  fetch = +refs/heads/*:refs/remotes/origin/*
6.更改项目下的_config.xml文件
deploy:
  type: git
  repo:
    github: https://github.com/chengzequn/chengzequn.github.io.git
    coding: https://git.coding.net/chengzequn/chengzequn.git
  bransh: master
7.下次更改后push就可以同时上传同步到github和coding上
欢迎访问我的个人博客:http://www.5210blog.com
