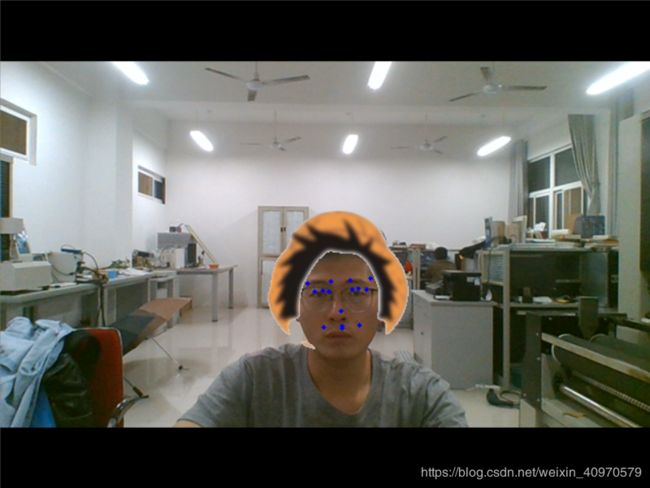
自己编程实现抖音特效(Python)
最近被抖音的各种神奇特效折服的不行不行的,于是准备自己写一个简单的小特效,下面开始进入正题:
首先我们要知道特效要实现的功能。
本人毕竟第一次弄,就选择一个简单的特效------戴帽子
框架搭建思路:
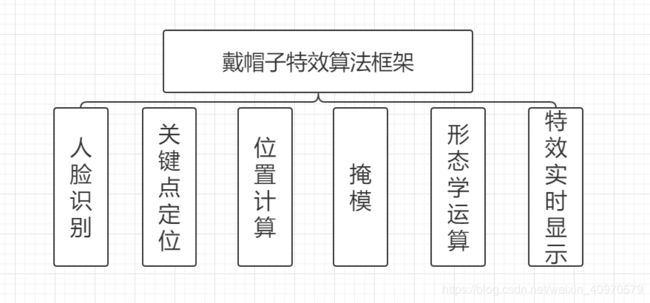
人脸识别
这里的人脸识别采用开源库OpenCV中的haarcascade_frontalface_default.xml文件进行检测,这个文件在OpenCV官网上或者GitHub上就可以下载,这里挂个网址:
https://github.com/opencv/opencv/tree/master/data/haarcascades
需要下载哪个文件,点进去,右键单击Raw即可下载。
经后期实践证明,这个方法并不太好,对于侧脸和遮挡不能很好的检测出人脸。
这里做一个简单的例子对文件的使用进行说明:
import cv2
import numpy as np
# 调用文件
face = cv2.CascadeClassifier("./haarcascade_frontalface_default.xml")
# 打开摄像头,
cap = cv2.VideoCapture(0)
while True:
	# ret 返回布尔值,frame表示每帧图像
    ret, frame = cap.read()
    # 灰度转换
    gray = cv2.cvtColor(frame, cv2.COLOR_BGR2GRAY)
    face_detection = face.detectMultiScale(gray, 1.1, 5)
    if len(face_detection) > 0:
        for faceRect in face_detection:
        	# 左上角坐标和长宽
            x, y, w, h = faceRect
            # 绘制边框矩形,线宽为2
            cv2.rectangle(frame, (x, y), (x + w, y + h), (255, 255, 0), 2)
    cv2.imshow("face", frame)
    if cv2.waitKey(1) & 0xFF == ord('q'):
        break
运行上述示例,就可以看到自己帅气、美丽的脸庞被框起来了(虽然效果不太好)。这里我们需要的参数有x, y, w, h ,也就是边框左上角坐标和边框矩形的长和宽。
人脸关键点定位
这里采用深度学习对人脸关键点进行定位,环境配置:
win10+OPENCV4+TensorFlow(CPU)1.8
具体操作可参照:
基于OpenCV和tensorflow的人脸关键点检测
手把手教你做人脸识别和关键点检测(基于tensorflow和opencv)
我的深度学习训练和测试代码是根据上述两篇博客进行修改的,数据集采用
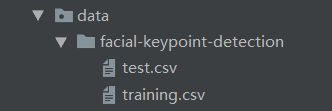
Facial Keypoints Detection数据集,这个网上下载有点麻烦,需要注册啥的,如果需要的话可以私信我,或者发我邮箱: [email protected] 。数据集如下图所示:
下面进入正题:神经网络结构采用三层神经网络,两层全连接,池化方式为最大值,激活函数为Relu,Dropout为0.7。经过150次左右的迭代,loss趋于稳定,大约为1.12。下面将附上训练代码,代码大部分是上面提到的博客提供的代码,做了略微的改动以适应版本配置需求。
import matplotlib.pyplot as plt
import os
import tensorflow as tf
import pandas as pd
import numpy as np

def input_data(train=True):
    # 获取训练集和测试集
    file_name = train_csv if train else test_csv

    df = pd.read_csv(file_name)
    cols = df.columns[:-1]
    df = df.dropna()  # 丢弃有缺失数据的样本
    df['Image'] = df['Image'].apply(
        lambda img: np.fromstring(img, sep=' ') / 255.0)  # 归一化输入的数据
    X = np.vstack(df['Image'])
    X = X.reshape((-1, 96, 96, 1))
    if train:
        y = df[cols].values / 96.0  # 将坐标缩放到0,1区间,加速收敛
    else:
        y = None
    print(df.describe())
    return X, y

train_csv = './data/facial-keypoint-detection/training.csv'
test_csv = './data/facial-keypoint-detection/test.csv'
valid_size = 100  # 验证集大小
train_epoches = 300 # 循环训练次数
batch_size = 64  # mini-batch的大小
learning_rate = 0.001  # 学习率

def weights_variable(shape, namew='w'):
    # 初始化权重
    initial = tf.truncated_normal(shape=shape, stddev=0.1)
    return tf.Variable(initial, name=namew)
def biases_variable(shape, nameb='b'):
    # 初始化偏置
    initial = tf.constant(0.1, shape=shape)
    return tf.Variable(initial, name=nameb)
def conv2d(x, W):
    # 定义2维卷积操作
    return tf.nn.conv2d(x, W, strides=[1, 1, 1, 1], padding='VALID')
def max_pool2x2(x):
    # 定义一个2*2的池化层
    return tf.nn.max_pool(x, ksize=[1, 2, 2, 1], strides=[1, 2, 2, 1], padding='SAME')


def CNN_Net(x, W, B):
    # 定义一个三层CNN模型
    h_conv1 = tf.nn.relu(conv2d(x, W['w_conv1']) + B['b_conv1'])
    h_pool1 = max_pool2x2(h_conv1)

    h_conv2 = tf.nn.relu(conv2d(h_pool1, W['w_conv2']) + B['b_conv2'])
    h_pool2 = max_pool2x2(h_conv2)

    h_conv3 = tf.nn.relu(conv2d(h_pool2, W['w_conv3']) + B['b_conv3'])
    h_pool3 = max_pool2x2(h_conv3)

    h_pool3_flat = tf.reshape(h_pool3, [-1, 11 * 11 * 128])
    h_fc1 = tf.nn.relu(tf.matmul(h_pool3_flat, W['w_fc1']) + B['b_fc1'])  # 定义全连接层

    h_fc2 = tf.nn.relu(tf.matmul(h_fc1, W['w_fc2']) + B['b_fc2'])
    h_fc2_drop = tf.nn.dropout(h_fc2, keep_prob=keep_prob)  # 通过drop_out防止过拟合

    return h_fc2_drop

# 分别定义不同层的权重和偏置,保存在字典中
W = {
    'w_conv1': weights_variable(shape=[3, 3, 1, 32], namew='w1'),
    'w_conv2': weights_variable(shape=[2, 2, 32, 64], namew='w2'),
    'w_conv3': weights_variable(shape=[2, 2, 64, 128], namew='w3'),
    'w_fc1': weights_variable(shape=[11 * 11 * 128, 500], namew='wf1'),
    'w_fc2': weights_variable(shape=[500, 500], namew='wf2'),
    'w_fc3': weights_variable(shape=[500, 30], namew='wf3'), }

B = {
    'b_conv1': biases_variable(shape=[32], nameb='b1'),
    'b_conv2': biases_variable(shape=[64], nameb='b2'),
    'b_conv3': biases_variable(shape=[128], nameb='b3'),
    'b_fc1': biases_variable(shape=[500], nameb='bf1'),
    'b_fc2': biases_variable(shape=[500], nameb='bf2'),
    'b_fc3': biases_variable(shape=[30], nameb='bf3')
}

# 创建模型保存的文件夹
if not os.path.exists('ckpt_model'):
    os.makedirs('ckpt_model')
# 声明张量
x_ = tf.placeholder(tf.float32, shape=[None, 96, 96, 1], name='input')  # x是我们输入的图片矩阵,大小为96*96
y_ = tf.placeholder(tf.float32, shape=[None, 30], name='y')  # y是训练集中关键点的标签,用于训练中的梯度下降
keep_prob = tf.placeholder(tf.float32, name='keep_prob')

h_fc2_drop = CNN_Net(x_, W, B)

# 在输出层进行+0.0操作,命名输出
y_conv = tf.add(
    tf.matmul(h_fc2_drop, W['w_fc3']) + B['b_fc3'], 0.0, name='output')
# 用output命名输出结果(关键点的坐标)

# 定义损失函数
loss = tf.sqrt(tf.reduce_mean(tf.square(y_ - y_conv)))
train_step = tf.train.AdamOptimizer(learning_rate=learning_rate).minimize(loss)

init = tf.initialize_all_variables()  # 用于初始化变量
saver = tf.train.Saver()  # 用于保存模型
loss_list = []
with tf.Session() as sess:
    sess.run(init)  # 初始化变量
    X, y = input_data()
    # 拆分训练集,便于后续进行交叉验证
    X_valid, y_valid = X[:valid_size], y[:valid_size]
    X_train, y_train = X[valid_size:], y[valid_size:]

    TRAIN_SIZE = X_train.shape[0]  # 获取数据集的大小
    train_index = list(range(TRAIN_SIZE))
    X_train, y_train = X_train[train_index], y_train[train_index]

    for epoch in range(train_epoches):
        np.random.shuffle(train_index)  # 打乱顺序,便于训练
        X_train, y_train = X_train[train_index], y_train[train_index]  # 获取mini-batch
        for j in range(0, TRAIN_SIZE, batch_size):
            # 训练模型,每次训练取batch_size张图片进行训练
            sess.run(train_step, feed_dict={
                x_: X_train[j:j + batch_size], y_: y_train[j:j + batch_size], keep_prob: 0.7})

        # 计算损失率
        loss_rate = sess.run(
            loss, feed_dict={x_: X_valid, y_: y_valid, keep_prob: 1.0})
        loss_list.append(loss_rate)
        print("epoch:{0} loss:{1}".format(epoch, loss_rate * 96.0))

    saver.save(sess, 'ckpt_model/model.ckpt')  # 保存模型

# 绘制损失率变化曲线
plt.plot(loss_list, 'k-', label='Loss', color='blue')
plt.title('LOSS_RATE')
plt.xlabel('Generation')
plt.ylabel('Loss')
plt.legend(loc='lower right')
plt.show()
完成后会得到四个文件:
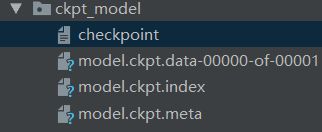
这里我们需要15组坐标参数,分别是得到的事物组关键点的位置坐标。其对应关系如下图所示(请自动忽略画的水平)
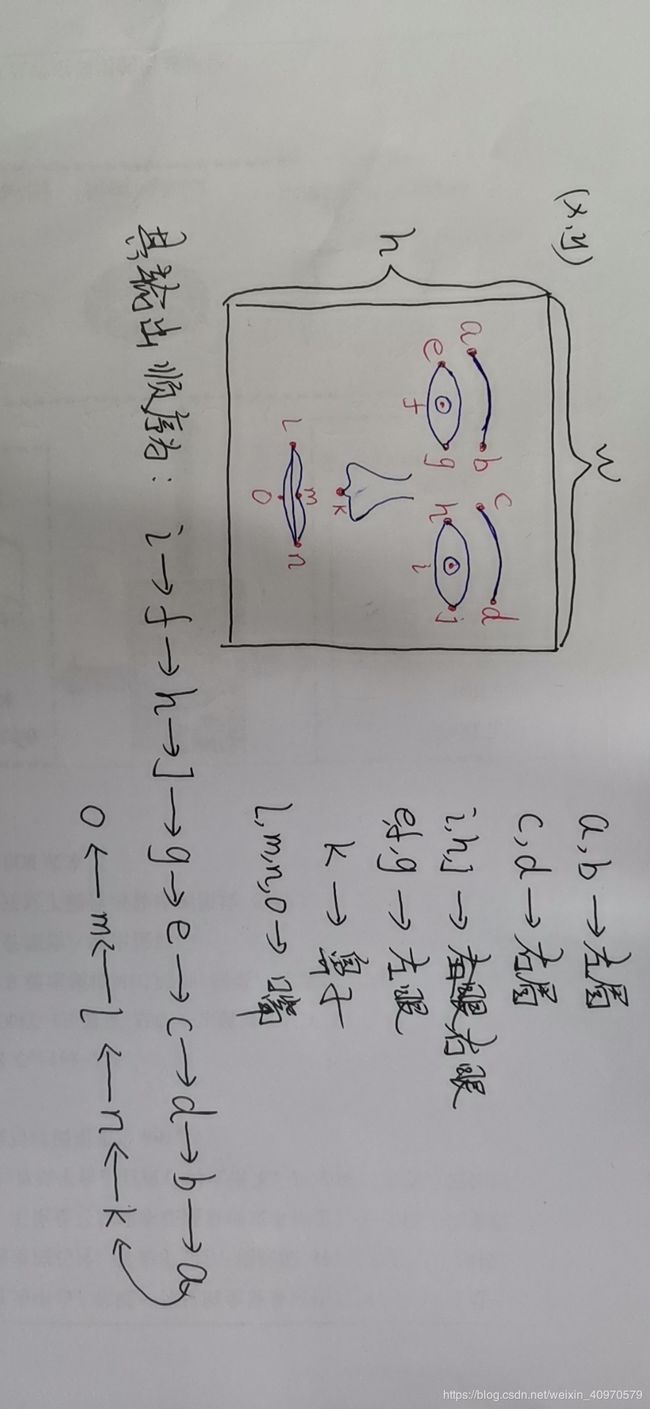
获得对应关键点的坐标后,我们将获得类似下面这样的数据:
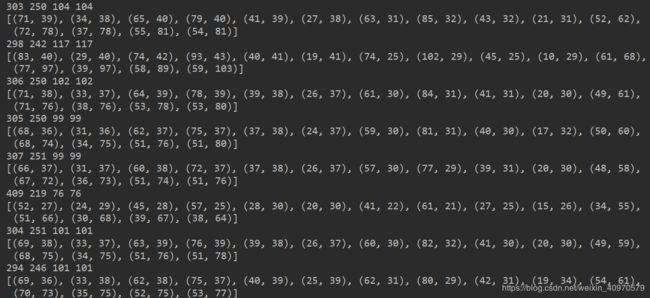
目前为止,我们的工作也就完成了90%了。
位置计算
通过几何关系和实际情况,选择自己喜欢的特效图片,我选择的是路飞的帽子,由于手动截图质量不高,就被我弄成成下面这个样子了:

15个特征点除定位外还可以根据位置选择局部特效,我会在后面的博客中更新15组关键点的使用,这里我们只使用x,y,w,h四个参数
形态学运算
这里这要涉及到图像ROI和形态学运算的操作,先附上代码,代码前面部分作用是resort训练好的模型参数,复制粘贴上面的博客中的代码,后面是图像ROI和形态学运算。不说废话,一切都在代码中:
import cv2
import os
import sys
import tensorflow as tf
import numpy as np
import time

model = cv2.imread('hair.png')

def ad_threshold(img):
    img = cv2.medianBlur(img, 5)
    img = cv2.GaussianBlur(img, (3, 3), 0)  # 降噪处理
    th2 = cv2.adaptiveThreshold(img, 255,
                                cv2.ADAPTIVE_THRESH_GAUSSIAN_C, cv2.THRESH_BINARY, 17, 4)
    return th2


cap = cv2.VideoCapture(0)
cap.set(3, 600)
cap.set(4, 800)
# 调用分类器
classfier = cv2.CascadeClassifier('./haarcascade_frontalface_default.xml')
color = (0, 255, 0)
saver = tf.train.import_meta_graph('./ckpt_model/model.ckpt.meta')  # 加载保存的计算图
with tf.Session() as sess:
    saver.restore(sess, tf.train.latest_checkpoint('./ckpt_model'))  # 加载checkpoint文件
    graph = tf.get_default_graph()
    for op in sess.graph.get_operations():
        print(op.name)
    # 通过变量名重新定义张量
    input_x = sess.graph.get_tensor_by_name("input:0")
    keep_prob = sess.graph.get_tensor_by_name('keep_prob:0')
    output_y = sess.graph.get_tensor_by_name('output:0')

    while cap.isOpened():
        ret, frame = cap.read()  # 读取每一帧图片

        # 转换为灰度图
        gray = cv2.cvtColor(frame, cv2.COLOR_BGR2GRAY)
        gray = ad_threshold(gray)

        faceRects = classfier.detectMultiScale(gray, scaleFactor=1.2, minNeighbors=3, minSize=(32, 32))

        if len(faceRects) > 0:
            for face in faceRects:

                x, y, w, h = face
                print(x, y, w, h)
                image = frame[y - 5:y + h + 5, x - 5:x + w + 5]
                image = cv2.resize(image, (96, 96), interpolation=cv2.INTER_CUBIC)  # 调整为96*96大小
                crop = image / 255.0  # 归一化

                output_y1 = sess.run(output_y,
                                     feed_dict={input_x: np.reshape(crop, [-1, 96, 96, 1]), keep_prob: 1.0})  # 获取检测结果
                pt = np.vstack(np.split(output_y1[0] * 96, 15)).T
                # ----------------------------------------------
                # 获得关键点坐标
                list_x = []; list_y = []; res = []
                # 绘制关键点检测结果
                for index in range(15):
                    loc_x = int(pt[0][index] / 96 * w + x)
                    loc_y = int(pt[1][index] / 96 * h + y)
                    list_x.append(loc_x-x)
                    list_y.append(loc_y-y)

                    cv2.circle(frame, (loc_x, loc_y), 2, (255, 0, 0), -1)

                res = list(zip(list_x,list_y))
                print(res)
                # resize图像
                model = cv2.resize(model, (w+40, h+40))
                # ROI 图像
                ROI = frame[y-40:y + h, x-20:x + w+20]

                model_gray = cv2.cvtColor(model, cv2.COLOR_BGR2GRAY)
                ret, mask = cv2.threshold(model_gray, 200, 255, cv2.THRESH_BINARY)
                # 形态学运算
                mask_inv = cv2.bitwise_not(mask)
                frame_bg = cv2.bitwise_and(ROI, ROI, mask=mask)
                model_fg = cv2.bitwise_and(model, model, mask=mask_inv)
                # 图形融合
                last = cv2.add(frame_bg, model_fg)
                frame[y-40:y + h, x-20:x + w+20] = last

        cv2.imshow('face_detection', frame)
        #time.sleep(1)
        cv2.waitKey(100)
        while cv2.waitKey(1) & 0xFF == ord('q'):
            break
特效实时显示
特别声明:
关于神经网络训练测试部分代码,特别感谢上述两篇博客博主的分享:
基于OpenCV和tensorflow的人脸关键点检测
手把手教你做人脸识别和关键点检测(基于tensorflow和opencv)
