vue-cli 项目添加分页模块----搜索列表分页模块
vue-cli 项目添加分页模块----搜索列表分页模块
最近公司做了个态势感知系统(说白了就是数据可视化,做一些数据分类显示),由于搜索出来的数据特别多需要做个分页组件,废话不多说 直接上干货。
先看看效果

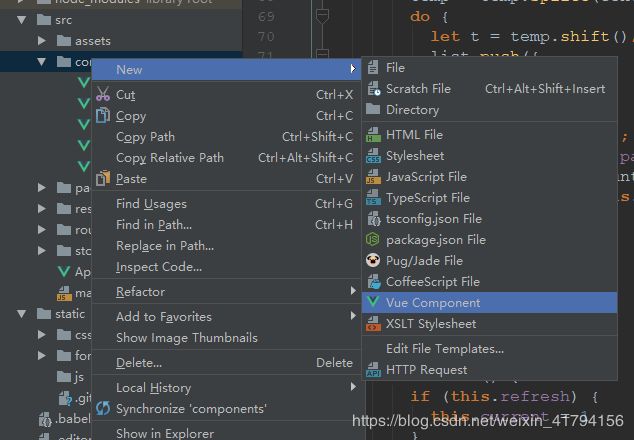
首先你需要在components文件夹创建一个paging组件(我用的webstorm)
html部分 template 无须解释
<template>
  <nav>
    <ul class="pagination">
      <li :class="{'disabled': current == 1}"><a href="javascript:;" @click="setCurrent(current - 1)"> « a>li>
      <li :class="{'disabled': current == 1}"><a href="javascript:;" @click="setCurrent(1)"> 首页 a>li>
      <li v-for="p in grouplist" :class="{'active': current == p.val}"><a href="javascript:;"
                                                                          @click="setCurrent(p.val)"> {{ p.text }} a>
      li>
      <li :class="{'disabled': current == page}"><a href="javascript:;" @click="setCurrent(page)"> 尾页 a>li>
      <li :class="{'disabled': current == page}"><a href="javascript:;" @click="setCurrent(current + 1)"> »a>li>
    ul>
  nav>
template>
JS逻辑 代码中都有备注
export default {
    name: 'paging',
    data() {
      return {
        current: this.currentPage
      }
    },
    props: {
      total: {// 数据总条数
        type: Number,
        default: 0
      },
      display: {// 每页显示条数
        type: Number,
        default: 10
      },
      currentPage: {// 当前页码
        type: Number,
        default: 1
      },
      pagegroup: {// 分页条数
        type: Number,
        default: 5,
        coerce: function (v) {
          v = v > 0 ? v : 5;
          return v % 2 === 1 ? v : v + 1;
        }
      },
      refresh: { // 不是必须 搜索后默认第一页
        type: Boolean,
        default: false
      }
    },
    computed: {
      page: function () { // 总页数
        return Math.floor(this.total / this.display);
      },
      grouplist: function () { // 获取分页页码
        this.doRefresh();
        let len = this.page, temp = [], list = [], count = Math.floor(this.pagegroup / 2), center = this.current;
        if (len <= this.pagegroup) {
          while (len--) {
            temp.push({text: this.page - len, val: this.page - len});
          }
          return temp;
        }
        while (len--) {
          temp.push(this.page - len);
        }
        let idx = temp.indexOf(center);
        (idx < count) && (center = center + count - idx);
        (this.current > this.page - count) && (center = this.page - count);
        temp = temp.splice(center - count - 1, this.pagegroup);
        do {
          let t = temp.shift();
          list.push({
            text: t,
            val: t
          });
        } while (temp.length);
        if (this.page > this.pagegroup) {
          (this.current > count + 1) && list.unshift({text: '...', val: list[0].val - 1});
          (this.current < this.page - count) && list.push({text: '...', val: list[list.length - 1].val + 1});
        }
        return list;
      }
    },
    mounted() {
      this.doRefresh()
    },
    methods: {
      doRefresh() {
        if (this.refresh) {
          this.current = 1
        }
      },
      setCurrent: function (idx) {
        if (this.current !== idx && idx > 0 && idx < this.page + 1) {
          this.current = idx;
          this.$emit('pagechange', this.current);
        }
      }
    }
  }
最后就是CSS了 来吧直接上
.pagination {
    font-family: "sans";
    overflow: hidden;
    display: table;
    margin: 0 auto;
    /*width: 100%;*/
    height: 50px;
  }

  .pagination li {
    float: left;
    height: 30px;
    border-radius: 5px;
    margin: 3px;
    color: #000000;
    background: white;
  }

  .pagination li :hover {
    background: #696969;
  }

  .pagination li :hover a {
    color: #fff;
  }

  .pagination li a {
    display: block;
    width: 40px;
    height: 30px;
    text-align: center;
    line-height: 30px;
    font-size: 12px;
    border-radius: 5px;
    text-decoration: none;
    color: black;
  }

  .pagination .active {
    background: #696969;
  }

  .pagination .active a {
    color: #fff;
  }
这里说一下 ‘font-family: “sans”;’ sans 就是自定义的一个字体名字,需要你在自己的index.css里定义一下引用的第三方字体如:
@font-face {
  font-family: 'sans';
  src: url('./resource/font/webfont.eot'); /* IE9*/
  src: url('./resource/font/webfont.eot?#iefix') format('embedded-opentype'), /* IE6-IE8 */
  url('/static/font/webfont.woff') format('woff'), /* chrome、firefox */
  url('./resource/font/webfont.ttf') format('truetype'), /* chrome、firefox、opera、Safari, Android, iOS 4.2+*/
  url('./resource/font/webfont.svg#webfont') format('svg'); /* iOS 4.1- */
}
需要的字体可去各字体网站去下载
然后就是在需要显示分页的地方引入分页模块可
import Paging from "../components/Paging";
然后定义需要的参数
data() {
      return {
        total: 0, //总条数
        current: 1, //当前激活页
        display: 10, //每页显示多少条
        refresh: false, //是否刷新(第一页激活)有搜索时需要
      };
    },
然后在methods里写接收模块传出的翻页的控制方法
//分页查询
      pagechange(currentPage) {
        this.refresh = false;
        this.page = {
          start: currentPage * 10,
          size: 10
        };
       // 获取列表 可根据后端要求改变page的方式
        this.getList(this.page)
      }
最后在页面引用模块
    <div class="g-bottom">
      <paging v-if="!noData && total>10" :total="total" :current-page='current' :refresh='refresh' @pagechange="pagechange">paging>
    div>
v-if="!noData && total>10" 是做一个 服务器报错 和数据不足一夜 一叶 异业······算了 不足10条时的显隐状态,可根据具体逻辑做修改。
OK 18:43分 下班啦···········