轻轻松松使用StyleGAN2(三):一笑倾人城,再笑倾人国:让你的女朋友开心笑起来
我们可以用StyleGAN2提取真实人脸的latents,并且用这样的latents重建人脸图像。
一种方法是直接使用StyleGAN2 projector,内容请参考:
轻轻松松使用StyleGAN2(二):使用run_projector.py将真实人脸投射到StyleGAN2 dlatents空间并重建图像
另外一种,是使用StyleGAN2 Encoder,下面我们着重讲这一种方法。
首先,准备运行环境:
(1)显卡:官网要求有16GB内存的NVIDIA GPU(即:NVIDIA Tesla V100),经实测,11GB内存的NVIDIA GeForce RTX 2080Ti也可以跑起来。
(2)StyleGAN2需要安装定制开发的“TensorFlow ops”,目前只支持TensorFlow 1.14,如果你默认安装的是TensorFlow 1.15,需要重新安装1.14。
(3)安装定制开发的“TensorFlow ops”,还需要C语言编译器,在Windows10平台上,可以选择安装Visual Studio 2017、2019或者2015。
(4)下载预训练的StyleGAN2人脸模型“stylegan2-ffhq-config-f.pkl”,预训练模型下载后,可放在工作目录的“.\models”目录下。
以上(1)-(4)的具体操作说明,可以参见:
轻轻松松使用StyleGAN2(一):试用经验分享
涉及Visual Studio 2015和Cuda/CuDNN的安装指南,可以参见:
非常详细:Windows 10+Anaconda3+CUDA10.1,安装dlib19.17开发环境成功手记
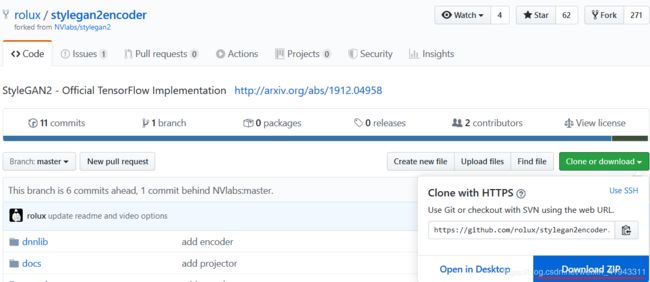
(5)获取StyleGAN2 Encoder,GitHub上的链接是:
https://github.com/rolux/stylegan2encoder
我们可以把源代码下载下来,解压缩后放到我们的工作目录下:
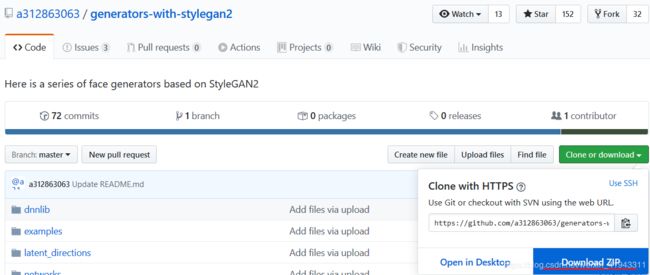
(6)获取StyleGAN2人脸编辑向量,GitHub上的链接是:
https://github.com/a312863063/generators-with-stylegan2
我们可以把源代码下载下来,解压缩后放到我们的工作目录下:
(7)把StyleGAN2人脸编辑向量,复制到StyleGAN2 Encoder的“.\ffhq_dataset”目录下,比如:
将“generaters-with-stylegan2-master\latent-direcitons”整个目录copy到“stylegan2encoder-master\ffhq_dataset”目录下。
(8)修改部分文件,
(8.1)修改pretrained_networks.py:
    # 'gdrive:networks/stylegan2-ffhq-config-f.pkl':                          'https://drive.google.com/uc?id=1Mgh-jglZjgksupF0XLl0KzuOqd1LXcoE',
    'gdrive:networks/stylegan2-ffhq-config-f.pkl':                           '.\models\stylegan2-ffhq-config-f.pkl',
(8.2) 创建config.py:
dlatents_dir = 'latent_representations'
generated_dir = 'generated_images'
result_dir = 'results'
(8.3) 创建move_and_show.py
import os
import pickle
import PIL.Image
import numpy as np
import dnnlib
import dnnlib.tflib as tflib
import config
from encoder.generator_model import Generator
import matplotlib.pyplot as plt
import glob

# 预训练好的网络模型,来自NVIDIA
Model = './models/stylegan2-ffhq-config-f.pkl'
_Gs_cache = dict()

# 加载StyleGAN已训练好的网络模型
def load_Gs(model):
    if model not in _Gs_cache:
        model_file = glob.glob(Model)
        if len(model_file) == 1:
            model_file = open(model_file[0], "rb")
        else:
            raise Exception('Failed to find the model')

        _G, _D, Gs = pickle.load(model_file)
        # _G = Instantaneous snapshot of the generator. Mainly useful for resuming a previous training run.
        # _D = Instantaneous snapshot of the discriminator. Mainly useful for resuming a previous training run.
        # Gs = Long-term average of the generator. Yields higher-quality results than the instantaneous snapshot.

        # Print network details.
        # Gs.print_layers()

        _Gs_cache[model] = Gs
    return _Gs_cache[model]

# 使用generator生成图片
def generate_image(generator, latent_vector):
    latent_vector = latent_vector.reshape((1, 18, 512))
    generator.set_dlatents(latent_vector)
    img_array = generator.generate_images()[0]
    img = PIL.Image.fromarray(img_array, 'RGB')
    return img.resize((256, 256))

# 将真实人脸图片对应的latent与改变人脸特性/表情的向量相混合,调用generator生成人脸的变化图片
def move_and_show(generator, flag, latent_vector, direction, coeffs):
    fig,ax = plt.subplots(1, len(coeffs), figsize=(15, 10), dpi=80)
    # 调用coeffs数组,生成一系列的人脸变化图片
    for i, coeff in enumerate(coeffs):
        new_latent_vector = latent_vector.copy()
        # 人脸latent与改变人脸特性/表情的向量相混合,只运算前8层(一共18层)
        new_latent_vector[:8] = (latent_vector + coeff*direction)[:8]
        ax[i].imshow(generate_image(generator, new_latent_vector))
        ax[i].set_title('Coeff: %0.1f' % coeff)
    [x.axis('off') for x in ax]
    # 显示
    plt.show()

    # 根据看到的人脸变化的效果,输入一个你认为合适的浮点数
    favor_coeff = float(input('Please input your favourate coeff, such as -1.5 or 1.5: '))
    new_latent_vector = latent_vector.copy()
    # 用输入的浮点数控制生成新的人脸变化
    new_latent_vector[:8] = (latent_vector + favor_coeff*direction)[:8]
    # 增加一个维度,以符合generator对向量的要求
    new_latent_vector = new_latent_vector.reshape((1, 18, 512))
    # 将向量赋值给generator
    generator.set_dlatents(new_latent_vector)
    # 调用generator生成图片
    new_person_image = generator.generate_images()[0]
    # 画图,1024x1024
    canvas = PIL.Image.new('RGB', (1024, 1024), 'white')
    canvas.paste(PIL.Image.fromarray(new_person_image, 'RGB'), ((0, 0)))
    # 根据不同的标志,存入不同的文件名
    if flag == 0:
        filename = 'new_age.png'
    if flag == 1:
        filename = 'new_angle.png'
    if flag == 2:
        filename = 'new_gender.png'
    if flag == 3:
        filename = 'new_eyes.png'
    if flag == 4:
        filename = 'new_glasses.png'
    if flag == 5:
        filename = 'new_smile.png'
    # 将生成的图像保存到文件
    canvas.save(os.path.join(config.generated_dir, filename))


def main():
    # 初始化
    tflib.init_tf()
    # 调用预训练模型
    Gs_network = load_Gs(Model)
    generator = Generator(Gs_network, batch_size=1, randomize_noise=False)

    # 读取对应真实人脸的latent,用于图像变化,qing_01.npy可以替换为你自己的文件名
    os.makedirs(config.dlatents_dir, exist_ok=True)
    person = np.load(os.path.join(config.dlatents_dir, 'qing_01.npy'))

    # 读取已训练好的用于改变人脸特性/表情的向量
    # 包括:改变年龄、改变水平角度、改变性别、改变眼睛大小、是否佩戴眼镜、改变笑容等
    age_direction = np.load('ffhq_dataset/latent_directions/age.npy')
    angle_direction = np.load('ffhq_dataset/latent_directions/angle_horizontal.npy')
    gender_direction = np.load('ffhq_dataset/latent_directions/gender.npy')
    eyes_direction = np.load('ffhq_dataset/latent_directions/eyes_open.npy')
    glasses_direction = np.load('ffhq_dataset/latent_directions/glasses.npy')
    smile_direction = np.load('ffhq_dataset/latent_directions/smile.npy')

    # 混合人脸和变化向量,生成变化后的图片
    move_and_show(generator, 0, person, age_direction, [-6, -4, -3, -2, 0, 2, 3, 4, 6])
    move_and_show(generator, 1, person, angle_direction, [-6, -4, -3, -2, 0, 2, 3, 4, 6])
    move_and_show(generator, 2, person, gender_direction, [-6, -4, -3, -2, 0, 2, 3, 4, 6])
    move_and_show(generator, 3, person, eyes_direction, [-3, -2, -1, -0.5, 0, 0.5, 1, 2, 3])
    move_and_show(generator, 4, person, glasses_direction, [-6, -4, -3, -2, 0, 2, 3, 4, 6])
    move_and_show(generator, 5, person, smile_direction, [-3, -2, -1, -0.5, 0, 0.5, 1, 2, 3])

if __name__ == "__main__":
    main()
(9) 操作命令(统一在“stylegan2encoder-master\”目录下操作):
(9.1)将放在“./raw_images”目录下原始图片,经过对齐、裁剪,放到“./aligned_images/”目录下:
python align_images.py raw_images/ aligned_images/
(9.2)运行encode_images.py,将“./aligned_images/”目录下的人脸图片映射到latents,并将生成的图片放到“./generated_images/”目录下:
python encode_images.py aligned_images/ generated_images/ latent_representations/ --lr 1.3 --iterations 1000 --randomize_noise True
(9.3)运行move_and_show.py,对人脸进行变化,并将满意的变化图片保存到文件(用于变化的人脸latents直接写在文件中,可以自己替换):
python move_and_show.py
(10)运行效果
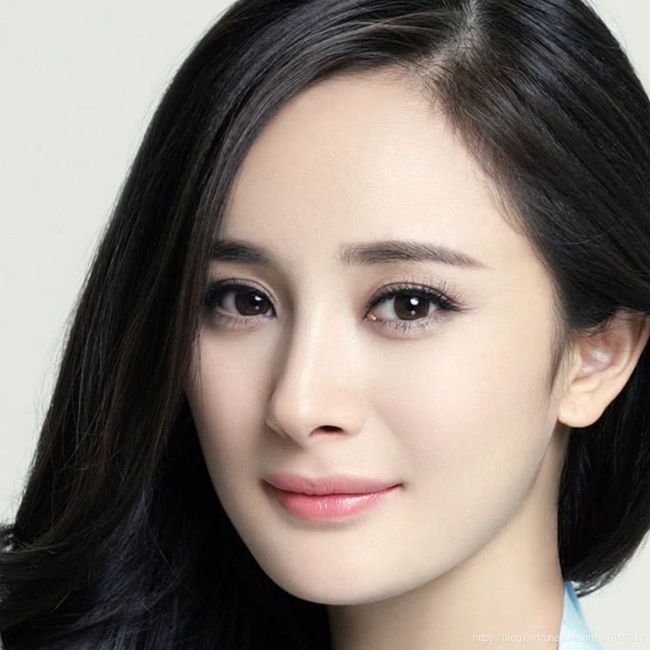
(10.1)StyleGAN2 Encoder实现的效果如下:
真实人脸 StyleGAN2人脸 微笑 再开心一点
侧脸 眼睛大一点 年轻一点
这些图片,可以通过设置coeff变量,实现人脸变化效果的渐进式改变,你可以把这些图片做成动画,女朋友的一颦一笑、回眸一笑百媚生就可以自由掌握了。
另一方面,这样的改变也可以应用在博物馆的名画上,让蒙娜丽莎笑起来、让《浔阳遗韵》的歌女轻启朱唇也都不难实现。
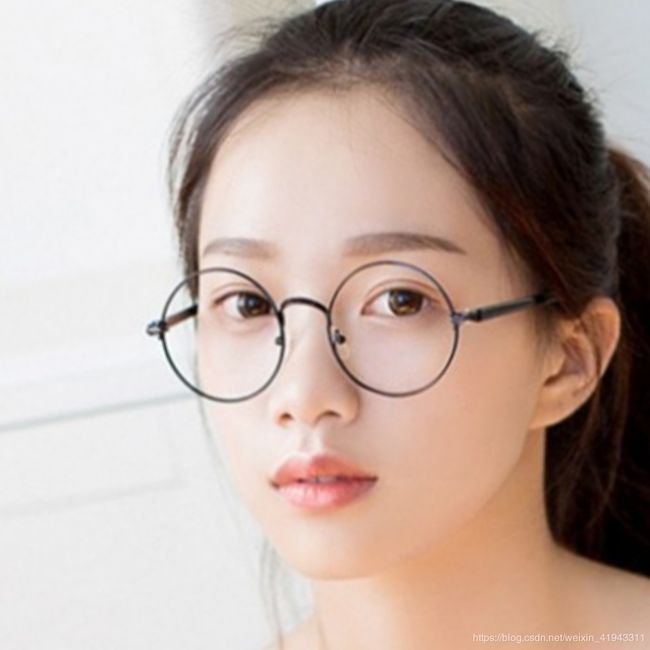
(10.2)不过,对于某些图片,以及一些戴眼镜的人脸图片,StyleGAN2 Encoder的实测效果还有一点点问题,因此感兴趣的朋友也可以用第一代的StyleGAN Encoder来试试看:
真实人脸 StyleGAN2人脸 微笑 把脸扭过来 摘掉眼镜
对应的第一代StyleGAN人脸编辑向量,GitHub上的链接是:
https://github.com/a312863063/seeprettyface-face_editor
下载后复制到StyleGAN Encoder的“.\ffhq_dataset”目录下即可。
关于第一代StyleGAN Encoder的环境准备以及工作原理等,可以参考:
轻轻松松使用StyleGAN(六):StyleGAN Encoder找到真实人脸对应的特征码,核心源代码+中文注释
用于第一代StyleGAN Encoder的move_and_show.py源代码如下:
import os
import pickle
import PIL.Image
import numpy as np
import dnnlib
import dnnlib.tflib as tflib
import config
from encoder.generator_model import Generator
import matplotlib.pyplot as plt
import glob

# pre-trained network.
Model = './models/karras2019stylegan-ffhq-1024x1024.pkl'
_Gs_cache = dict()

# 加载StyleGAN已训练好的网络模型
def load_Gs(model):
    if model not in _Gs_cache:
        model_file = glob.glob(Model)
        if len(model_file) == 1:
            model_file = open(model_file[0], "rb")
        else:
            raise Exception('Failed to find the model')

        _G, _D, Gs = pickle.load(model_file)
        # _G = Instantaneous snapshot of the generator. Mainly useful for resuming a previous training run.
        # _D = Instantaneous snapshot of the discriminator. Mainly useful for resuming a previous training run.
        # Gs = Long-term average of the generator. Yields higher-quality results than the instantaneous snapshot.

        # Print network details.
        # Gs.print_layers()

        _Gs_cache[model] = Gs
    return _Gs_cache[model]

def generate_image(generator, latent_vector):
    latent_vector = latent_vector.reshape((1, 18, 512))
    generator.set_dlatents(latent_vector)
    img_array = generator.generate_images()[0]
    img = PIL.Image.fromarray(img_array, 'RGB')
    return img.resize((256, 256))

def move_and_show(generator, flag, latent_vector, direction, coeffs):
    fig,ax = plt.subplots(1, len(coeffs), figsize=(15, 10), dpi=80)
    for i, coeff in enumerate(coeffs):
        new_latent_vector = latent_vector.copy()
        new_latent_vector[:8] = (latent_vector + coeff*direction)[:8]
        ax[i].imshow(generate_image(generator, new_latent_vector))
        ax[i].set_title('Coeff: %0.1f' % coeff)
    [x.axis('off') for x in ax]
    plt.show()

    favor_coeff = float(input('Please input your favourate coeff, such as -1.5 or 1.5: '))
    new_latent_vector = latent_vector.copy()
    new_latent_vector[:8] = (latent_vector + favor_coeff*direction)[:8]
    new_latent_vector = new_latent_vector.reshape((1, 18, 512))
    generator.set_dlatents(new_latent_vector)
    new_person_image = generator.generate_images()[0]
    canvas = PIL.Image.new('RGB', (1024, 1024), 'white')
    canvas.paste(PIL.Image.fromarray(new_person_image, 'RGB'), ((0, 0)))
    if flag == 0:
        filename = 'new_age.png'
    if flag == 1:
        filename = 'new_angle.png'
    if flag == 2:
        filename = 'new_gender.png'
    if flag == 3:
        filename = 'new_eyes.png'
    if flag == 4:
        filename = 'new_glasses.png'
    if flag == 5:
        filename = 'new_smile.png'
    canvas.save(os.path.join(config.generated_dir, filename))


def main():
    tflib.init_tf()
    Gs_network = load_Gs(Model)
    generator = Generator(Gs_network, batch_size=1, randomize_noise=False)

    os.makedirs(config.dlatents_dir, exist_ok=True)
    # person = np.load(os.path.join(config.dlatents_dir, 'lucy3370_3_01.npy'))
    person = np.load(os.path.join(config.dlatents_dir, 'glasses_lady03_01.npy'))

    # Loading already learned latent directions
    age_direction = np.load('ffhq_dataset/latent_directions/age.npy')
    angle_direction = np.load('ffhq_dataset/latent_directions/angle_horizontal.npy')
    gender_direction = np.load('ffhq_dataset/latent_directions/gender.npy')
    eyes_direction = np.load('ffhq_dataset/latent_directions/eyes_open.npy')
    glasses_direction = np.load('ffhq_dataset/latent_directions/glasses.npy')
    smile_direction = np.load('ffhq_dataset/latent_directions/smile.npy')

    move_and_show(generator, 0, person, age_direction, [-3, -2, -1, -0.5, 0, 0.5, 1, 2, 3])
    move_and_show(generator, 1, person, angle_direction, [-2, -1.5, -0.6, -0.3, 0, 0.3, 0.6, 1.5, 2])
    move_and_show(generator, 2, person, gender_direction, [-4, -3, -2, -1, 0, 1, 2, 3, 4])
    move_and_show(generator, 3, person, eyes_direction, [-3, -2, -1, -0.5, 0, 0.5, 1, 2, 3])
    move_and_show(generator, 4, person, glasses_direction, [-1.5, -1.0, -0.5, -0.2, 0, 0.2, 0.5, 1.0, 1.5])
    move_and_show(generator, 5, person, smile_direction, [-3, -2, -1, -0.5, 0, 0.5, 1, 2, 3])

if __name__ == "__main__":
    main()
(完)


