Mac搭建redash开发环境使用mysql源(三)
Mac搭建redash开发环境使用mysql源(三)
- Redash登录
- MySQL
- 安装
- MySQL命令
- 修改源文件
- 测试Dbeaver连接
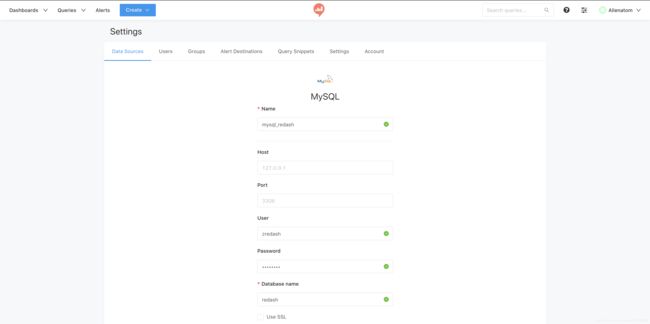
- redash添加mysql源
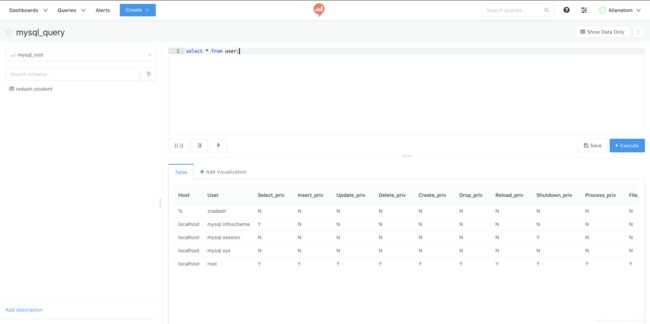
- 查询
- 拜拜
Redash登录
一步登录
MySQL
安装
在Mac里装软件就是简单,brew install mysql搞定。
安装好根据命令行的提示设置密码,我选了最低等级的密码,就是只包含字母数字,当然,这也给自己挖了一个坑
MySQL命令
启动mysql.server start
关闭mysql.server stop
重启mysql.server restart
登录mysql -u root -p
创建数据库create database redash;
创建用户 create user 'zredash' identified by '12345678';
给用户授权 grant all privileges on redash to zredash;
刷新权限flush privileges;
切换数据库use redash;
查看当前的数据库show databases;
显示当前数据库的表单show tables;
建表
CREATE TABLE student(
id int(12),
Name varchar(10),
);
插入数据insert student (id,name) values (1,'aaa'),(2,'bb'),(3,'c');
删除数据delete from user where name = 'aaa';
删除表drop table student;
修改源文件
如果现在就上redash新建数据源的话是找不到mysql的,应为源文件里用的MySQLdb这个库,这在python3时代已经停止了支持,
所以要在redash/redash/query_runner/mysql.py中把所有的MySQLdb替换为pymysql,同时要安装pymysql,
重启服务即可正常使用MySQL作为数据源。
感谢第六帅的帖子!
测试Dbeaver连接
官网download安装文件,安好之后添加数据库
这时候会出现错误
mysql 无法连接 Unable to load authentication plugin ‘caching_sha2_password’.
这是因为mysql8之前的版本使用的密码加密规则是mysql_native_password,但是在mysql8则是caching_sha2_password,所以需要修改密码加密规则。
重新回到mysql
先查看mysql初始的密码策略SHOW VARIABLES LIKE 'validate_password%';

validate_password.policy是medium,我们修改为low:set global validate_password_policy=LOW;
好像是这步运行完后就能设置简单密码的数据库用户了,我忘了当时操作的顺序了。
接下来我们改一下加密规则。输入select user,host,plugin,authentication_string from user;

这里是我改过了,正常plugin里应该全都是caching_sha2_password
然后alter user 'root' @'localhost' identified with mysql_native_password by 'admin';,就变成我图上那样了。
之后就可以顺利的用dbeaver连接mysql了。
两个参考,感谢
ERROR 1819 (HY000): Your password does not satisfy the current policy requirements
mysql 无法连接 Unable to load authentication plugin ‘caching_sha2_password’.
redash添加mysql源
查询
拜拜
本来想添加一个新导入的疫情表试一试效果,但是还要测试MongoDB,就用这个表测试新源吧~~


