【Java】解决跨域问题的三种方案
本篇博客会介绍前后端分离项目如何实现跨域请求。
CORS(Cross-Origin Resource Sharing)问题的出现主要是因为浏览器的同源策略,同源的要求是:同协议,同IP,同端口。即不能在非同源情况下进行请求,实际上是为了保护用户的安全。

首先,准备一下frontend和backend的代码。这里为了创造非同源条件,前端跑在本机的8080端口下,后端跑在本机的8000端口下。
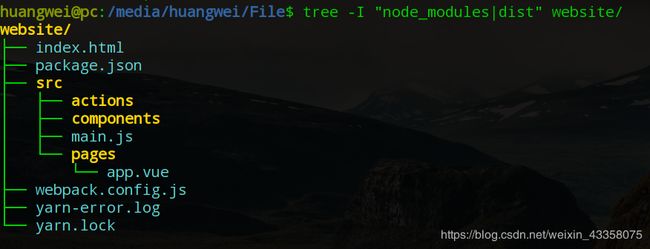
- 前端利用yarn创建的项目,webpack-dev-server作为服务器。前端项目结构和主要代码如下:
package.json
{
  "name": "website",
  "version": "1.0.0",
  "main": "y",
  "license": "MIT",
  "scripts": {
    "build": "webpack",
    "start": "webpack-dev-server --port '8080'"
  },
  "dependencies": {
    "axios": "^0.19.1",
    "axios-jsonp-pro": "^1.1.7",
    "css-loader": "^3.4.2",
    "element-ui": "^2.13.0",
    "file-loader": "^5.0.2",
    "style-loader": "^1.1.3",
    "ts-loader": "^6.2.1",
    "typescript": "^3.7.5",
    "vue": "^2.6.11",
    "vue-loader": "^15.8.3",
    "vue-style-loader": "^4.1.2",
    "vue-template-compiler": "^2.6.11",
    "webpack": "^4.41.5",
    "webpack-cli": "^3.3.10",
    "webpack-dev-server": "^3.10.1"
  }
}
webpack.config.js
const Vlp = require('vue-loader/lib/plugin');
const path = require('path');

module.exports = {

    entry: './src/main.js',

    output: {
        path: path.resolve(__dirname, './dist'),
        filename: 'main.js'
    },

    mode: 'development',

    module: {
        rules: [
            {
                test: /\.vue$/,
                loader: 'vue-loader'
            },
            {
                test: /\.css$/,
                loader: 'style-loader!css-loader'
            },
            {
                test: /.(eot|woff|woff2|ttf)([\\\\\\\\?]?.*)$/,
                loader: "file-loader"
            }
        ]
    },

    plugins: [
        new Vlp()
    ]

}
index.html
<html lang="en">
<head>
    <meta charset="UTF-8">
    <meta name="viewport" content="initial-scale=1.0, maximum-scale=1.0, minimum-scale=1.0, user-scalable=no">
    <meta http-equiv="X-UA-Compatible" content="ie=edge">
    <title>Documenttitle>
head>
<body>

    <div id="app">div>

    <script src="./dist/main.js">script>
body>
html>
main.js
import Vue from 'vue';
import ElementUI from 'element-ui';
import 'element-ui/lib/theme-chalk/index.css';
import app from './pages/app.vue';

Vue.use(ElementUI);

new Vue({
    el: '#app',
    render: h => h(app)
});
pages/app.vue
<template>
  <div>

  div>
template>

<style scoped>
style>

<script>
export default {
};
script>
- 后端新建了一个springboot项目,只改动了入口文件和配置了端口。
SeckillApplication.java
package com.example.seckill;

import org.springframework.boot.SpringApplication;
import org.springframework.boot.autoconfigure.SpringBootApplication;
import org.springframework.web.bind.annotation.CrossOrigin;
import org.springframework.web.bind.annotation.GetMapping;
import org.springframework.web.bind.annotation.RequestMapping;
import org.springframework.web.bind.annotation.RestController;

@RestController
@RequestMapping("/api")
@SpringBootApplication
public class SeckillApplication {

	@GetMapping("/test")
	public String test() {
		return "hello";
	}

	public static void main(String[] args) {
		SpringApplication.run(SeckillApplication.class, args);
	}

}
一、JSONP
jsonp的原理其实是