springboot集成cas
搭建cas服务器:
1.下载cas
百度网盘链接:https://pan.baidu.com/s/1JqSoH2NtJOHw_O-pcTrRSQ
提取码:o1me
2.解压之后,使用idea工具打开,打包
3.将target文件夹下的cas.war放到tomcat的webapp中
启动tomcat并访问http://localhost:8080/cas

启动成功
4.使用cas默认用户名密码登录
cas\WEB-INF\classes\application.properties
![]()
即用户名:casuser 密码:Mellon
登录测试

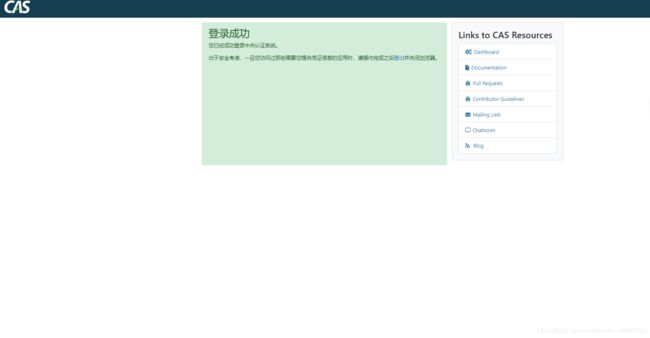
登录成功
5.去除https认证
CAS默认使用的是HTTPS协议,如果使用HTTPS协议需要SSL安全证书(需向特定的机构申请和购买) 。如果对安全要求不高或是在开发测试阶段,可使用HTTP协议。我们这里讲解通过修改配置,让CAS使用HTTP协议。
如果不去除https认证下面整合客户端时会出现未认证授权的服务。

修改cas\WEB-INF\classes\services\HTTPSandIMAPS-10000001.json文件,以支持http请求
"serviceId" : "^(https|imaps|http)://.*",
6.改成数据库认证方式
注释掉默认用户名密码配置,添加数据库连接信息等配置,具体添加的配置如下:
cas.serviceRegistry.initFromJson=true
cas.serviceRegistry.json.location=classpath:/services

cas.authn.jdbc.query[0].url=jdbc:mysql://192.168.0.134:3306/localmysql?useUnicode=true&characterEncoding=utf-8&useSSL=true
cas.authn.jdbc.query[0].user=root
cas.authn.jdbc.query[0].password=root
cas.authn.jdbc.query[0].sql=select * from app_user where username=?
cas.authn.jdbc.query[0].fieldPassword=password
cas.authn.jdbc.query[0].driverClass=com.mysql.jdbc.Driver


cas.authn.jdbc.query[0].url=jdbc:mysql://192.168.0.134:3306/localmysql?useUnicode=true&characterEncoding=utf-8&useSSL=true&autoReconnect=true&failOverReadOnly=false&autoReconnect=true&serverTimezone=UTC
cas.authn.jdbc.query[0].user=root
cas.authn.jdbc.query[0].password=root
cas.authn.jdbc.query[0].sql=select * from app_user where username=?
cas.authn.jdbc.query[0].fieldPassword=password
cas.authn.jdbc.query[0].driverClass=com.mysql.cj.jdbc.Driver
使用数据库用户名密码登录,测试

登录成功,至此cas服务端搭建完成
cas客户端搭建
本实例是基于springboot框架完成,后续会完善基于springmvc框架集成cas.
1.使用idea创建springboot项目
2.添加maven依赖
<!--cas客户端配置-->
        <dependency>
            <groupId>net.unicon.cas</groupId>
            <artifactId>cas-client-autoconfig-support</artifactId>
            <version>2.1.0-GA</version>
        </dependency>

<!--springboot启动器-->
        <dependency>
            <groupId>org.springframework.boot</groupId>
            <artifactId>spring-boot-starter-web</artifactId>
        </dependency>
3.配置application.properties
server.port=8088
#cas服务端地址
cas.server-url-prefix=http://localhost:8080/cas
#cas服务端登录地址
cas.server-login-url=http://localhost:8080/cas/login
#客户端地址
cas.client-host-url=http://localhost:8088
#Ticket校验器
cas.validation-type=CAS
4.编写配置类,继承CasClientConfigurerAdapter
@Configuration
@EnableCasClient
public class CasConfigure extends CasClientConfigurerAdapter  {

    @Override
    public void configureAuthenticationFilter(FilterRegistrationBean authenticationFilter) {
        super.configureAuthenticationFilter(authenticationFilter);
        authenticationFilter.getInitParameters().put("authenticationRedirectStrategyClass","com.patterncat.CustomAuthRedirectStrategy");
    }

}
5.编写控制器
@Controller
public class LoginController {

    @RequestMapping("/login")
    @ResponseBody
    public String login(HttpServletRequest request){
        //获取用户名并返回
        Assertion assertion = (Assertion)request.getSession().getAttribute(AbstractCasFilter.CONST_CAS_ASSERTION);
        AttributePrincipal principal = assertion.getPrincipal();
        return principal.getName();
    }

    //单点登出
    @RequestMapping("/logout")
    public String logout(HttpSession session){
        session.invalidate();
        return "redirect:http://localhost:8080/cas/logout?service=http://localhost:8080/cas";
    }

}
6.启动函数
@SpringBootApplication
public class SpringbootCasApplication {

    public static void main(String[] args) {
        SpringApplication.run(SpringbootCasApplication.class, args);
    }

}
7.启动,测试
启动成功,访问http://localhost:8088/login
由于未登录,直接跳转到cas登录

输入用户名密码登录

成功返回登录用户的用户名。
下面测试单点登出
访问http://localhost:8088/logout

实现单点登出
至此单系统集成全部完成。
多系统session共享
- 由于目前大部分企业的产品都是分布式或微服务项目,导致一个项目可能分别部署在多台服务器中,那么就会出现一个问题。
- 比如用户登录到系统A,之后又由系统A请求系统B,由于系统A和B是分别部署在不同的服务器上,那么系统B session中并没有保存用户的信息,所以在请求系统B时就还需要输入用户名密码。
- 所以需要进行多系统间的session共享。目前有很多解决方案,本文采用的是redis实现。
1.pom文件添加依赖
       <!--redis依赖-->
        <dependency>
            <groupId>org.springframework.session</groupId>
            <artifactId>spring-session-data-redis</artifactId>
        </dependency>
        <dependency>
            <groupId>org.springframework.boot</groupId>
            <artifactId>spring-boot-starter-data-redis</artifactId>
            <exclusions>
                <exclusion>
                    <groupId>io.lettuce</groupId>
                    <artifactId>lettuce-core</artifactId>
                </exclusion>
            </exclusions>
        </dependency>
        <dependency>
            <groupId>redis.clients</groupId>
            <artifactId>jedis</artifactId>
        </dependency>
        <!--springSession依赖-->
        <dependency>
            <groupId>org.springframework.session</groupId>
            <artifactId>spring-session</artifactId>
            <version>1.3.1.RELEASE</version>
        </dependency>
2.新建RedisSessionConfig.java配置类
@Configuration
@EnableRedisHttpSession(maxInactiveIntervalInSeconds = 86400*30)
public class RedisSessionConfig {
    //连接redis服务
    @Bean
    public JedisConnectionFactory connectionFactory(){
        return new JedisConnectionFactory();
    }
}
其中@EnableRedisHttpSession中maxInactiveIntervalInSeconds 参数是声明过期时间
开启注解后,spring会创建一个拦截器,来实现session共享。
@Bean注解让spring根据配置文件来连接redis
3.配置redis连接信息
#redis配置
spring.redis.host=localhost  //连接地址
spring.redis.port=6379		//端口
spring.redis.timeout=0		//连接超时时间
spring.redis.database=0		//数据库索引 默认为0
4.修改控制器
@Controller
public class LoginController {

    @RequestMapping("/login")
    @ResponseBody
    public String login(HttpServletRequest request){
        HttpSession session = request.getSession();
        UUID uid = (UUID) session.getAttribute("uid");
        if (uid==null){
            uid = UUID.randomUUID();
        }
        session.setAttribute("uid",uid);

        //获取用户名并返回
        Assertion assertion = (Assertion)request.getSession().getAttribute(AbstractCasFilter.CONST_CAS_ASSERTION);
        AttributePrincipal principal = assertion.getPrincipal();
        return principal.getName();
    }

    //登出
    @RequestMapping("/logout")
    public String logout(HttpSession session){
        session.invalidate();
        return "redirect:http://localhost:8080/cas/logout?service=http://localhost:8080/cas";
    }

}
至此,session共享搭建完成。
有的人会问如何在两台或多台服务上实现共享session,其实原理很简单参考上述步骤在另外一个项目中配置一次,启动后就会实现session共享。